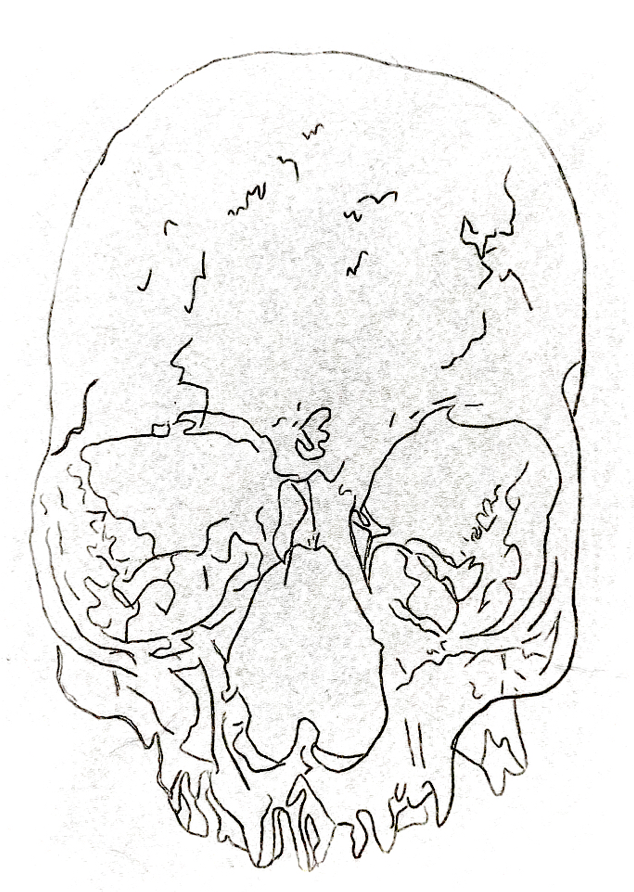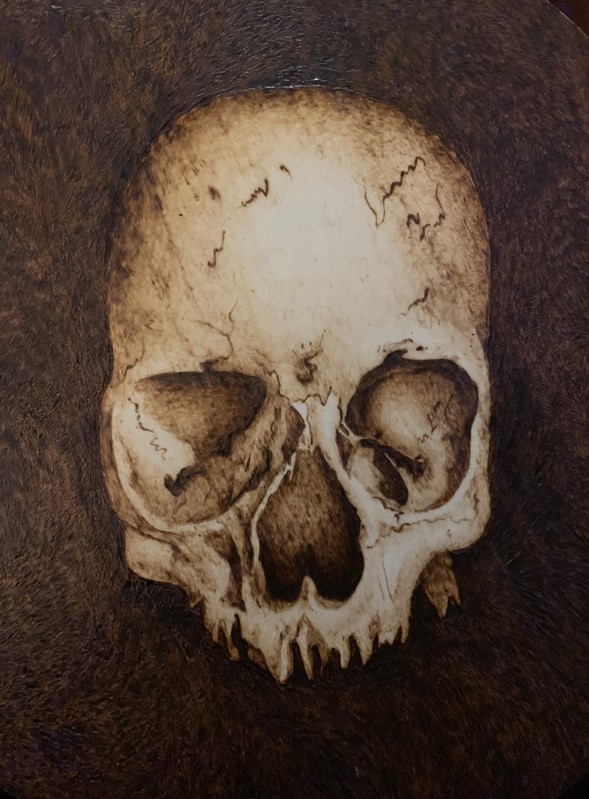
One of my favorite images to burn is the Halloween skull. I love the way the burned marks give the skull image an aged and tarnished look. I also love the look of the various tonal values that you apply to the skull to give depth and dimension to your burning. In this tutorial, I will also provide you with a template that you can use to create your very own skull.
Let’s get started!
You will need:
- Halloween skull template (found at the end of this article)
- TRUArt pen
- Carbon paper
- Ballpoint pen
- Magic eraser
- Tape
- Fine-sanded wood
Step 1:
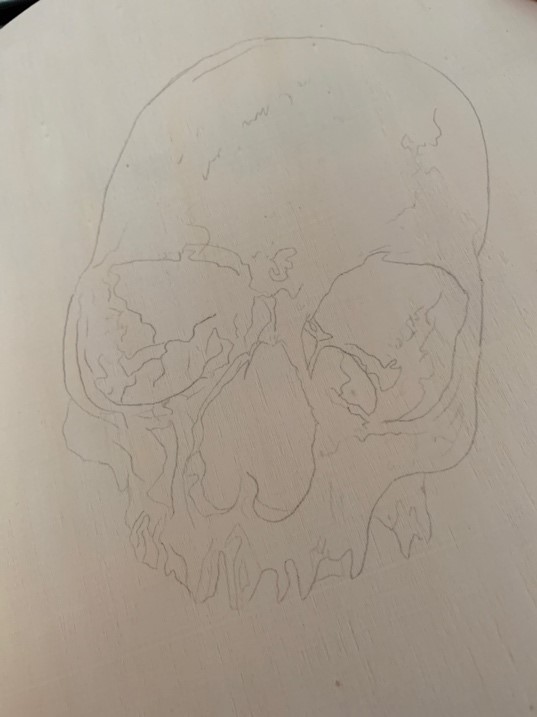
Take your wood, template, carbon paper, pen and tape. Tape your paper to your wood and begin the tracing process. For instructions on how to complete this process, please refer to my previous post here.
Step 2:
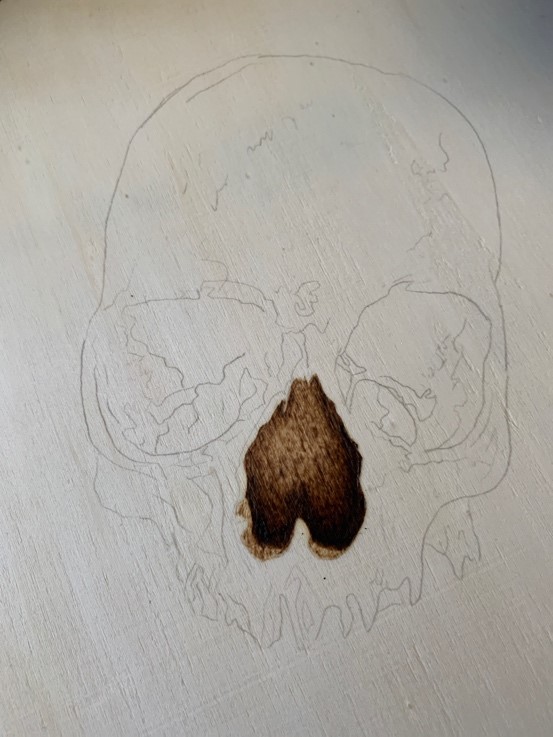
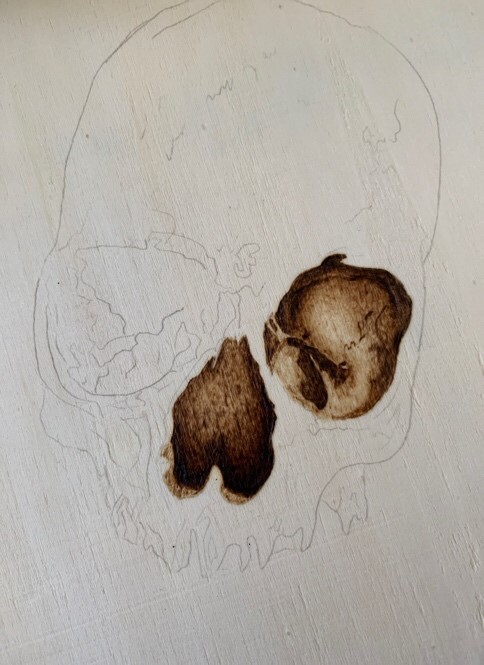
Once everything has been transferred, start your shading process. I started in the nasal cavity. Be aware of where light will hit and cast shadows. I started working on the darker end and slowly lightened my shading as I moved up. This is not an easy skill to master. For shading tips, please view my shading tutorial here.
Step 3:
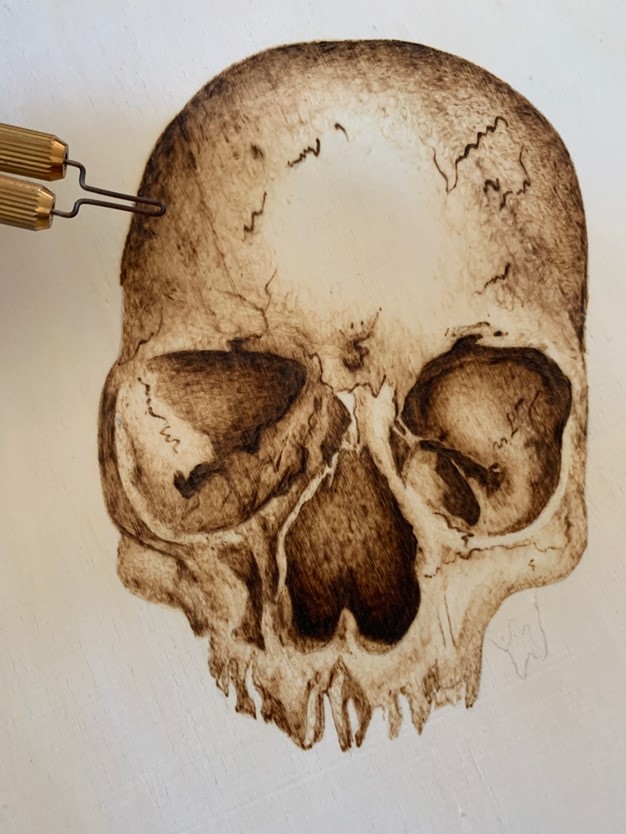
Once I completed the shading in the nasal region, I began the same process in the eye sockets of me Halloween skull. The template should be used as a guide to indicate where areas should be darkened. Don’t worry about your tracing being visible through the shading, you can remove those lines once your image has been completely burned.
Step 4:
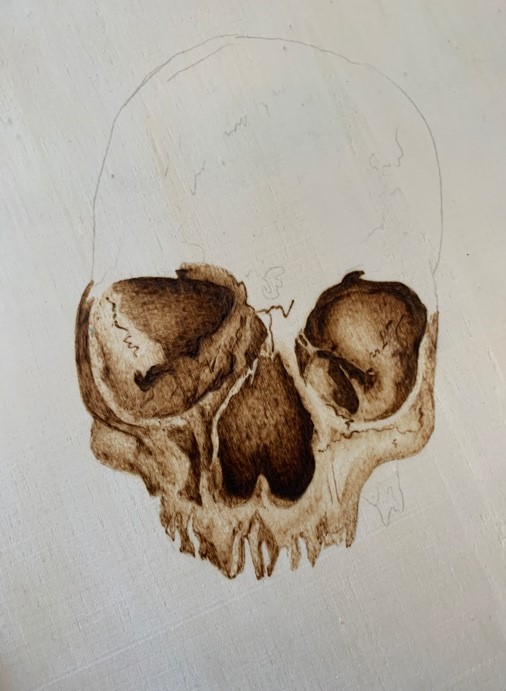
Start shading around the jawline. Remember to burn in a light tone here. We do not want our darker tones to blend with the lighter. We need to decipher what parts of the image are further away than the rest or what area has more depth. The shading around the skull is only meant to indicate where the shadows lie.
Step 5:
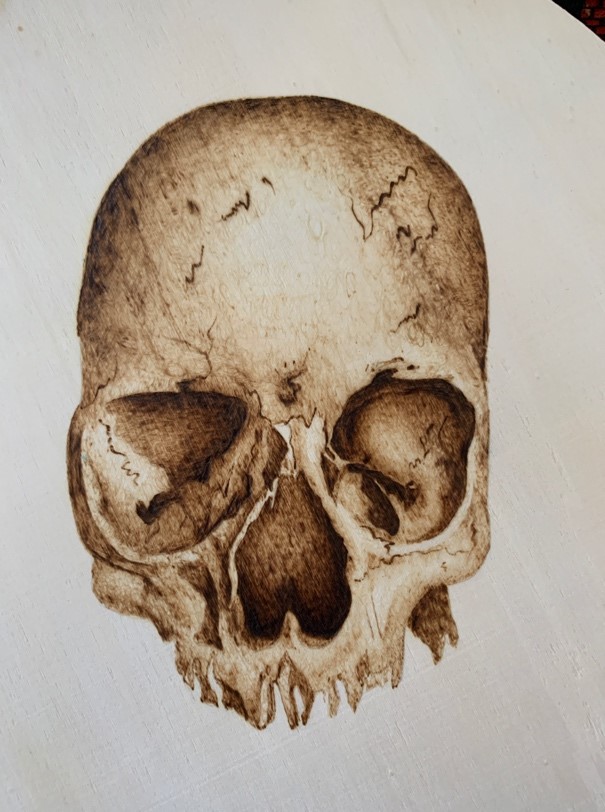
Begin working your way up the skull. Notice the crack lines on the template. At a lower heat, trace the lines to show cracks on the skull. Be sure your heat is not too high or you will create splotches instead of crack lines. You can always increase your temperature if needed. Add more lines if you wish.
Step 6:
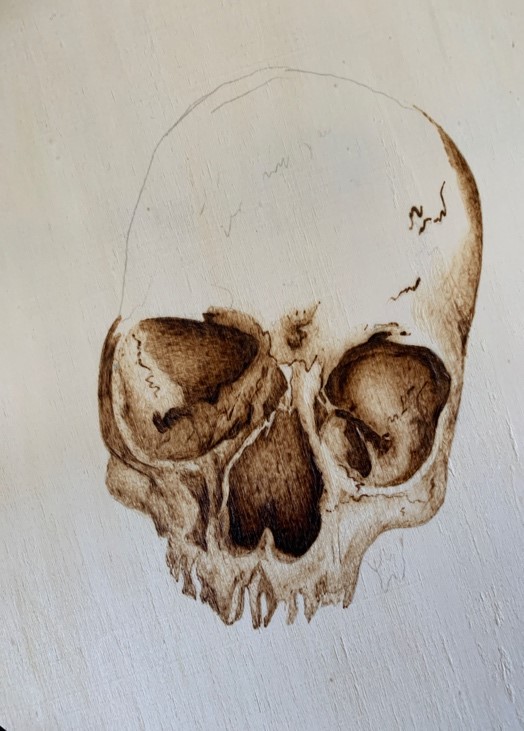
When outlining the skull, the shading should be a darker value around the top portion of the head. You still don’t want this to be a dark shade, just a tonal shade darker than the bottom of the skull. Slowly fill in the center of the skull with a lighter value as you go inward.
 |
 |
Step 7:
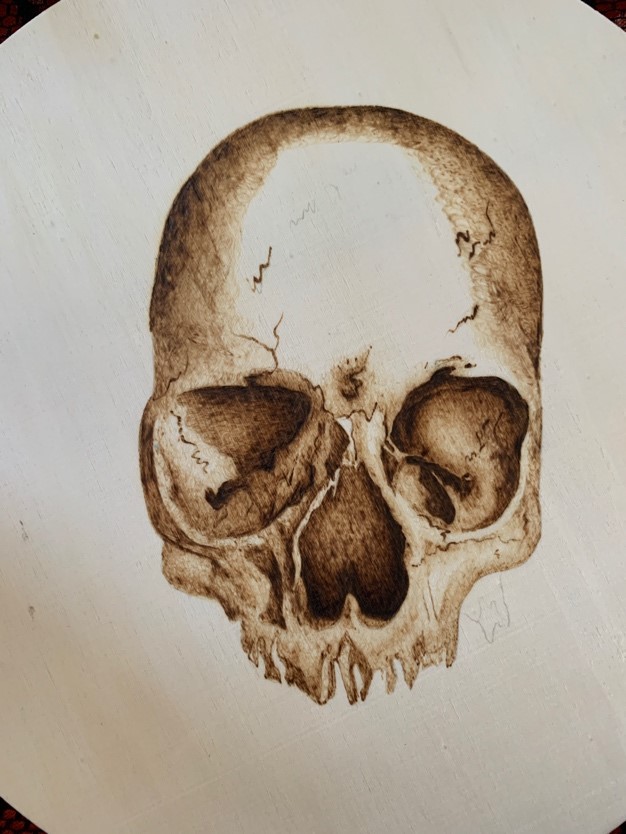
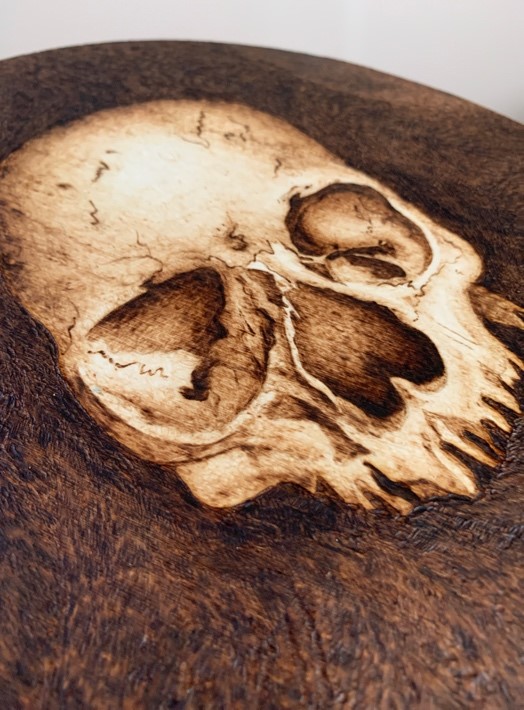
Once you have completely burnt your skull image, start burning the background. This is an extremely time consuming process. You will also need to use high heat so this step must be done with caution. An alternate option would be to use paint to fill in the blank space or just leave it untouched. I personally love the look of the background burned. If you choose to do this, start on one spot and work your way down keeping your strokes as uniform as possible. This prevents an uneven burn and makes the completed piece look more polished.
Now that your burning is complete, take a dampened magic eraser and erase the lines that are visible from your tracing.
 |
 |
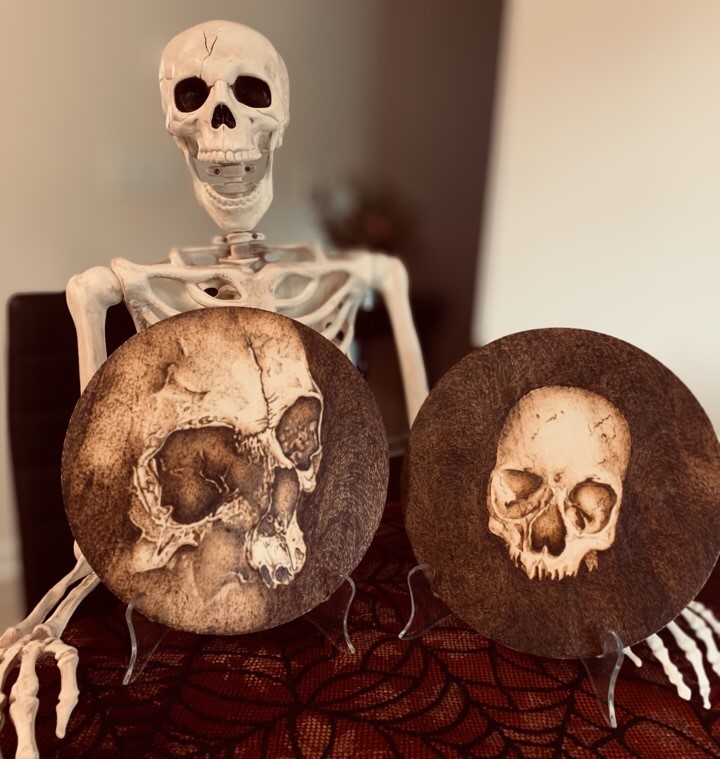
I hope you have fun burning a skull of your own. Remember, this takes time and practice. You stick with this and it will get easier every time you try. I hope everyone has a safe and Happy Halloween.
See you next time,
Andrea Pate
Pate’s Pyrography
Template