Pyrography or woodburning, is an art medium rapidly gaining popularity especially in the United States and United Kingdom. This art medium involves the use of a heating device that resembles a large pen, which, when applied to wood surfaces, leaves distinctive burn marks. There are already many professional pyrography artists around and most of their work is truly astounding – many even life-like especially when a touch of color is added.

As more and more budding artists join the pyrography band wagon, many do not know what to start off with or know about the differences among the many pens sold out there. This then poses a problem for many who nevertheless went ahead, bought a pen (usually convinced by online reviews) and are either stuck on how to use them properly or end up destroying the tool altogether. To address that and a few other key issues, let’s compare the two types of pyrography pens, the solid-point burners and the wire-nib burners.
Tip / Nib
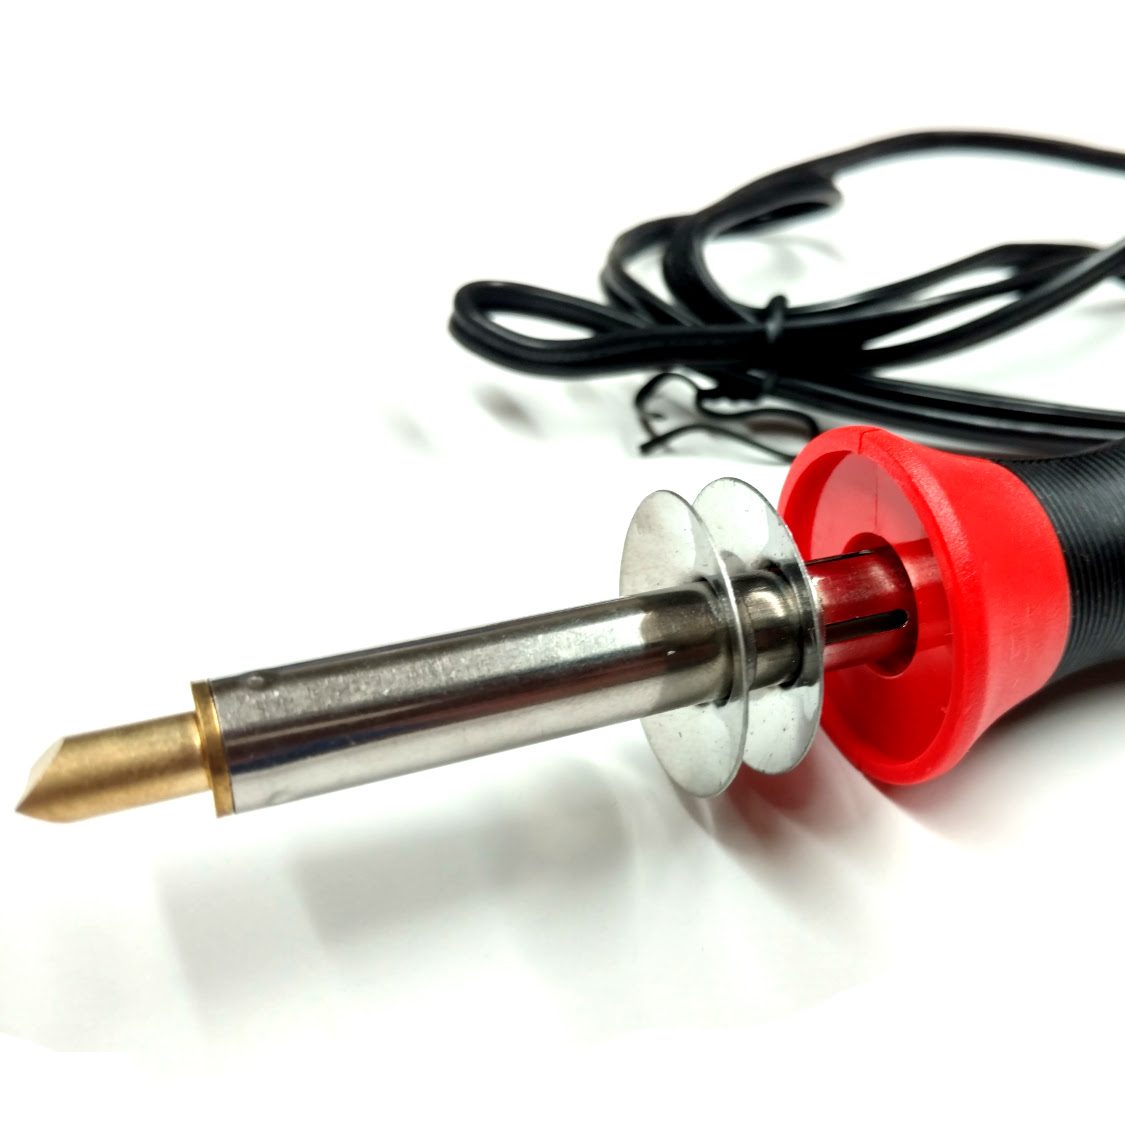
Solid-point burner – This type of pen usually requires a screw-in tip although some very few designs in the market feature non-screw tips held in place by a sleeve and a nut. Care should be taken when purchasing extra tips as they can vary in thread type. TRUArt pyrography pens use M4 X 0.7 tips. This means that the thread is 4 mm in diameter with a 0.7 mm thread pitch. These tips are screwed in tightly by hand and usually finished off with 1/8th to 1/4 of a turn using a pair of pliers.
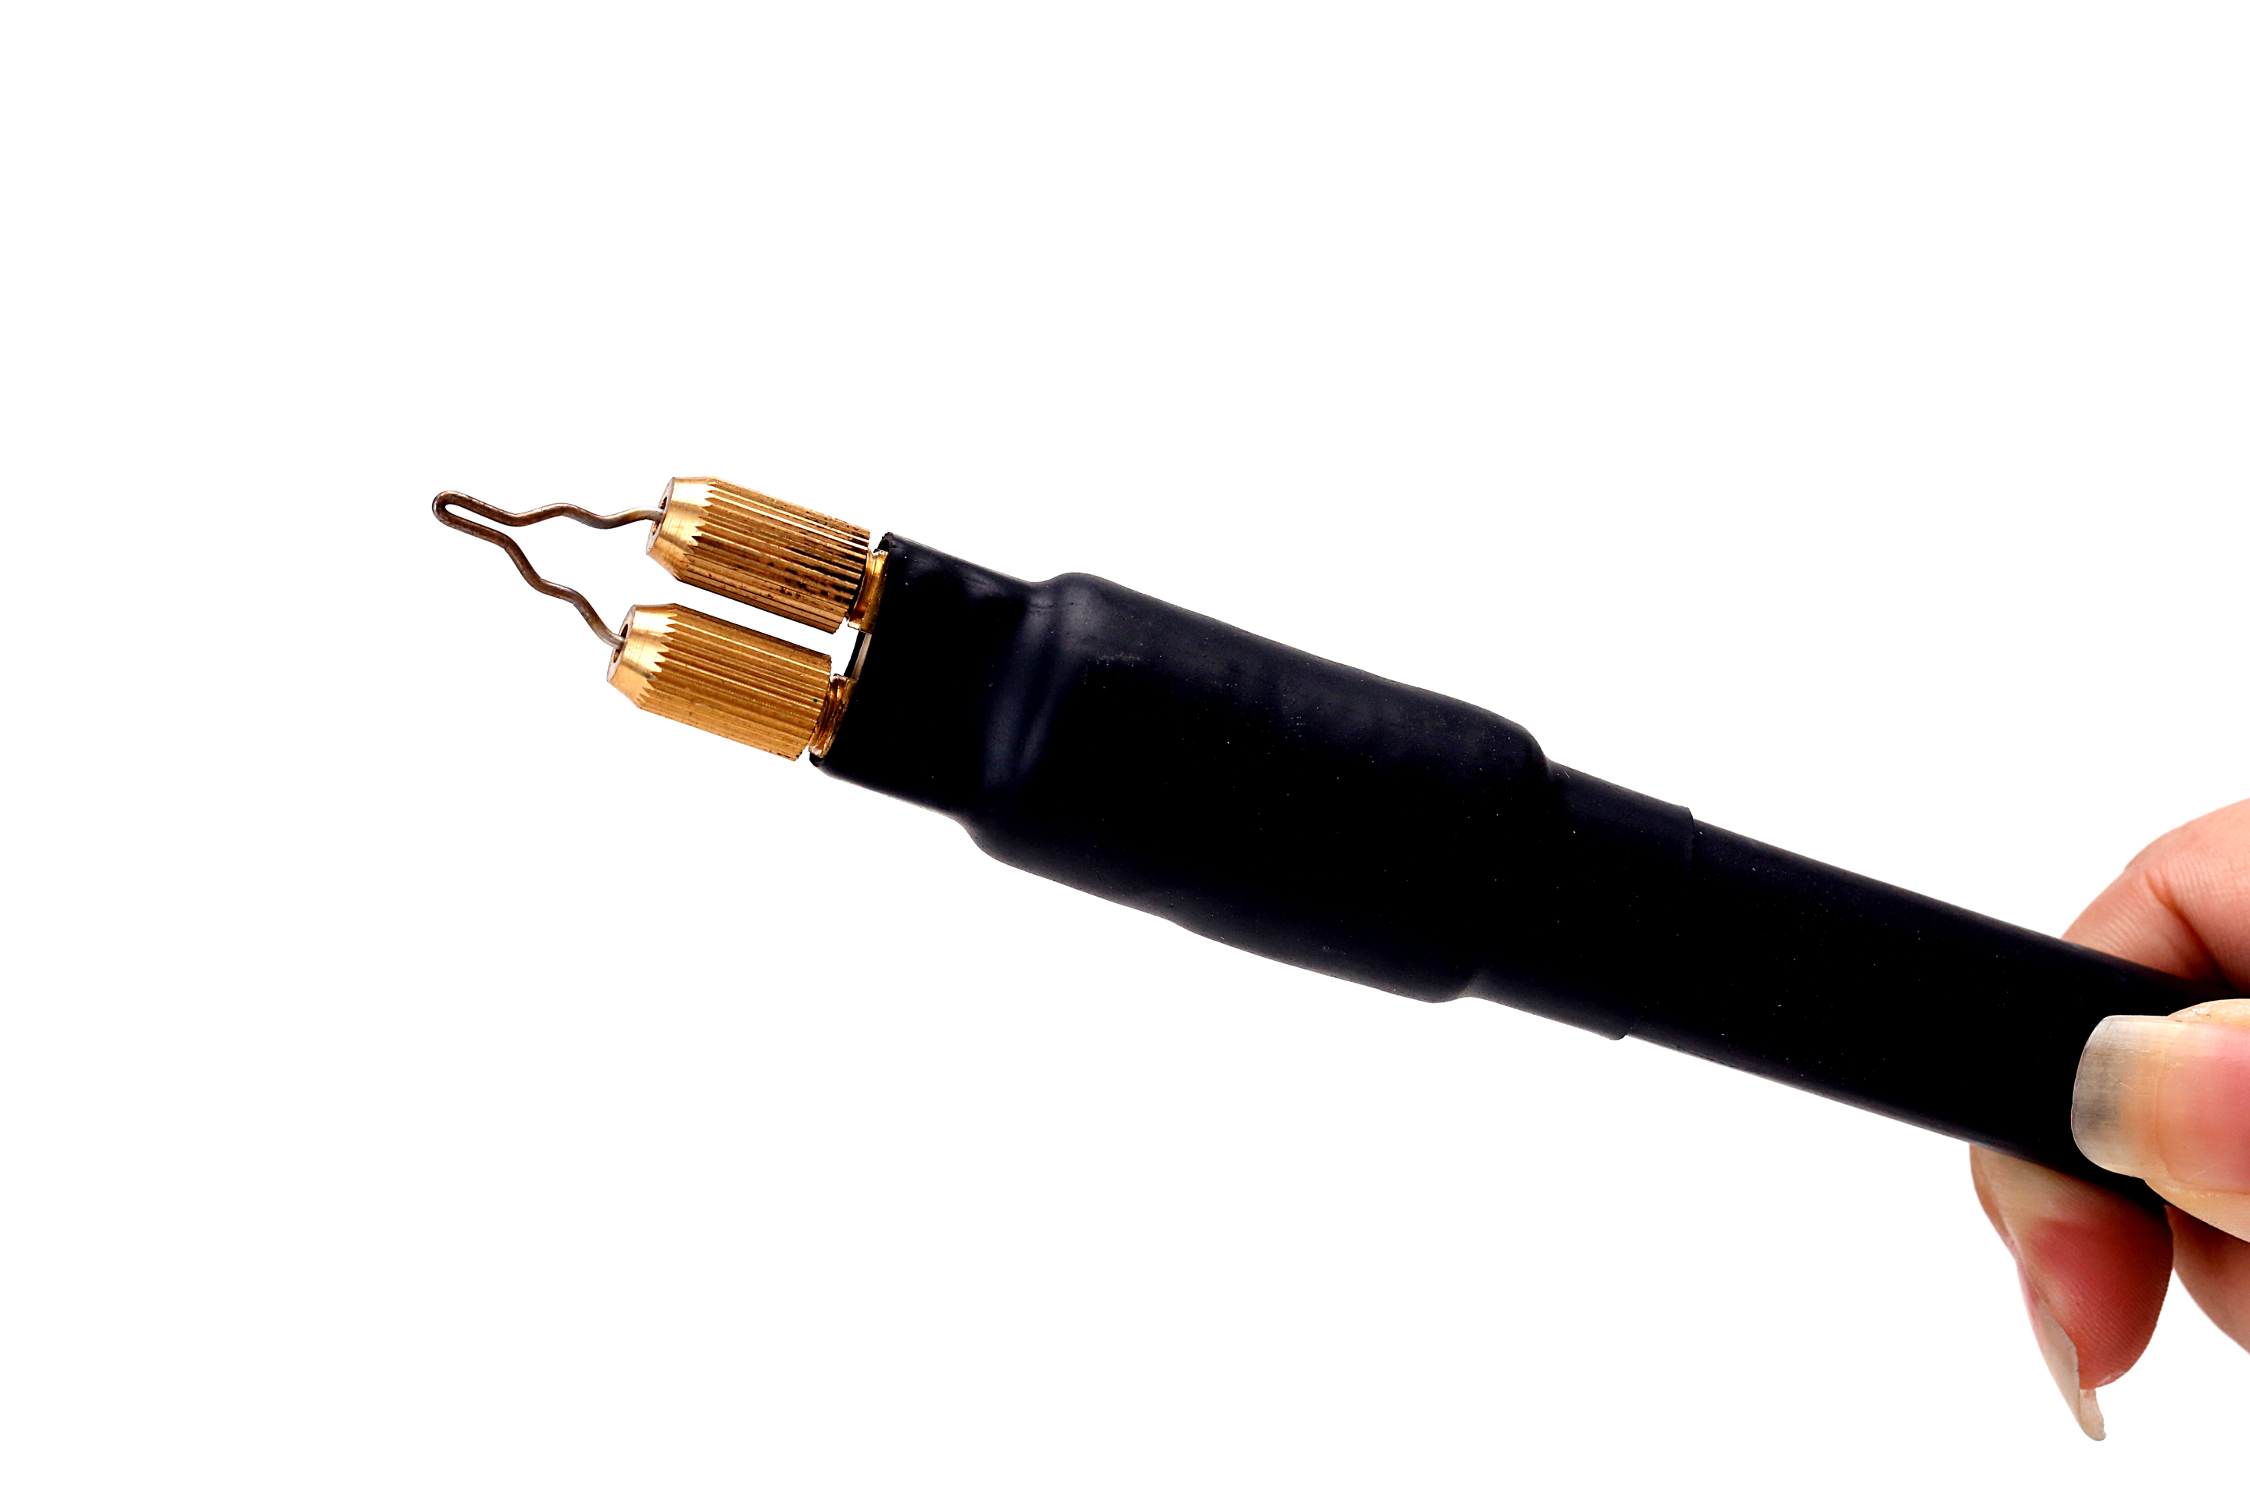
Wire-nib burner – This type of pen holds wire tips usually made from Ni-chrome wire of varying gauges. The wires are either inserted into collets or held in place by screws tightened unto them. TRUArt’s 60 W Professional Woodburning Detailer can accept 20 to 16 GA wire tips.
Heat transfer
Solid-point burners create heat by means of a heating element within the pen that is then transferred to the tip and operate at a fixed temperature.
Wire-nib burners create heat on the nibs by electric current going through it. The collets or wire nib holders should never be shorted.
| Solid-point burner | Wire-nib burner |
| Pros | Cons | Pros | Cons |
| Cheaper than Wire-nib burners
Wide selection of patterned and stamp tips Brass tips conducts heat faster and retains it longer than other metals Easy screw-in and unscrewing of tips (only do this when unit is cold!) Variable heat output (TRUArt 15 W – 30 W pens) Ergonomic handle with anti-slip rubber Ventilation holes and double heat sinks to dissipate heat away from hands Price is great for beginners in pyrography No separate power supply No danger of shorting out the pen |
Brass becomes soft when heated. Oftentimes, beginners tend to put too much pressure on it instead of letting the heat do the work. This bends the softened brass tip, which leads to breakage – leaving the screw inside the pen and rendering it useless.
Long waiting period for hot tips to cool down enough for unscrewing/replacement Long waiting period (3-5 mins) for tips to heat up sufficiently Only two power settings – 15 Watts and 30 Watts Cannot create customized tips Hands are farther away from work surface than Wire-nib burners Tips may become lose within pen when heated. This will require further tightening with pliers (about 1/8 to 1/4 of a turn) |
Nibs heat up much faster (less than 1 minute) than Solid-point tips
Fast cool-down Easy inserting and removal of nibs Nibs stay tight inside collets even at the pen’s highest voltage setting Wide selection of nib shapes and sizes Easily create customized nibs from a roll of Ni-chrome wire Very close distance between hand and work surface Digital power supply allows very fine tuning of heat output on the tips, which allows for superior control over burn Pen is smaller and lighter than Solid-point burners Non-slip ribber handles Can accept 20 GA to 16 GA (0.8 mm to 1.25 mm diameter) nibs Ni-chrome wire nibs do not break easily when pressure is applied Preferred by professionals |
More expensive than Solid-point burners
Nib selection does not have big patterns or stamps like the Solid-point burner tips Bulky power supply Burner can get almost uncomfortably hot if voltage is too high and heat on the nib is not used fast enough Danger of shortening the burner if the collets are directly connected to each other by any metal object Skill in using voltage setting to get the required heat has to be developed |
Ultimately, when selecting a woodburning or pyrography pen, you will first have to consider what you intend to do. Figure out if you could see yourself doing this occasionally or often. If you’re just starting out in the art of pyrography and do not know what kind of pyrography pen will suit you, you’re safe if you start with the Solid-point burner. Later on, once you’re more confident in the art and start investing long hours into it, you may want to consider upgrading to the more robust and industrial strength of the Wire-nib burner.
If you still want to know more, simply share your thoughts or questions through the comments below and we’ll answer them within the day.


I bought a TRUART solid point pen in hopes that I could make detailed images with elaborate shading, almost as if I were just drawing with pencil. But i quickly found that there’s not much opportunity for me to do that with this pen and according to videos, it seems that the wire tip pens allow you easier dexterity to make curved lines as well as nibs to create a larger range of shading. Would you say this is true?
Hi Aliyah,
Right off the top of my head, I’ll say that “yes, it is true that wire tip pens allow for more burning options overall”. But that is not to say that the solid point pen cannot do those things either. They do tend to take a little longer in achieving the desired results compared to the more powerful 60W sets and the techniques to get those results can be quite different.
That said, there are beginners who started out with the Stage 1 (15W – 30W) set and have grown quite proficient with it that they felt a bit awkward moving up to the Stage 2 (60W) set – though most, if not all, agree that the Stage 2 (60W) is definitely better when it comes to detailing.
In the end, it really boils down to the user and what they are used to or prefer.
Many people use the all-purpose (universal) tip (A) for burning the outline of designs and for creating straight lines. The calligraphy tip (B) is good for curved lines and for natural writing. The extra fine tip (C) is typically used for detailed work, straight lines, and creating tighter curves. As for me I would use the TRUArt (Stage 1) Wood and Leather Pyrography Pen.
I have been woodburning for 2 years with a solid point pen…I have been through 3 of them so far as it seems like they get a little unpredictable after a lot of use. However, I have been buying the lower priced pens. I am trying to decide if I should graduate to a wire tip, but I am wondering about how deep of a burn you can get with them? The tips don’t look very robust! Currently my main project is fabricating and burning custom cutting boards, and for that I need a heavy burn that can withstand the board actually having a practical use. The artwork is always on the sides of the boards, not in the actual cutting space but it still needs to be pretty heavily embedded. I would really appreciate any thoughts from here…I am self taught and honestly have learned everything by trial and error….but I dont want to spend $200.00 on a burner that I might not like. Thank you!
Hello Donell,
Solid point pens do tend to wear out after long-term usage – especially if you use them in a business context. This happens naturally primarily because of metal stress or fatigue. With wire tips, the high tensile strength of the Nichrome wire easily copes with these stresses and can operate at a much higher temperature, thus, are able to burn much deeper and last a lot longer. It is actually for these reasons that many professionals prefer the wire tips over solid tipped pens.
Wire-tipped burners are indeed an investment. But seeing that you seem to be in the pyrography business, it might be worth thinking about. If you’re after deep burns, wire tips will deliver. Be careful that you don’t cause a fire because they can literally start one on maximum power setting. The increased burn speed also works in favor of the business – you spend fewer hours on projects. There really is a lot to like. 🙂
Can someone please, please point me in the right direction? I am going to be doing a logo design for a company and i need to do it pretty big which also means the lines need to be pretty thick. What can i use to get the thickest lines?
Hello Heather,
Right off the top of my head, I’m thinking the broad side of a shader tip. They can cover a wide area fast – especially the Stage 2 wood burner.
Then again, considering that this logo may be displayed in an elevated area and viewed from a certain distance, your lines would have to be quite dark with distinct lines. For this, I’d recommend a writing tip on a burner set on the highest heat setting.
I hope this helps.
I have the 50 watt wire tip burner and the pens melt. the heat never gets into the “red” section on the machine, not even up to green. Is this to be expected?