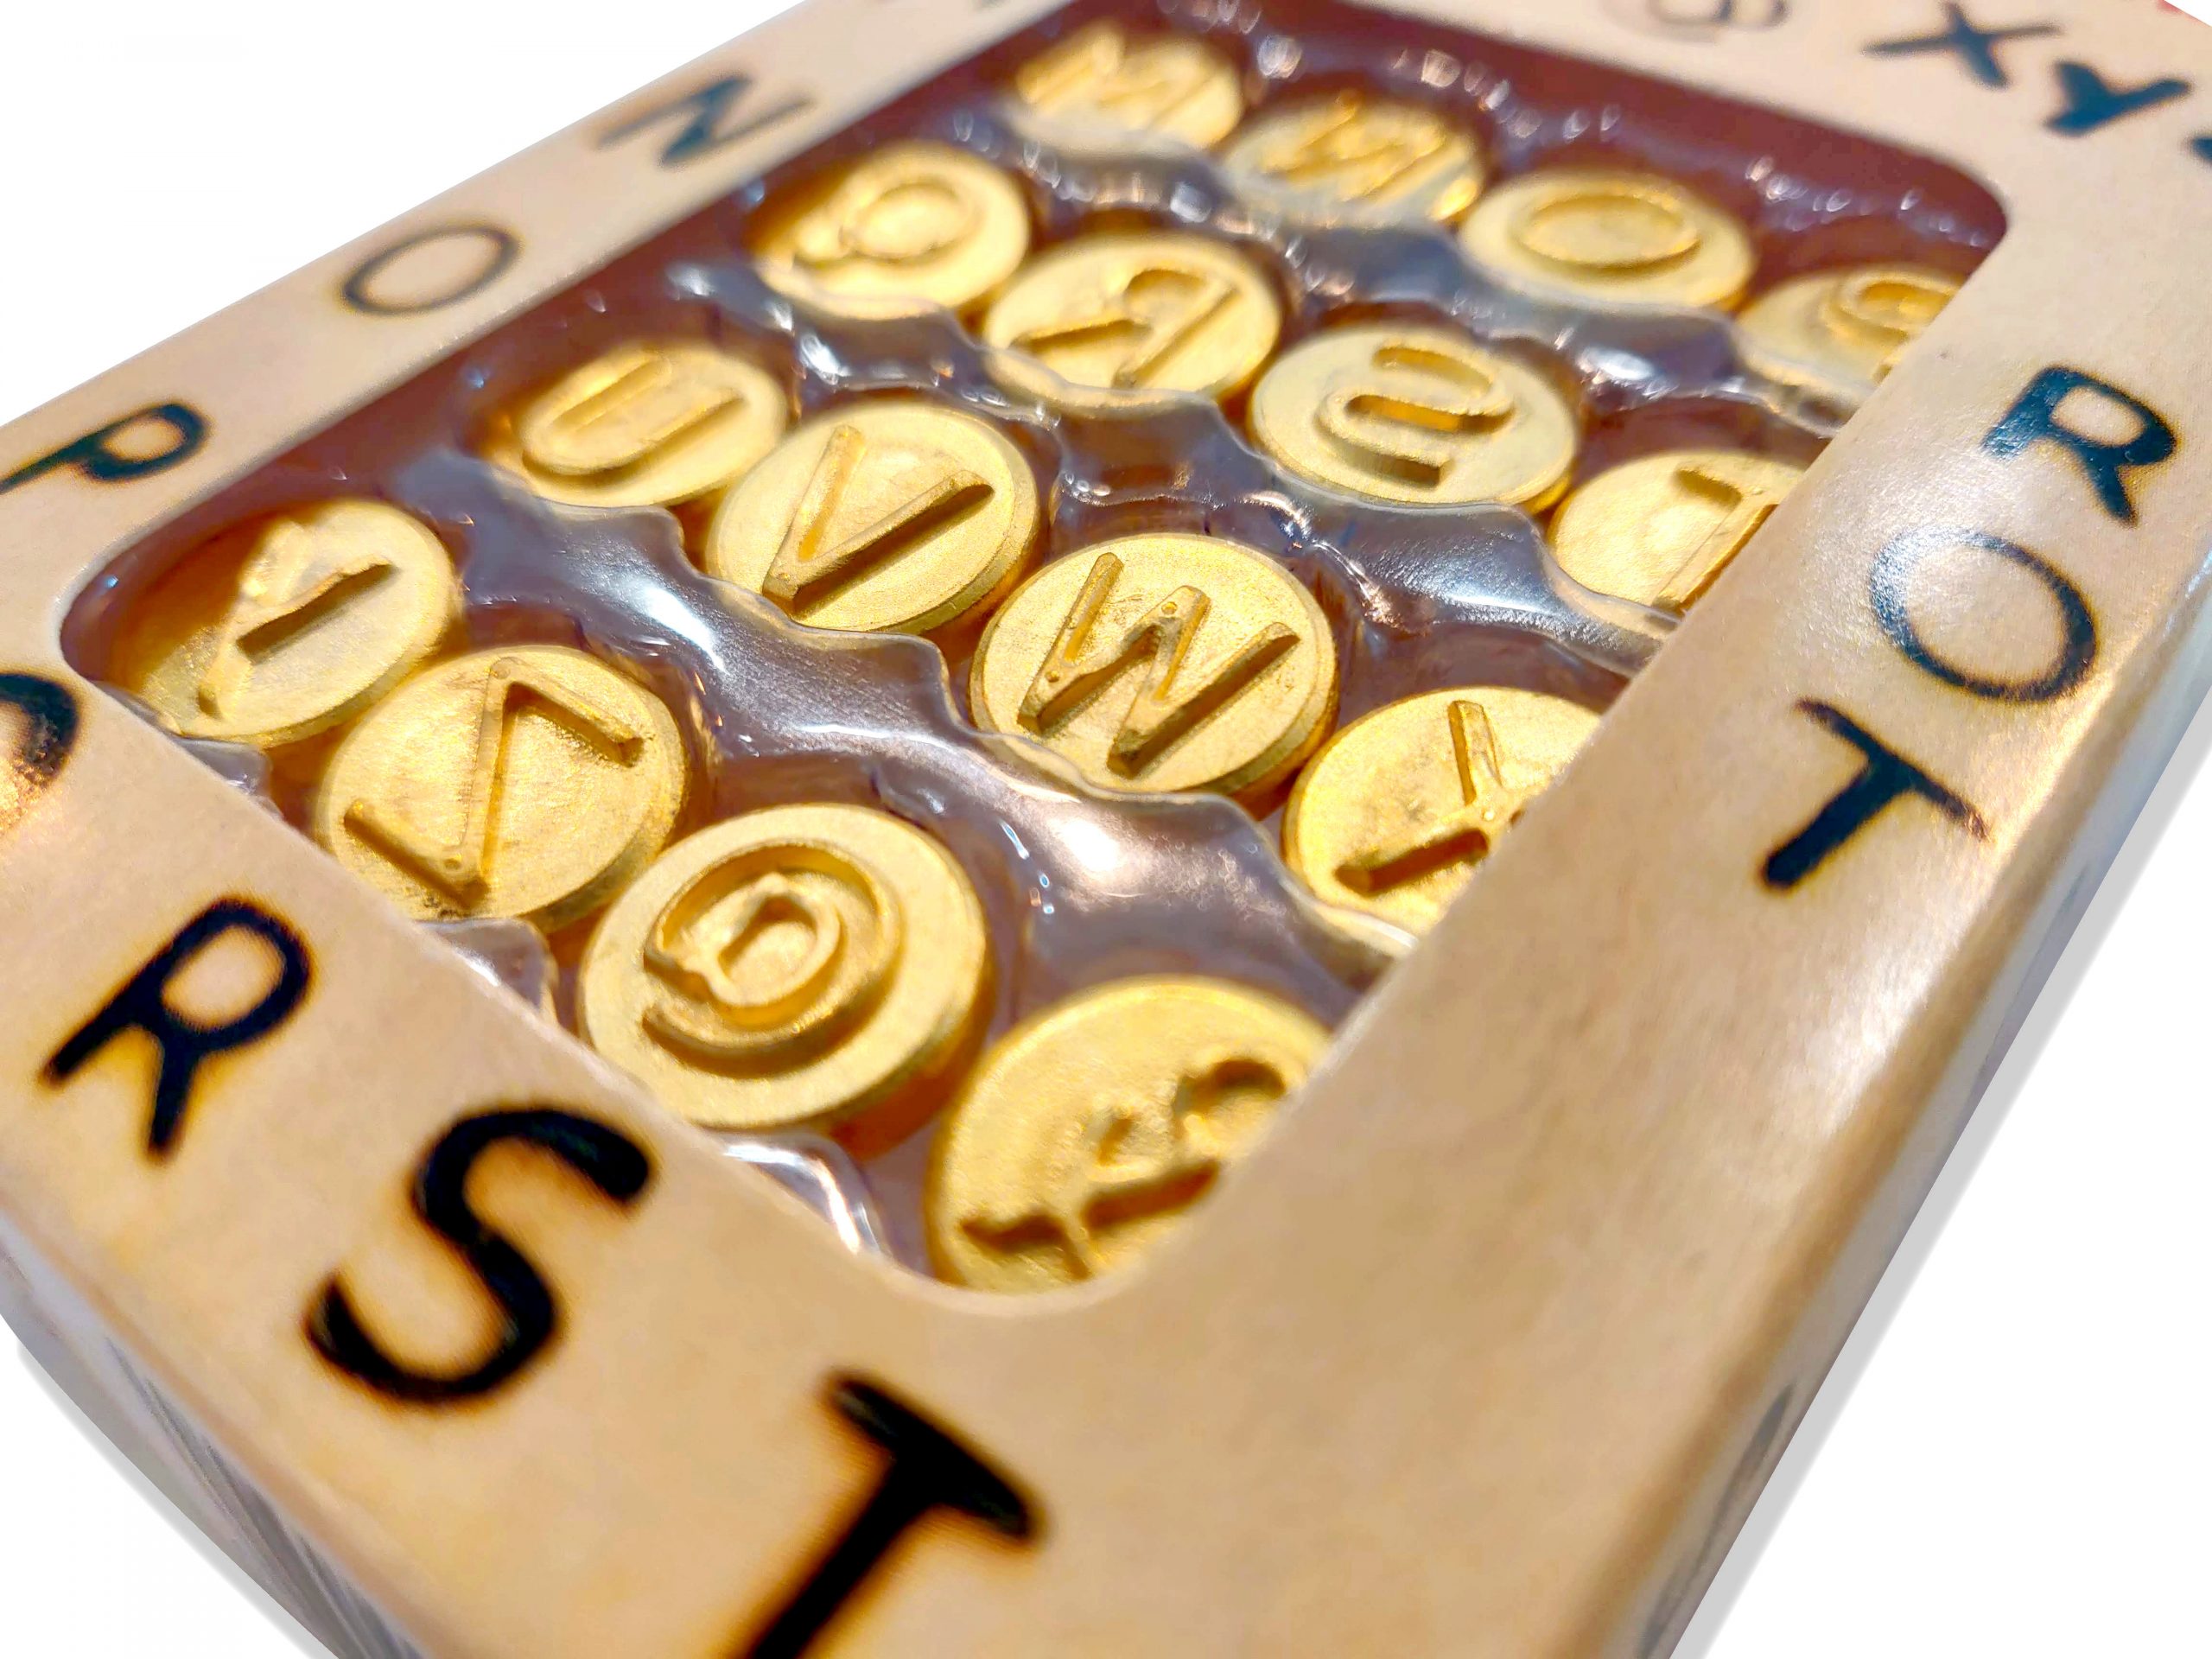
A burned name on a cutting board, a date on a keepsake box, or a monogram on a wood tag can make a project feel distinctly handmade. Brass letter tips for wood burning make that personalization faster than drawing every character by hand, but a clean imprint depends on more than pressing a hot letter into wood. Tip compatibility, wood grain, heat, and timing all show up in the final result.
What Brass Letter Tips Do Best
Brass letter tips are shaped stamps that transfer a single letter, number, or symbol to a burnable surface. They are especially useful when you need readable, repeatable text for gift tags, signs, ornaments, storage labels, wedding favors, and maker marks. Instead of building each character with a shading or writing tip, you use the heated face of the letter to create the form in one controlled press.
Their strength is consistency. A set keeps the letter style and size uniform across a project, which is difficult to achieve with freehand lettering. They also help newer wood burners add polished personalization before they are comfortable with calligraphy-style pyrography.
That said, letter tips are not designed for every text job. They work best for short names, initials, dates, and bold words. A detailed quote, a tiny address line, or curved script usually calls for a fine-detailing tip and a steady hand. Think of brass letters as a stamping tool, not a replacement for every kind of burned lettering.
Choose a Compatible Wood Burning Tool
Before planning a project, confirm that the letter tips fit your pen. Brass alphabet tips are commonly made for solid-point wood burning pens with threaded, interchangeable tips. They may not fit a professional wire-nib detailer, which uses shaped wire nibs rather than screw-in brass points.
Check the thread style, tip diameter, and the manufacturer’s compatibility guidance. Forcing a mismatched tip can damage the pen or leave the letter loose and uneven. Install and remove tips only when the pen is unplugged and fully cool. Once the tool is heated, hold it by its insulated grip and place it in a proper metal or ceramic stand whenever it is not in use.
A 15W or 30W solid-point pen can be a practical match for small lettering projects, especially on soft, unfinished wood. If you are producing repeated marks or working on denser hardwood, a tool with adjustable heat gives you more control. The goal is not maximum heat. It is enough heat to burn the character evenly without scorching the surrounding wood.
Start With the Right Wood Surface
The surface can make a letter stamp look crisp or frustratingly blotchy. Choose clean, unfinished wood that is smooth enough for the full face of the letter tip to contact it. Basswood is a friendly starting point because it burns readily and has a fine, even grain. Birch plywood made specifically for crafting can also work well when its top veneer is smooth and consistent.
Sand the project surface before burning, moving up to a fine grit so the stamp does not catch on raised fibers. Then remove sanding dust with a dry, clean cloth. Dust trapped under a letter tip can create pale gaps, while rough grain can pull the imprint out of shape.
Grain direction still matters. Long, open grain may burn darker in some areas of a letter than others. On a rustic sign, that variation can add character. On a formal monogram, it may look uneven. Test a letter on an offcut from the same piece before you commit to the finished surface.
Brass Letter Tips for Wood Burning: A Clean-Print Method
The easiest way to improve lettering is to treat each impression as a controlled test of heat, pressure, and time. Make several practice stamps on scrap wood, changing one variable at a time. This takes minutes and saves a finished project from an irreversible spelling mistake or a row of overly dark letters.
Begin by letting the pen reach a stable operating temperature in its stand. Position the wood on a firm, heat-safe work surface. Use a ruler and a light pencil guideline to establish the baseline for your text. For centered names or words, mark the middle point first, then work outward so the layout does not drift to one side.
Set the letter tip flat against the wood. Apply gentle, even pressure without rocking the pen. Hold it in place just long enough for the full character to brown, then lift straight up. Rocking creates doubled edges and dark corners, while twisting can smear the shape into the surrounding grain.
If the first stamp is pale, increase dwell time slightly before turning up the heat. If it is dark around the outside but light in the center, the tip may not be sitting level, the surface may be uneven, or the pen may be too hot. Let the tip cool completely before adjusting or changing it.
For most projects, a medium brown impression is more useful than a nearly black one. Medium burns keep the letterforms readable and leave room for surrounding line work, color, or finish. Very dark burns can look dramatic, but they often conceal detail in smaller letters.
Keep Spacing Consistent
Clean burning will not rescue crowded spacing. Brass stamps have a physical width, and the blank space around each letter is part of the design. Practice the full word on paper first, using the actual letter tips as a visual reference. Wide letters such as M and W need more room than narrow letters such as I and L.
Use a light pencil baseline and small vertical placement marks for each character. You can also make a simple spacer from a thin piece of scrap wood to repeat gaps between letters. This is particularly helpful for product batches, place cards, or sets of matching tags.
If you are stamping a word along a curve, work from the center letter outward. Rotate the wood or reposition yourself as needed so you can place each stamp squarely. Trying to reach around the project with an awkward wrist angle makes it harder to keep the letter face level.
Maintain the Tip Between Impressions
Resin and char can build up on the face of a brass tip, especially when you are making many stamps. That buildup softens the edges of the next letter and can leave tiny unburned pockets. With the tool unplugged and fully cool, clean the tip gently using fine abrasive material appropriate for the tool. Avoid aggressive scraping that can alter the letter face.
A dedicated set of letter tips is worth organizing in a labeled case or compartment box. Keep frequently used letters easy to find, and return each one after it cools. Missing letters have a way of appearing halfway through a personalized order.
When to Use Letter Tips With Hand-Burned Details
Stamped lettering does not have to look mechanical. Use brass letters for the primary name, date, or short message, then add borders, leaves, flourishes, or simple line art with a universal point or detailer tip. The combination gives the project structure while preserving the warmth of hand-burned work.
For a maker mark, try a stamped initial paired with a small freehand symbol. For a keepsake box, use letter tips for the recipient’s name and a fine tip for a meaningful date beneath it. If you are progressing from a Stage 1 solid-point kit toward more detailed work, this kind of mixed approach is a practical way to build lettering confidence while expanding your skills.
A successful letter burn is usually quiet and deliberate: smooth wood, a stable pen, a level tip, and one test before the final mark. Give each character that attention, and even a simple set of brass letters can turn an ordinary blank into a gift someone keeps.