Posted on Leave a comment

Pyrography Replacement Parts That Keep Tools Working

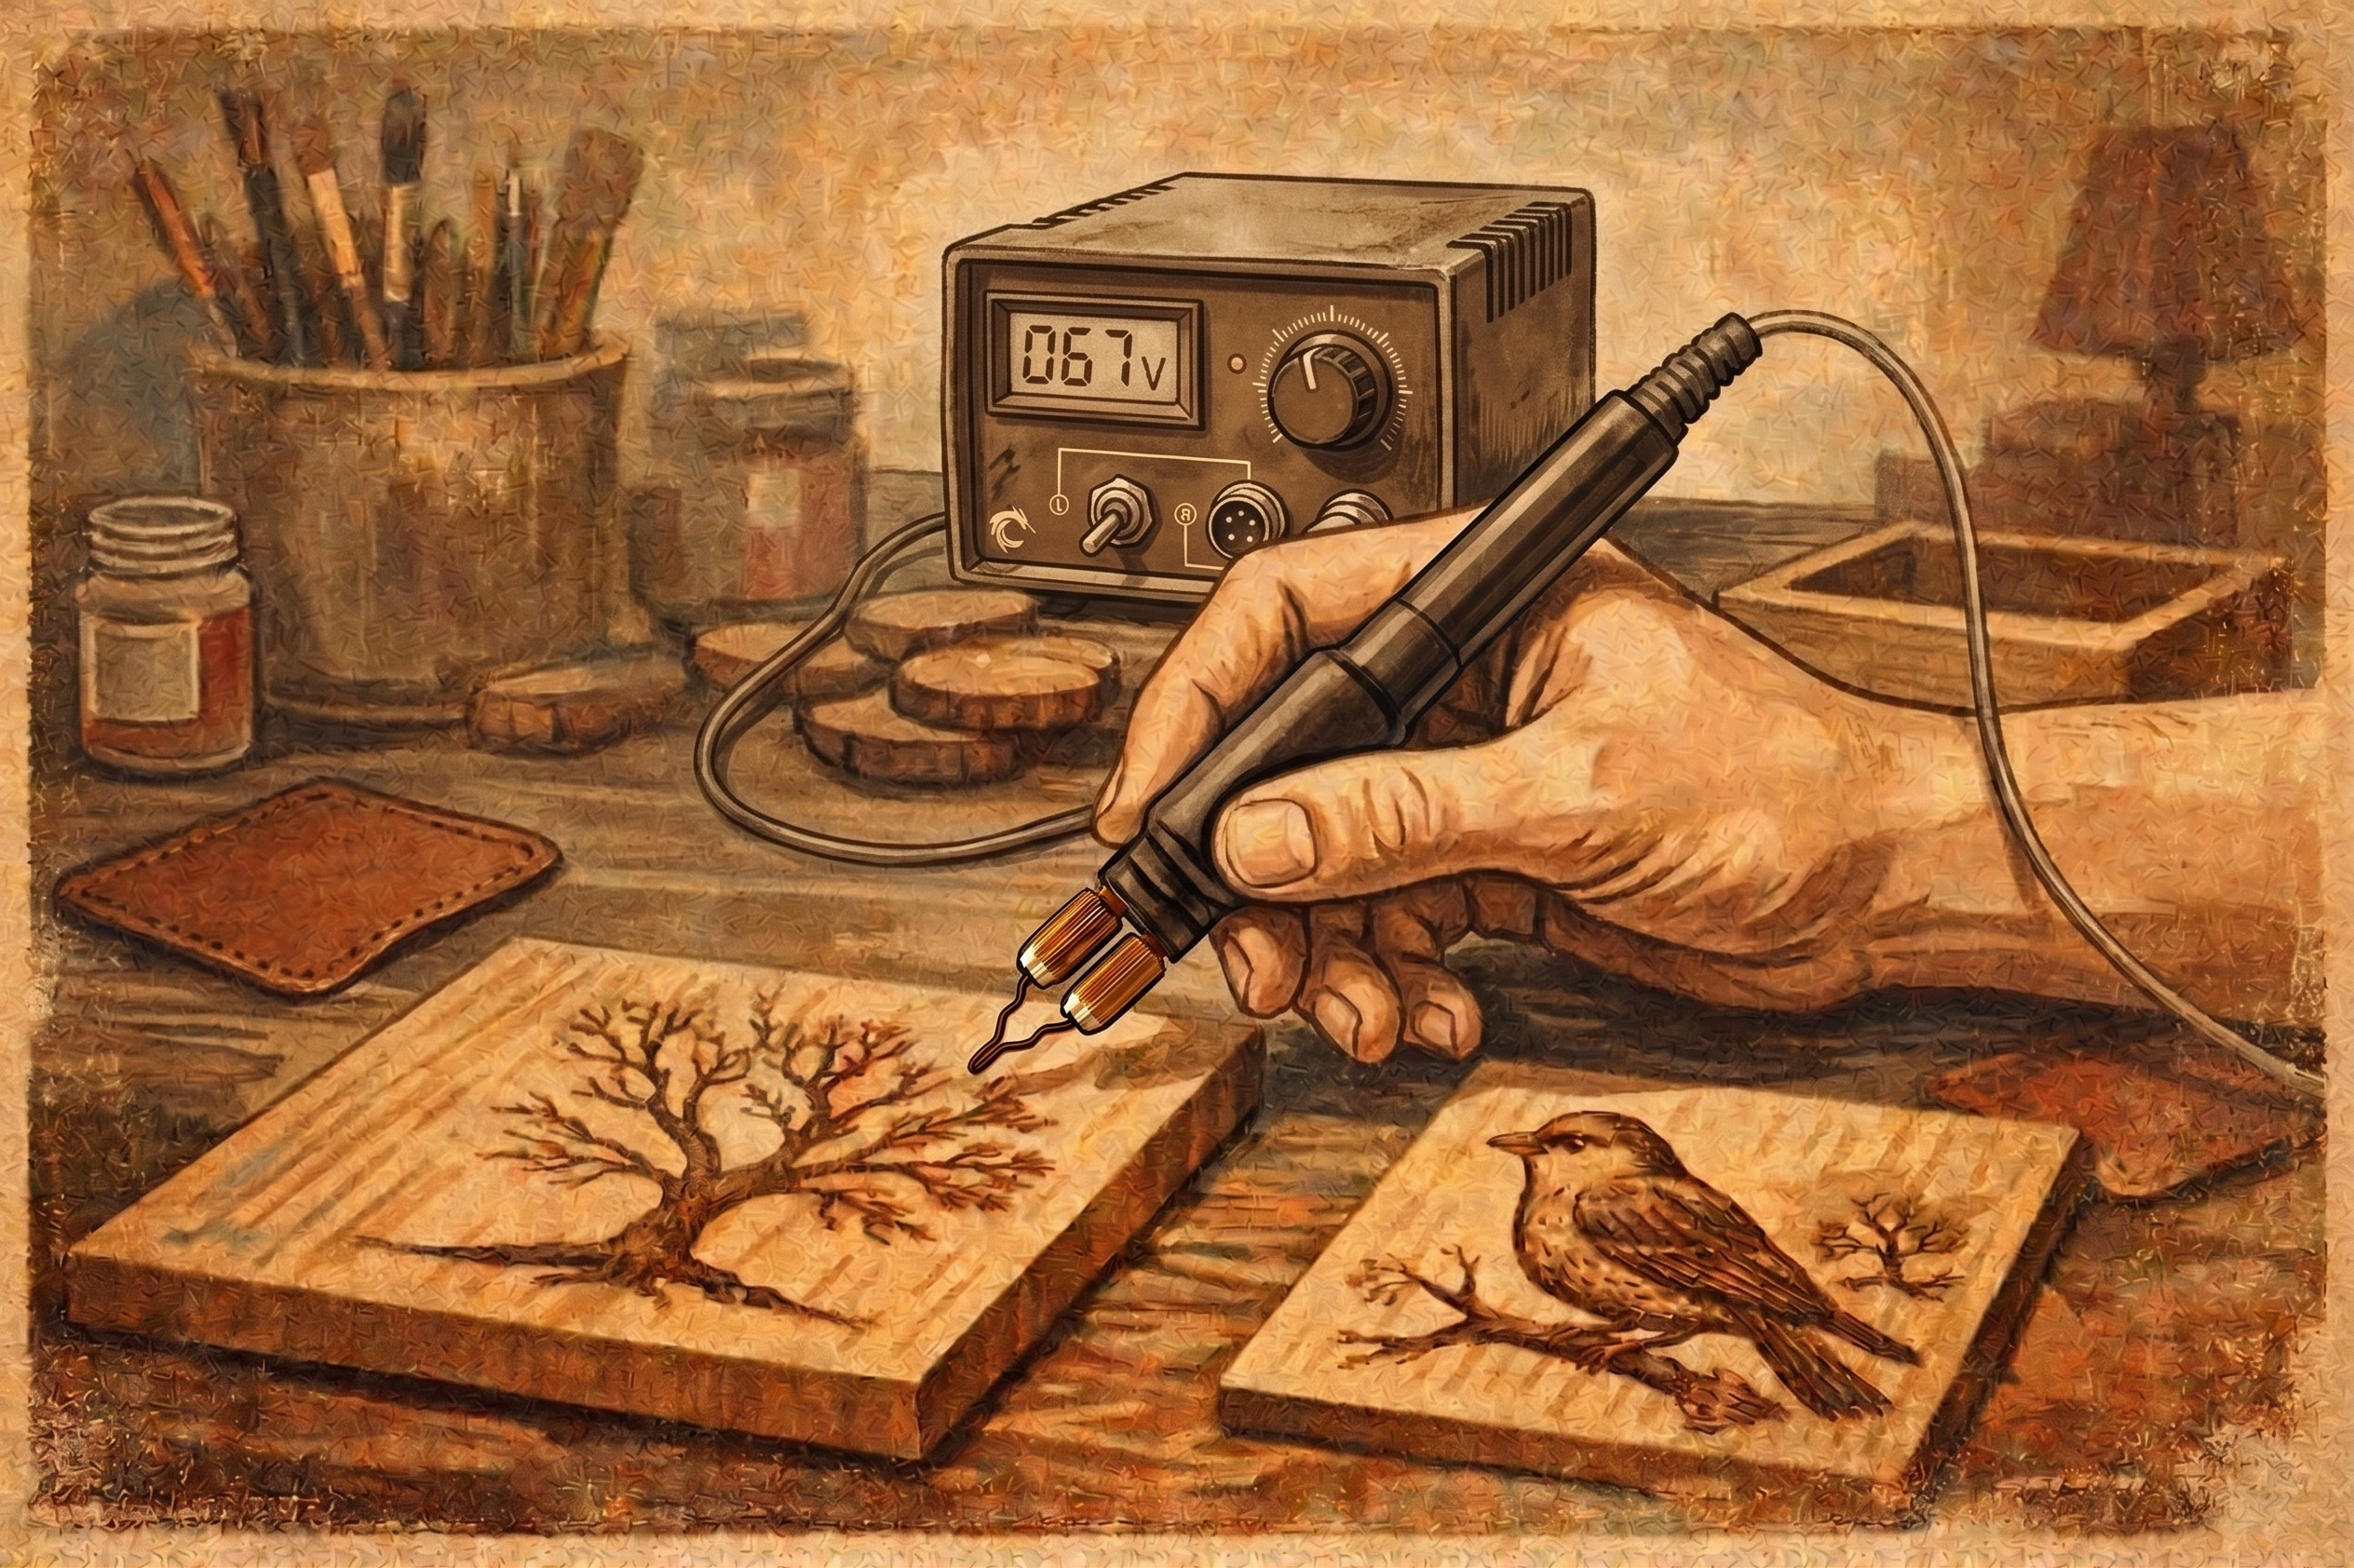
A favorite shader tip goes missing halfway through a personalized cutting board. A cord starts feeling unreliable just before a detailed portrait. Those are the moments when the right pyrography replacement parts matter most. Replacing a worn component is usually simpler and more cost-effective than replacing an entire system – provided you identify the part correctly and match it to your specific tool.

For makers building skills on wood, leather, gourds, and other appropriate burnable surfaces, a well-maintained burner means more consistent color, cleaner lines, and fewer interruptions between sketch and finished piece. The goal is not to stock every spare part available. It is to keep the small, model-specific components that protect your workflow and let your equipment perform as designed.

Know What Needs Replacing

Not every change in burn quality points to a failed part. Before ordering anything, look at the full setup: your selected tip or nib, the pen connection, the cord, the temperature setting, and the surface you are burning. A pale mark may simply mean the tool has not reached temperature, while uneven shading can come from a tip that needs to be cleaned rather than replaced.

Start with the most visible wear. Brass solid-point tips can gradually lose their crisp edges after repeated use, especially if you rely heavily on fine points for lettering or sharp feather details. A rounded writing point may still burn, but it will not produce the controlled hairlines it once did. Shader tips can also become less precise when their working edges are scratched, bent, or heavily worn.

With professional wire-nib systems, inspect the nib and its connection points carefully. A nib that is distorted, broken, or no longer heating evenly should be replaced with the correct style and gauge for the pen. Do not attempt to reshape a damaged wire nib while it is installed or powered. Let the tool cool completely, then follow the manufacturer’s instructions for removal and installation.

Other symptoms deserve a closer check. If a pen cuts in and out when moved, the issue may be a cord or connector. If the unit does not power on, confirm the outlet and power connection before assuming a component has failed. Digital temperature-control detailers are designed as systems, so swapping in a part that only looks similar can create poor performance or damage the tool.

The Pyrography Replacement Parts Worth Keeping

The best spare-part selection depends on whether you work with an entry-level solid-point burner or a Stage 2 detailer. Beginners often get the most value from extra compatible tips, a replacement pen when available for their model, and a proper stand. Experienced artists using a high-output single- or dual-pen system may also want spare pens, replacement cords, and favorite wire nib profiles ready for busy project periods.

Tips and nibs are the parts most makers replace regularly because they directly contact the work. Keep your selection practical. If you create signs, a writing point and a medium shader are often the first spares to reach for. If you burn wildlife, portraits, or fine decorative patterns, stock the detailing and shading nibs that shape your signature style. A large assortment is helpful only when you use it.

Pens, cords, and handles are different from tips because compatibility is non-negotiable. A replacement pen must be made for the exact burner or detailer model. The same rule applies to cords and connectors. Pin configuration, resistance, output requirements, and physical fittings can vary, even between tools with similar wattage or appearance.

Stands are easy to overlook, but they are working safety equipment. A stable metal or ceramic stand gives a hot pen a dedicated place to rest during tip changes, pauses, and project setup. Replace a stand that is bent, unstable, or no longer holds the pen securely. Never set a heated pen directly on a work surface.

Match the Part to Your Exact Tool

The fastest way to avoid a wrong order is to identify your burner before selecting a part. Check the model name, wattage, pen configuration, and whether the tool uses solid brass tips or wire nibs. Keep your original manual or product information with your workshop notes, especially if you own more than one burner.

A 15W or 30W solid-point wood and leather burning pen does not use the same components as a 60W professional detailer. Likewise, a dual-pen system needs parts designed to support its particular connections and output. “Universal” can sound convenient, but it is rarely the right standard for electrical components in pyrography.

When comparing pyrography replacement parts, use the manufacturer’s part name and compatible model list first. Then confirm the photos, connection type, and included quantity. If the replacement is a pen or cord, do not rely on a visual match alone. A quick compatibility check before purchase is far easier than troubleshooting a part that was never intended for your tool.

TRUArt’s focused tool range makes this process more straightforward: identify whether you are replacing a component for a Stage 1 solid-point kit or a Stage 2 detailer, then select the part built for that system. If you are unsure, contact customer support with the model information rather than guessing.

Replace Parts Without Creating New Problems

Unplug the burner and allow the pen, tip, or nib to cool fully before touching any component. Work on a clear, stable surface with good lighting. This is especially useful when handling small screws, wire nibs, or connectors that can be misplaced easily.

For solid-point tips, use the removal method specified for your pen. Avoid forcing a tip that is stuck. Excessive pressure can damage the threads or the pen body, turning a simple tip change into a larger repair. Once the new tip is installed, make sure it is seated correctly, but do not overtighten it.

For wire-nib detailers, install only the nib type intended for the pen. Confirm that both ends are secured evenly before powering on the unit. After installation, test the tool at a moderate setting on a scrap piece of clean, unfinished wood. Watch for even heating and stable operation before returning to a detailed project.

When replacing a cord or pen, turn off and unplug the power unit first. Align connectors carefully and never force them. A proper connection should feel secure without excessive pressure. If the new component does not fit easily, stop and verify that it is the correct replacement rather than trying to make it work.

Help Your Parts Last Longer

A few routine habits extend the life of your equipment and preserve burn quality. Clean tips after they have cooled, removing residue gently with an appropriate cleaning method for the tip material. Keep tips organized so fine points do not collide with heavier pieces in a loose drawer. Store pens and cords without sharp bends that strain the wire or connection points.

Use heat with intention. Higher temperatures can speed up large fills and deep shading, but excess heat can leave more residue on the working surface of a tip or nib. Match the setting to the wood species, grain direction, and effect you want. A controlled temperature and slower hand often produce a cleaner result than maximum heat.

It also helps to separate maintenance from creative time. At the end of a project, let the tool cool in its stand, wipe down the parts you used, and return them to a labeled case or organizer. That small routine means you are more likely to notice a worn tip or strained cord before your next project is underway.

Repair, Replace, or Upgrade?

Replace consumable tips and nibs when their shape or performance no longer supports the work you want to do. Replace pens, cords, and stands when they are damaged or unreliable and a compatible part is available. If the power unit itself is inconsistent, or your projects have outgrown the control of an entry-level tool, an upgrade may make more sense than repeated repairs.

That decision depends on your goals. A hobbyist making seasonal ornaments may only need a fresh writing tip and a dependable solid-point pen. An artist burning detailed commissions may benefit more from digital temperature control, premium detailing tips, or a dual-pen setup that keeps two favorite nibs ready to use.

Treat replacement parts as part of your creative kit, not an afterthought. With the correct spares on hand and a few careful maintenance habits, your burner stays ready for the next nameplate, keepsake box, leather accent, or detailed work of art you are ready to make.
Posted on Leave a comment

How to Clean Wood Burning Tips Without Damage

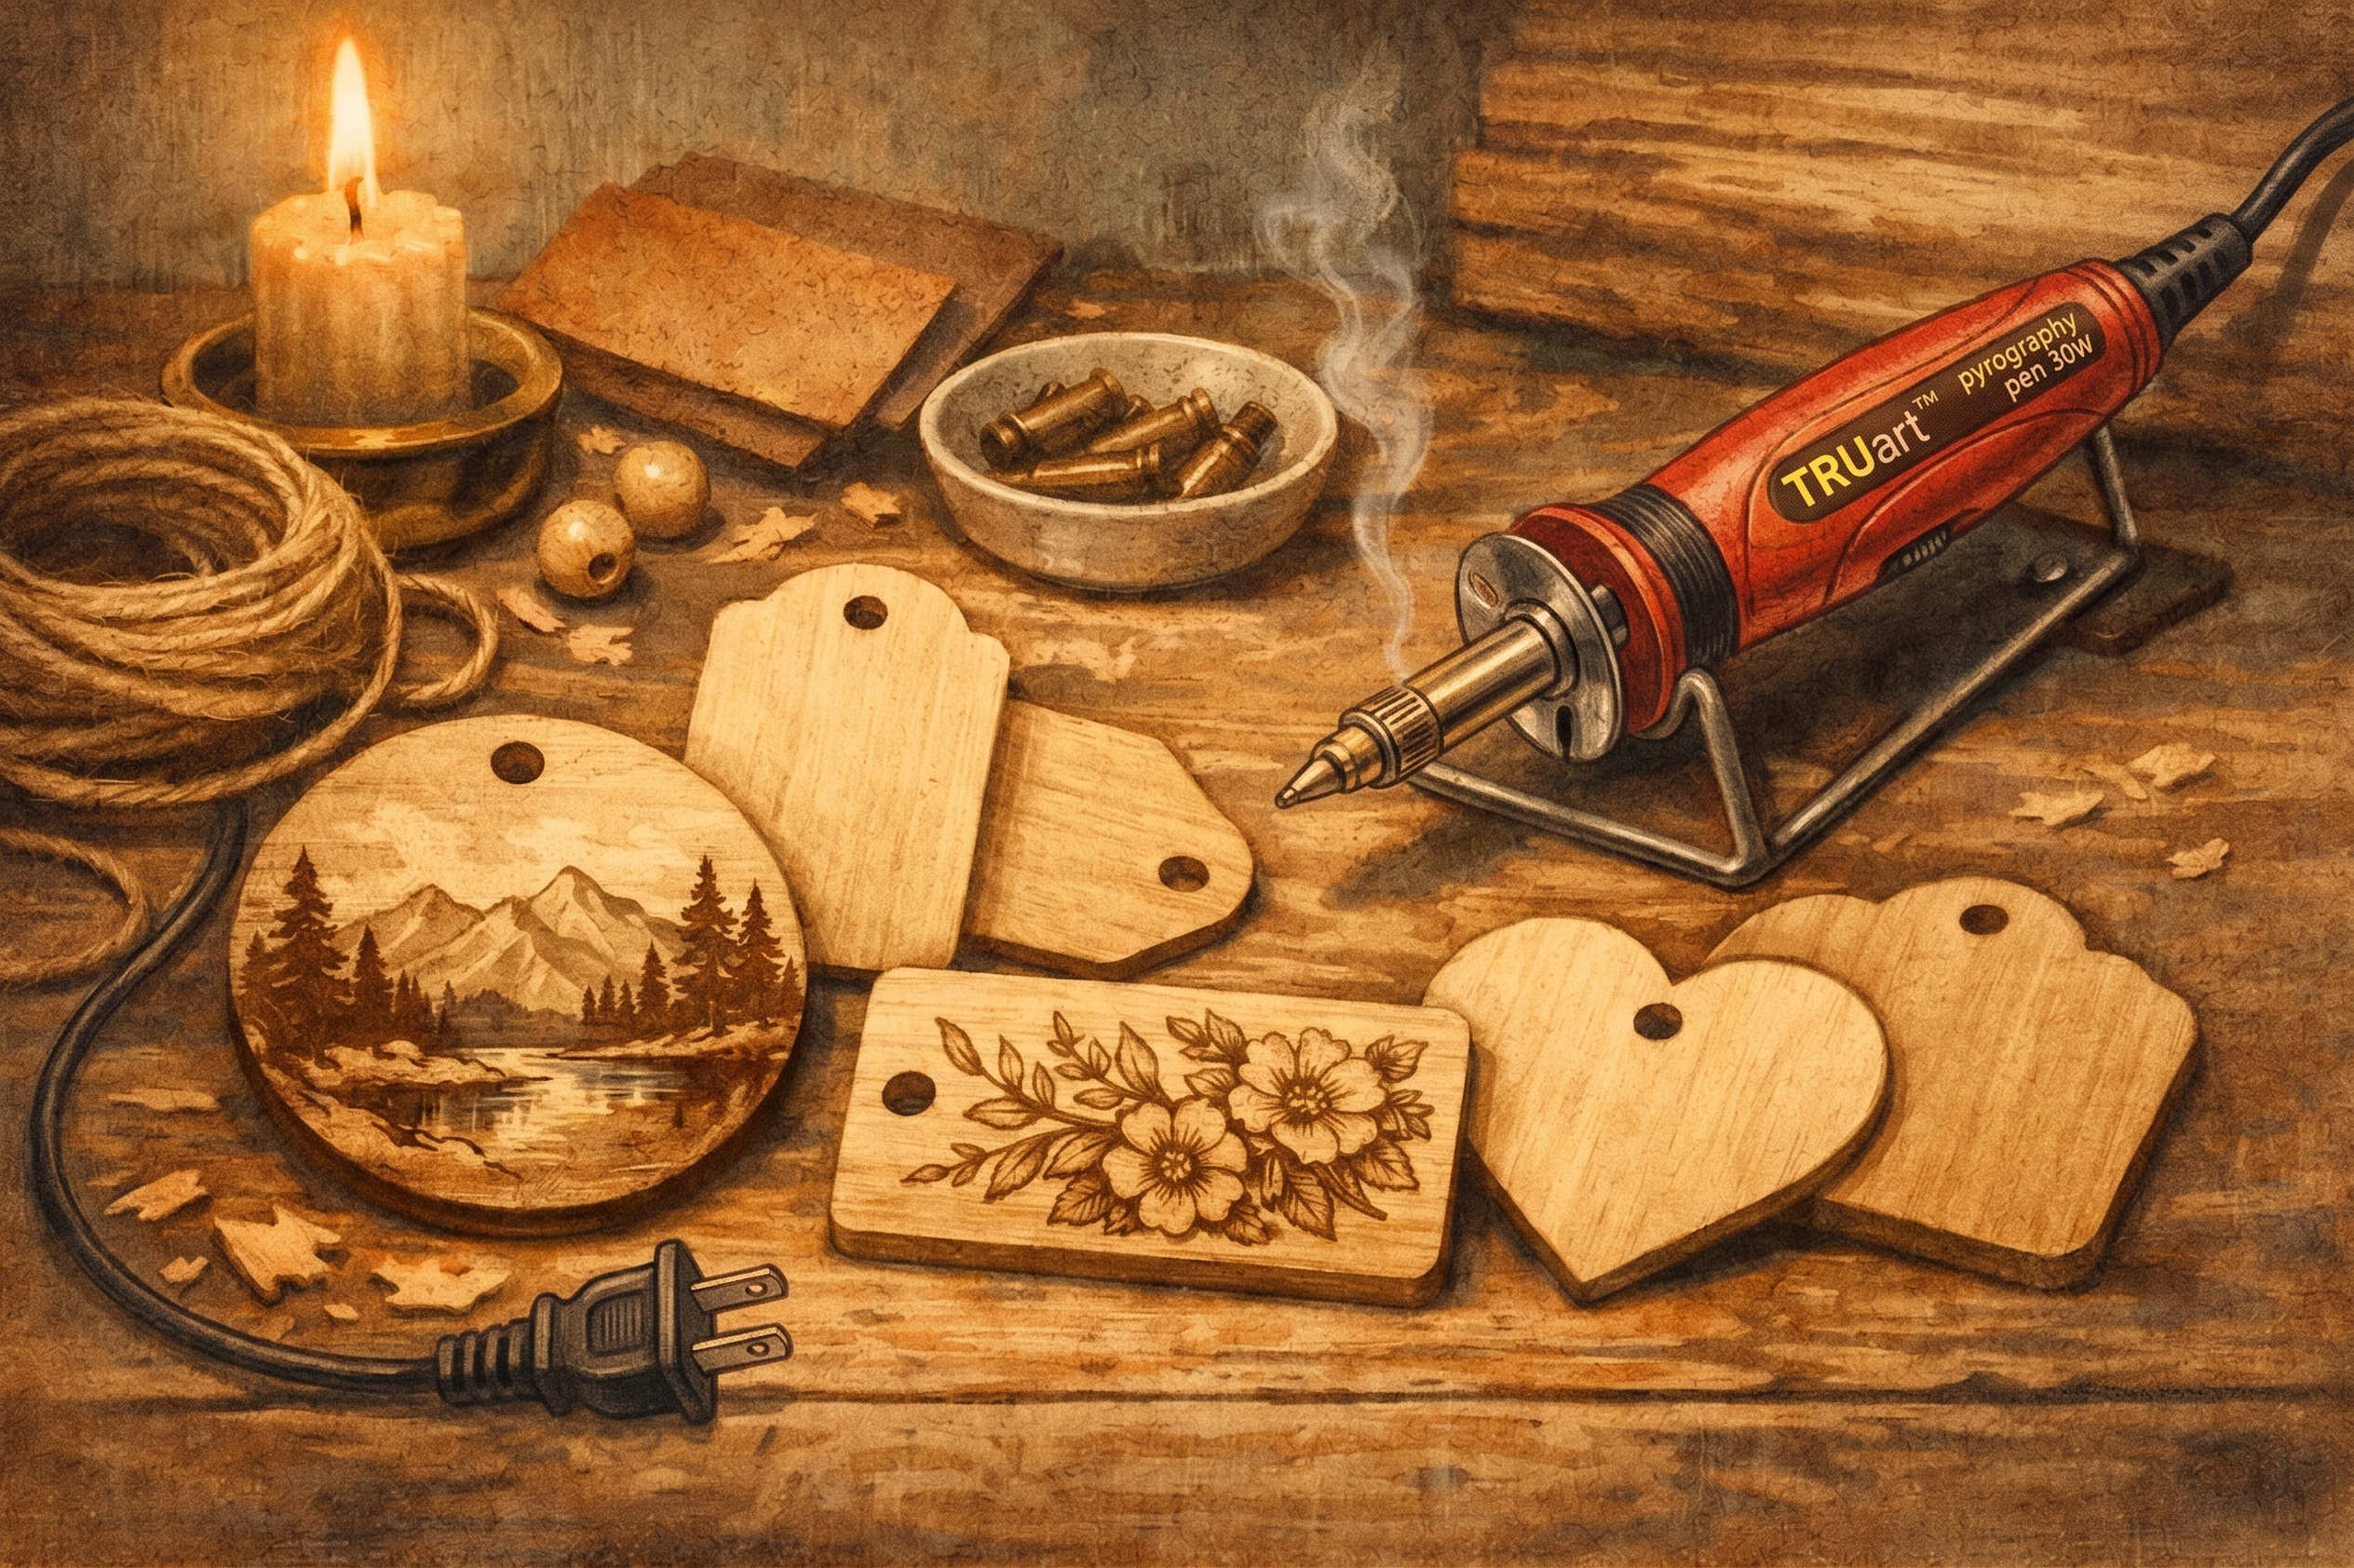
A dark, sticky tip can turn a smooth shading pass into a scratchy, uneven mark. Knowing how to clean wood burning tips is one of the simplest ways to keep your lines crisp, your temperature settings predictable, and your pyrography time focused on the artwork instead of fighting the tool.

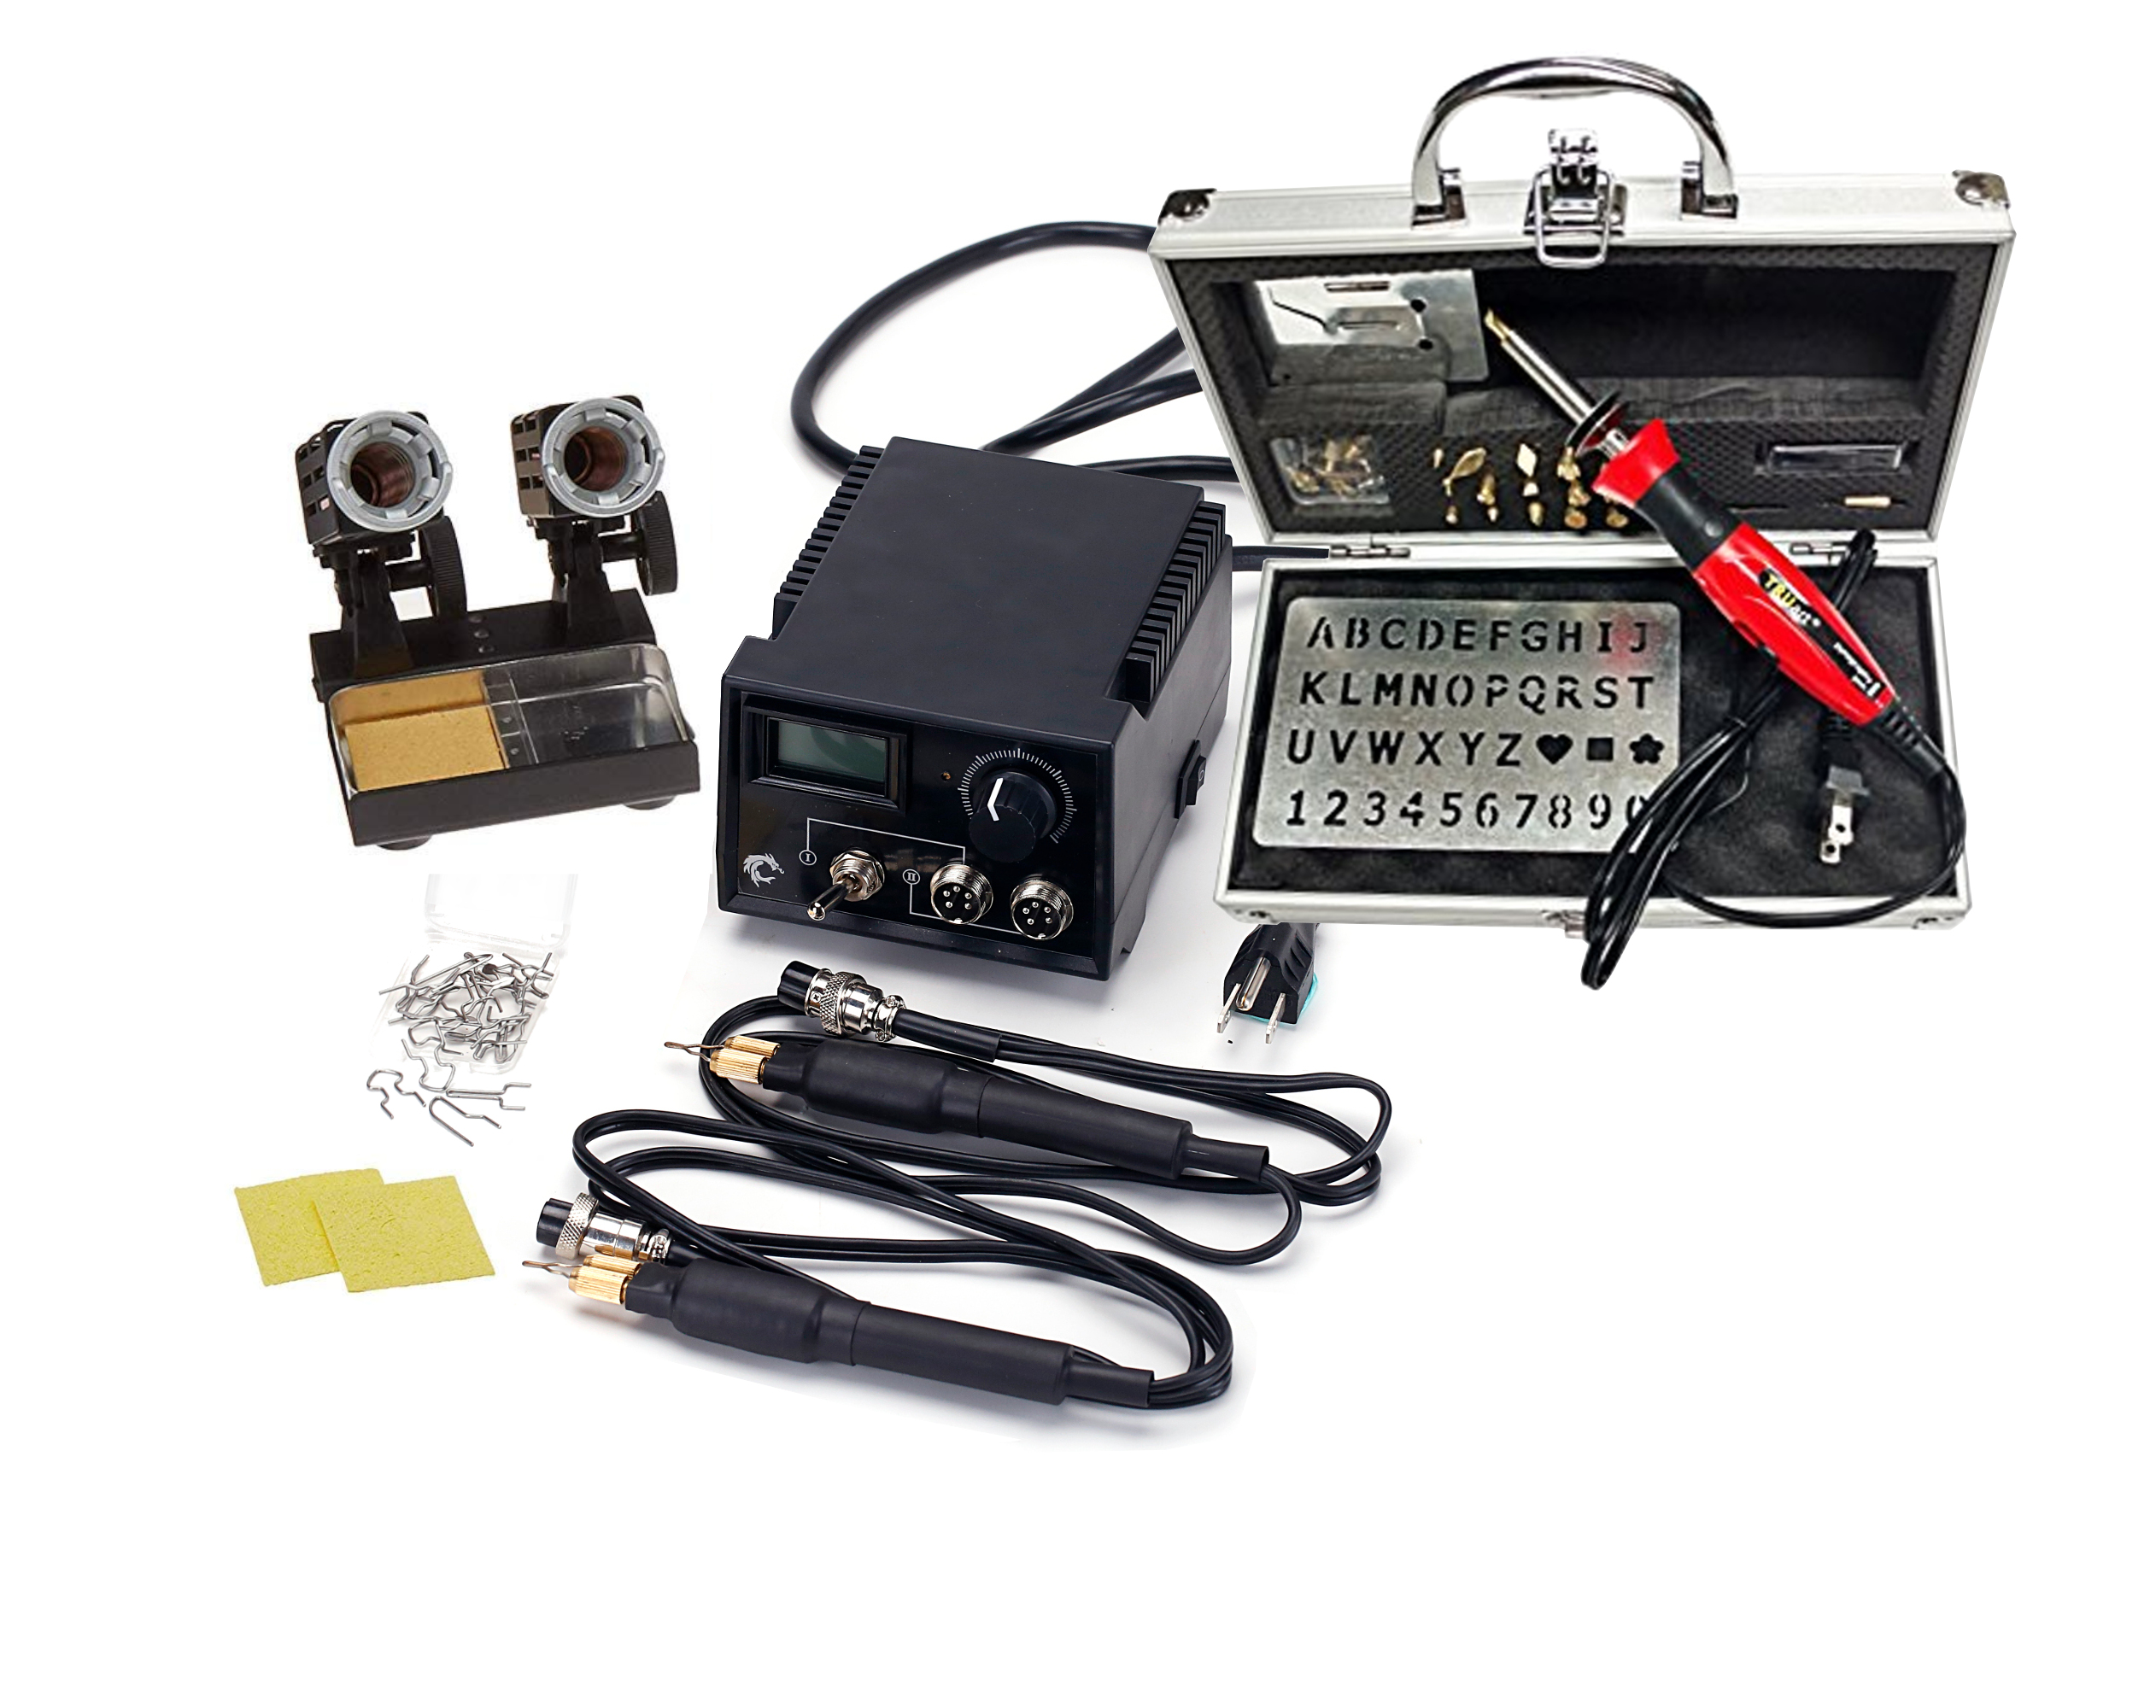
The right method depends on the tip you use. A removable solid brass tip on a hobby burner can tolerate different care than a delicate wire nib on a high-output detailer. In both cases, the goal is the same: remove carbon gently without changing the tip’s shape, finish, or ability to transfer heat.

Why Clean Wood Burning Tips Regularly?

As you burn, natural resins and fine wood dust can bake onto the heated metal. This dark buildup is carbon. A little discoloration is normal and does not automatically mean your tip needs aggressive cleaning. But when buildup becomes thick or rough, it affects the way the tip glides across the surface.

A dirty tip may drag fibers, leave blotchy dark spots, or require you to raise the temperature just to get a consistent mark. That extra heat can make delicate details harder to control. On a solid tip, carbon can obscure a crisp edge or fine point. On a wire nib, buildup can make lines feel less responsive and can interfere with clean shading.

Routine maintenance also makes tip changes easier. If removable tips are left with residue for long periods, they can become harder to seat properly in the pen barrel. Clean tools give you a more reliable starting point, especially when you switch from broad shading to fine lettering or detailed texture.

How to Clean Wood Burning Tips Safely

Start with the burner switched off and unplugged. Place the pen in a proper metal or ceramic stand and let the tip cool completely before handling it or removing a removable tip. Never rest a hot pen on a worktable, and never grip the metal barrel of the pen.

Once the tool is cool, wipe away loose dust with a dry, lint-free cloth. Look closely at the working edge of the tip. You are checking for raised black residue, sticky deposits, or rough areas that catch against the cloth. Normal heat coloring, such as gold, brown, blue, or darkened metal, is not necessarily a problem. The texture matters more than the color.

For light buildup, a gentle rub with a small piece of vegetable-tanned leather or a dedicated tip-cleaning pad is often enough. Work slowly and use only enough pressure to lift the carbon. The purpose is to polish away residue, not reshape the metal.

If you are using an interchangeable brass tip, remove it only after it has cooled and according to your tool’s instructions. Clean the tip separately, then make sure both the tip and connection area are dry and free of debris before reinstalling it. A tip that is not fully seated can heat unevenly and reduce the control you expect from the pen.

Cleaning Solid Brass Tips

Solid brass tips are common on entry-level wood and leather burning pens. They are durable, but the edges and points can still be damaged by overly aggressive cleaning. A soft brass brush, a leather strop, or a purpose-made cleaning block can remove moderate carbon while preserving the tip profile.

Brush in the direction of the tip’s shape rather than sawing back and forth across a fine point. For a shader, follow the curve of the working face. For a pointed writing tip, move from the base toward the point with a light touch. After cleaning, wipe the tip with a dry cloth to remove loosened particles.

Avoid trying to make a heavily used tip look factory-new. Brass naturally changes color with heat. Chasing a bright finish with harsh abrasives can round off edges, flatten a point, and alter the marks the tip was designed to make. A clean working surface is the target, not a mirror polish.

Cleaning Wire Nibs on Detailers

Wire nibs require a lighter hand. Their fine profiles are what make them useful for controlled linework, feathering, and detailed shading, but those same profiles can be bent or weakened by force. Do not scrape a wire nib with a knife, pliers, or a coarse file.

After the nib has cooled, use a soft brush or a gentle cleaning pad to remove loose carbon. Support the pen by its insulated handle and avoid pressing sideways on the wire. If residue is concentrated at the very end of a fine nib, work carefully around it rather than pulling or twisting the wire.

For a digital temperature-control unit, persistent carbon can also be a sign that your heat setting is higher than the wood needs. Before assuming the nib is the problem, test a lower temperature on a scrap piece of the same clean, unfinished wood. Often, a slightly slower pass at a more controlled temperature produces cleaner marks and less residue.

What to Do With Stubborn Carbon Buildup

When ordinary wiping and light polishing do not remove the buildup, patience is safer than force. Start by cleaning in short sessions with a leather strop or a tool-specific tip cleaner. Check the surface between passes so you do not remove more metal than necessary.

For removable solid tips, it may be more practical to replace a tip that has become badly pitted, misshapen, or permanently rough. A fresh tip is a small upgrade compared with the frustration of trying to create detailed work with an altered edge. This is especially true for specialty patterns, lettering tips, and fine points where a small change in shape changes the burn mark.

Wire nibs should be replaced when they no longer hold their intended shape, heat unevenly, or have a damaged connection. Do not attempt to bend a hot nib back into position. Let the tool cool, inspect it in good light, and replace the nib if its performance or shape is compromised.

TRUArt makers using interchangeable tips or professional detailing pens can keep a few frequently used replacements on hand. That lets you continue a project with a reliable working tip instead of over-cleaning one that has reached the end of its useful life.

Cleaning Methods to Skip

Some shortcuts create more problems than they solve. Keep these four methods off your workbench:

  • Do not quench a hot tip in water. Sudden cooling can stress the metal and may introduce moisture where it does not belong.
  • Do not use coarse sandpaper, grinding wheels, or aggressive files. They can quickly change a tip’s profile and ruin fine detail capability.
  • Do not use harsh household chemicals or soaking solutions. Residue can affect future burns and may damage parts of the pen or tip assembly.
  • Do not scrape tips with sharp metal tools. This can gouge brass and bend delicate wire nibs.

A gentle method takes a little longer, but it protects the performance you paid for. If a cleaning approach requires heavy pressure, it is probably the wrong approach for a pyrography tip.

Keep Tips Cleaner Between Projects

The easiest cleaning routine begins before carbon has a chance to harden. During longer sessions, pause occasionally, switch off the tool, and place it securely in its stand while it cools. Once cool, inspect the tip and remove light residue before it becomes a thick layer.

Your project material matters, too. Clean, unfinished wood with a smooth surface generally produces less troublesome buildup than dusty or resin-heavy stock. Sanding your workpiece thoroughly and wiping away sanding dust before burning helps the tip move more cleanly. Test your temperature on a scrap from the same piece of wood, especially when changing species or moving between pale basswood and denser, darker woods.

Use the lowest heat that produces the mark you want at a controlled pace. Higher heat may seem faster, but it can create harsh darkening, excess smoke, and more baked-on carbon. Good pyrography is usually a balance of heat, tip choice, pressure, and movement speed.

A clean tip does more than look better. It keeps your hand connected to the fine control that makes a burned line feel intentional. Build a few minutes of care into your setup and cleanup, and your next lettering piece, portrait, or custom gift will start with a tool ready to make its best mark.

Posted on Leave a comment

Unfinished Wood Tags for Crafts That Burn Beautifully

Unfinished Wood Tags for Crafts That Burn Beautifully

A small wooden tag can carry a surprising amount of character. Add a family name to a gift, a botanical border to a favor, or a crisp logo to handmade packaging, and it becomes part of the project rather than an afterthought. The right unfinished wood tags for crafts give you a clean surface for burning, painting, staining, lettering, and layering into work that feels distinctly yours.

For pyrography artists, tags are especially satisfying because they are fast to finish, easy to personalize, and useful in nearly every season. They also ask for more precision than a large practice board. A rough surface, an awkward grain direction, or a design that is too dense for the available space can make a small project feel harder than it needs to be.

What Makes a Wood Tag Good for Crafting?

Start with a tag that is truly unfinished, smooth, and ready for creative work. The surface should feel even under your fingertips, with no coating that interferes with a burn line, stain, paint, or adhesive. A clean, pale wood surface gives burned details strong contrast and leaves room for color if your design calls for it.

Grain matters, particularly when you are woodburning. Fine, consistent grain helps a pen glide and makes it easier to create even lines, small lettering, and delicate shading. Heavier grain can be beautiful, but it may pull a burn line darker or lighter as you move across the tag. That is not necessarily a flaw – it simply works best with designs that welcome a more rustic, natural look.

Thickness is another practical decision. Thin tags are lightweight and work well for gift labels, place cards, and ornaments, but they can flex if you press too hard while lettering or burning. A thicker blank feels more substantial for keychains, product tags, and keepsakes. It also gives you a sturdier surface when using detailed shading techniques.

The hole placement deserves attention, too. A centered hole at the top is ideal for hanging ornaments and gift tags. A corner hole can better suit product labels or luggage-style designs. Before committing to your layout, position the string, ribbon, or key ring so you can see how it changes the usable design area.

Choosing Unfinished Wood Tags for Crafts by Project

A tag shape should support the purpose of the finished piece. Rectangular tags provide the most room for names, dates, short messages, and branded information. Rounded tags soften a floral motif or a child-themed design. Circles are a natural choice for ornaments, while long narrow tags suit herb markers, party favors, and handmade product packaging.

For projects that need a polished, repeatable look, choose a consistent pack of tags in the same size and shape. This is helpful for wedding place settings, retail packaging, event favors, and holiday gift sets. Repeating one layout lets you build rhythm in your workflow: transfer the design, burn the lettering, add color if desired, then attach twine or ribbon.

If you are making one-of-a-kind pieces, variety can be more useful. A mix of shapes gives you freedom to match the blank to the artwork. A simple landscape may fit a wide rectangle, while a monogram and leafy border may look better on a round tag.

Best uses for small tags

Small tags reward simple, confident design. Use them for initials, short names, tiny icons, simple florals, paw prints, stars, or clean geometric borders. A small tag can look crowded quickly, so let open wood remain part of the composition.

When burning small lettering, use a fine detailing tip and work slowly enough to maintain spacing. It is better to use fewer words at a readable size than to force a long message into a narrow area. If the tag will hang from a package, remember that the recipient will usually see it at arm’s length, not under a magnifier.

Best uses for larger tags

Larger blanks make room for layered borders, illustrated scenes, recipes, family sayings, or detailed pet portraits. They are also a smart choice when you are practicing shading, because you have enough surface area to build gradual value changes instead of trying to force every detail into a few square inches.

A larger tag can also function as a mini sign. Add a drilled hole and twine for a pantry label, a garden marker, a door hanger, or a seasonal decoration. For a coordinated collection, repeat one border style or font across several tags while changing the central artwork.

Prep the Surface Before You Burn or Decorate

Even a smooth tag benefits from a quick inspection. Look for loose fibers around the edges and lightly sand only where needed. Fine sanding helps remove fuzz that can catch a pen tip or disrupt a painted edge. Wipe away all sanding dust before transferring a pattern or beginning your burn.

Sketch directly on the wood with a light hand, or transfer your design using your preferred pattern method. Keep guide lines faint. Heavy pencil marks can remain visible around burned lines, especially on pale wood. For repeated text, make a simple layout template first so names and dates land in the same place on every tag.

Test your pen temperature and tip choice on a spare unfinished piece of the same wood whenever possible. Different woods and grain areas respond differently to heat. A test pass tells you whether you need a lighter touch, a lower setting, or a slower stroke for the tone you want.

For clean pyrography, let heat do the work. Pressing hard can create uneven marks and makes fine lettering more difficult. A 15W or 30W solid-point burner can be a practical starting point for names, outlines, and simple decorative work. Artists building detailed shading, fine linework, or a larger batch of custom tags may prefer the added control of a digital temperature-control detailer and premium detailing tips.

Work on a stable, heat-safe surface with good ventilation, and return a hot pen to a proper metal or ceramic stand whenever it is not in your hand. Small blanks are easy to move, so secure the tag if necessary rather than chasing it across the work surface.

Design Ideas That Feel Personal, Not Generic

The best tags often combine useful information with one memorable visual detail. A wedding favor tag can include the couple’s names and date, then add a burned olive branch or wildflower sprig. A handmade candle tag can feature the scent name with a small flame motif. A holiday gift label can carry a bold initial framed by snowflakes, pine needles, or a simple stitched-style border.

For makers selling handmade goods, burned tags can add a recognizable finish without making packaging feel overly formal. Keep your logo or shop name readable, then reserve the rest of the surface for a product name, care note, or batch number. If every tag is made by hand, slight variation becomes part of the appeal. Consistency in placement and type size matters more than making every burn mark identical.

Color can be used sparingly after burning. Water-based paint, stain, colored pencil, and metallic accents all create different effects. A burned outline with a limited wash of color can make a floral design stand out while keeping the warmth of the wood visible. If you prefer a natural finish, use the contrast of light and dark burning alone and let the grain remain part of the artwork.

Common Mistakes to Avoid

The most frequent mistake is designing for the tag’s full dimensions instead of its safe visual area. Leave breathing room around the edge and around the hanging hole. A border that sits too close to the hole can look off-balance once twine is attached.

Another is using a complicated image without simplifying it first. Tiny tags do not need every petal, feather, or texture line. Reduce the design to its clearest shapes, then add only the details that will still read at the finished scale.

Finally, do not skip the test burn. Even experienced artists benefit from checking line weight and temperature before working on a finished blank. A few seconds of testing protects the tag, your layout, and the time you have already invested.

Turn a Simple Blank Into a Finished Detail

Unfinished tags are small enough to complete in an afternoon, yet versatile enough to become a signature part of your work. Start with a shape that suits the project, prepare the surface, and choose a design that leaves room for the wood to show through. With a steady hand, the right tip, and a little planning, a plain blank can become the detail people notice first.

Posted on Leave a comment

Free Printable Wood Burning Stencils to Try

A great pyrography project can go sideways before the pen is even plugged in. If a pattern is too detailed for the wood size, poorly transferred, or packed with tiny shaded areas, it can leave you chasing lines instead of enjoying the burn. Free printable wood burning stencils give makers a dependable place to start – especially when you want to practice a new tip, make a handmade gift, or turn a plain wood blank into something personal.

The best stencil is not necessarily the most elaborate one. It is the one that matches your current tool control, the grain of your wood, and the time you want to spend at the workbench. Start with a clean design, transfer it clearly, and let the burning create the character.

What Makes a Printable Wood Burning Stencil Work

A stencil for paint can rely on broad shapes and hard edges. A wood burning stencil needs to do more. It has to guide the placement of every line while leaving room for the natural variation that makes pyrography feel handmade.

Look for high-contrast line art with a clear outer shape and purposeful interior details. Botanical leaves, mountain scenes, animal silhouettes, monograms, simple florals, geometric borders, and seasonal ornaments all work well because they can be burned as outlines first and built up gradually. A pattern with too many hair-thin lines may print beautifully but become difficult to follow once heat darkens the surface.

Choose the Detail Level for Your Skill Stage

Beginners generally get stronger results from designs with open spaces, bold outlines, and repeated shapes. A simple leaf cluster teaches line consistency. A monogram lets you practice smooth curves. A small cabin or mountain scene introduces texture without requiring photorealistic shading.

More experienced burners can choose wildlife, layered florals, intricate mandalas, and portrait-style designs. These patterns benefit from fine detailing tips and controlled heat. A Stage 2 detailer with digital temperature control can make gradual tonal work easier, but a detailed stencil still needs patience. More lines do not automatically mean more depth.

Consider the finished size before committing. A design that looks balanced on letter-size paper may lose its smallest features when reduced for a gift tag or coaster. If the pattern contains a detail you cannot comfortably burn without crowding the next line, enlarge the print or simplify that area with a pencil.

How to Print and Size Your Stencil

Print the design in black and white on regular printer paper. Before transferring it, place the page over your unfinished wood blank and check the composition. Leave enough empty space around the artwork so the project does not feel cramped, particularly on round plaques and narrow tags.

Use your printer settings to scale the image up or down. For a set of matching ornaments, keep the outer shape consistent and vary only the center motif. For signs and larger plaques, printing a design across multiple pages can work, but tape the pages together first and confirm the full layout before you transfer anything.

Wood grain matters here. Straight grain can complement lettering, stems, or landscape elements. Highly figured grain can become part of the visual interest, but it may make delicate stencil lines harder to see. For your first attempt with a new printable design, choose a smooth, clean, unfinished wood surface. Sand it lightly if needed, then remove all dust before transferring.

Transfer Printable Stencil Lines Cleanly

The goal is a visible guide, not a dark drawing that competes with the burn. Graphite transfer paper is a practical choice for most projects. Position the stencil, secure it with low-tack tape, and trace each line with a ballpoint pen or stylus using light, even pressure. Lift one corner occasionally to make sure the lines are appearing without becoming too heavy.

You can also shade the back of the printed page with a soft pencil, place it graphite-side down, and trace the front. This method is useful when transfer paper is not available, though it may take more cleanup. Keep the lines light because deep graphite can smear into nearby areas as you work.

For designs you plan to reuse, trace the final transfer onto a separate sheet and label it with the project size. A small folder of proven patterns becomes more useful than a large collection of files you have never tested. TRUArt downloadable stencils can help fill that folder with project-ready ideas while you develop your own favorite motifs.

Burn the Outline Before Adding Texture

Once the pattern is transferred, start with the main outline. Work in short, controlled passes instead of trying to complete a long curve in one motion. Consistent speed and light pressure generally produce cleaner lines than pressing harder. Let the heated tip do the work.

Use a proper metal or ceramic pen stand whenever you set the tool down. Work on a stable, nonflammable surface with good ventilation, and use only clean, unfinished wood that is appropriate for pyrography. These habits protect both your project and your workspace.

After the outline is complete, step back before adding shading. Some designs need only a dark contour and a few accent lines. Others benefit from gradual texture: fine strokes for fur, curved marks for flower petals, or soft directional shading in a sky. Build the darkest areas slowly. If the wood begins to scorch or the tip drags, reduce the heat if your tool allows it, move a little faster, or test your stroke on a scrap from the same wood.

Match the Tip to the Mark You Need

A universal tip can handle basic outlining and simple shading, making it a solid option for a first stencil project. As your designs become more complex, interchangeable tips offer more control. Fine points suit small lettering, veins, and delicate contours. Shader tips fill larger areas more evenly. Rounded or specialty tips can create repeating textures that would take much longer by hand.

The trade-off is setup time. Swapping tips makes sense when a design has clearly different tasks, such as a bold border, soft background shading, and tiny interior details. For a small tag or ornament, sticking with one versatile tip may keep your lines more consistent and the project more relaxed.

Free Printable Wood Burning Stencil Ideas Worth Repeating

The most useful projects are often the ones you can adapt for several occasions. A simple initial inside a wreath can become a wedding favor, a housewarming gift, or a personalized stocking tag. A set of leaf silhouettes works for fall decor, recipe box lids, and coasters. A clean wildlife outline can become wall art or a practice piece for experimenting with directional shading.

Seasonal patterns are ideal for skill building because you can repeat the same format without repeating the same image. Try a small snowflake, pumpkin, heart, or sun motif on identical wood blanks. You will quickly notice how changes in heat, speed, and tip angle affect the final color. That repetition is where confidence comes from.

Lettering stencils deserve a place in every maker’s collection. Start with block letters rather than ornate scripts. Burn the outline first, then decide whether the inside needs to be filled, shaded, or left natural. A clean name, date, or short phrase can turn a basic project into a meaningful custom piece.

Fix Common Stencil Problems Before They Ruin the Project

If your transfer lines are faint, do not keep tracing harder in the same spot. Reposition the stencil, add a little more pressure, and test a small area first. If the transferred lines are too dark, erase gently before burning or treat them as a guide for a slightly darker outline.

When a burn line becomes wider than planned, resist the urge to trace it repeatedly. Repeated passes often create a dark groove that looks heavier than the rest of the design. Instead, balance the visual weight by slightly strengthening nearby key lines or adding intentional shading where it belongs.

If a pattern feels crowded once it is on the wood, simplify it. Remove a few interior marks, widen the spaces between details, or leave a shaded section as an outline. A stencil is a roadmap, not a rulebook. Your adjustments are part of the design process.

Keep a few printed patterns nearby, but choose one that makes you want to sit down and burn today. A clean transfer, a practiced outline, and one well-placed detail are enough to turn a free printable into a piece you will be proud to give, display, or use again as the start of your next idea.

Posted on Leave a comment

How to Choose Pyrography Tips for Any Project

How to Choose Pyrography Tips for Any Project

A tip can change the entire character of a burn. Swap a fine point for a shader and a delicate feather becomes a smooth shadow. Choose a rounded tip instead of a sharp one, and lettering can go from crisp to clumsy in a single stroke. Learning how to choose pyrography tips is less about collecting every shape available and more about matching the right contact surface, heat behavior, and tool system to the mark you want to make.

For a first project, a smaller selection is usually more useful than a crowded case of unfamiliar tips. As your skills grow, adding purpose-built tips gives you cleaner detail, faster coverage, and more control over the finished piece.

Start With the Mark You Want to Burn

Before choosing a tip, look at your design and identify its dominant marks. Fine outlines, broad shaded areas, handwritten names, fur texture, and repeating borders each call for a different working edge. A tip is not simply a decorative attachment. Its shape determines how much surface area touches the material, how heat transfers, and how easily you can steer the pen.

Fine-point tips are made for detail. Use them for controlled outlines, small curves, veins in leaves, whiskers, tiny lettering, and other narrow marks. Their small contact area helps create precise lines, but it also means they can burn deeply if you pause too long. They reward a lighter hand and steady movement.

Shading tips have a broader face that distributes heat across a larger area. They are the right choice for backgrounds, soft gradients, petals, skies, and dimensional form. A shader can cover more ground quickly, but it is not automatically easier to use. Smooth shading comes from consistent motion, deliberate overlap, and a heat setting that lets the tip glide instead of catching.

Writing tips are shaped to make lettering more natural. Depending on the design, they can create graceful script, bold block letters, or small decorative text. If personalization is the focus of your project, a writing tip is often more useful than several specialty shapes. It gives names, dates, and short messages a more intentional finish than trying to force every letter with a universal point.

Texture tips are best when the subject needs repeated marks. A spear or knife-style edge can suggest hair, feathers, grass, and grain. A ball tip can create dots, soft marks, and small accents. Patterned tips can be useful for borders and quick decorative effects, although they are less flexible than core detail and shading shapes.

The Essential Pyrography Tip Types

A capable starter setup does not need every tip style. Most makers can complete a wide range of woodburning projects with a small group of dependable shapes:

  • Fine point tips handle outlines, small details, controlled curves, and fine lettering.
  • Universal or cone tips offer a versatile edge for basic line work and beginner practice.
  • Shader tips create broad fills, gradients, and soft transitions.
  • Writing tips help with names, quotes, monograms, and decorative script.
  • Spear, knife, or skew tips make directional texture, crisp edges, and expressive strokes.

Think of these as a working foundation, not a rulebook. A shader can create a bold edge when used on its side, while a fine point can add delicate texture. The best tip choice depends on the result you need, not the name printed on the package.

Match Tip Size to Your Design Scale

Tip size matters as much as tip shape. A large shader is efficient on a plaque, cutting board-style blank, or broad background, but it can overwhelm a small tag or ornament. A very fine point gives beautiful control on miniature work, yet it can make a large project slow and tiring.

Choose smaller tips when your design has tight curves, small lettering, detailed portraits, or close-together elements. Move up to wider tips for larger areas and bolder designs. If your project combines both, plan to change tips during the burn rather than asking one attachment to do every job.

This is one reason experienced artists keep multiple tips within reach. Tip changes are not a sign that a tool lacks versatility. They are how you give each part of a design the right treatment.

Choose Tips That Fit Your Burner System

Compatibility comes before style. Not every pyrography tip fits every pen, and forcing an attachment can damage threads, create poor contact, or leave you with an unstable working setup. Check your tool’s product specifications before adding replacement or specialty tips.

Solid brass tips are commonly used with interchangeable-tip woodburning pens. They are practical for hobbyists because they are easy to install and come in a broad variety of shapes. A 15W or 30W pen set can be an approachable choice for basic line work, lettering, simple shading, and learning how different tip profiles behave.

Professional wire-nib systems use a different approach. Rather than installing solid brass shapes, the artist works with formed wire tips that heat quickly and offer highly responsive control. On a higher-output tool with digital temperature control, premium detailing tips can make subtle shading, fine lines, and repeated textures easier to execute consistently. Dual-pen systems add efficiency when a project requires frequent switching between, for example, a detail point and a broad shader.

Do not assume a tip that looks similar is interchangeable. Match the tip type to the pen system it was designed for. If you are building a collection around a particular burner, choosing compatible tips from the beginning prevents wasted purchases and keeps your workflow simple.

Consider Heat Control Alongside Tip Shape

A tip does not work independently from your burner’s heat output. The same shader may produce a pale, slow-moving mark at one setting and a dark, fast mark at another. Higher heat is not always better. Too much heat can reduce your working time, make shading harder to control, and leave unwanted dark spots where the pen pauses.

For detailed work, use the lowest practical temperature that produces a clean mark at a comfortable pace. For broad shading, a slightly higher setting may help the tip move smoothly across the surface. The right setting also depends on the material, its density, and the depth of color you want.

Digital temperature control is especially valuable when repeatability matters. It lets you return to a useful setting after testing and makes it easier to develop a reliable approach for a favorite type of project. Still, even a controlled tool benefits from a quick test on a spare piece of the same unfinished material before you begin the final design.

Choose by Skill Level, Not Just by Ambition

Beginners often see specialty tips and assume more options will create better work. Usually, better results come from learning a few essential shapes well. A universal point, fine point, shader, and writing tip provide enough range to practice pressure, speed, line direction, and tonal variation without making selection feel overwhelming.

Once you can create even lines and controlled shading, specialty tips become more valuable. Add them when you can name the problem they solve. Perhaps you are making wildlife art and need a better feather texture. Maybe you sell personalized keepsakes and want lettering that looks cleaner at small sizes. Or you may be producing larger pieces where a wider shader saves meaningful time.

Serious artists should also consider workflow. If you regularly switch between fine detail and broad shading, a professional dual-pen setup can keep both tips ready at their preferred settings. That reduces interruption and helps preserve visual consistency across a detailed project.

Test Before You Commit to the Final Piece

Every new tip deserves a short practice session. Create a sample board with straight lines, curves, dots, light-to-dark shading, and a few letters. Try the tip at more than one heat setting and change your speed before changing your pressure. This shows you how the tip responds without risking your finished work.

Pay attention to what feels natural in your hand. A tip may be technically suited to a task yet feel awkward for your preferred grip or drawing style. Comfort matters because controlled pyrography depends on repeated, deliberate movement.

Keep your hot pen in a proper metal or ceramic stand whenever it is not in use, and allow tips to cool fully before changing or cleaning them. A clean tip also burns more predictably, so remove residue carefully with the method recommended for your specific tool and tip type.

Build a Tip Collection With a Purpose

The most useful tip collection grows with your projects. Start with shapes that cover line work, shading, and lettering. Then let your favorite subjects guide the next additions. A maker focused on monograms may prioritize writing tips; a landscape artist may add broader shaders and texture edges; a portrait artist may invest in fine detailing tips and precise heat control.

TRUArt’s Stage 1 and Stage 2 approach reflects that progression: begin with an accessible set that lets you practice core techniques, then move toward more refined tip choices and greater temperature control as your work demands it.

Your next tip should make a familiar task easier, cleaner, or more expressive. When it does, it is not just another accessory. It is a practical step toward work that looks more like the image you had in mind.

Posted on Leave a comment

30 Watt Woodburning Pen Tips for Better Burns

30 Watt Woodburning Pen Tips for Better Burns

A 30W burner can make far more than a first practice mark. With the right tip shape, steady movement, and a surface that accepts heat well, it can produce crisp names on tags, soft shading on plaques, and texture that gives a simple design dimension. These 30 watt woodburning pen tips focus on getting more control from an approachable tool, without asking you to work faster than the material allows.

A 30W pen is a strong starting point for hobby pyrography because it delivers useful heat in a simple format. It is especially well suited to unfinished wood, cork, gourds, and suitable vegetable-tanned leather projects. Its trade-off is straightforward: compared with a higher-output detailer with digital temperature control, a 30W pen gives you less flexibility to make rapid heat changes. Your choice of tip, pressure, pace, and surface matters more.

Start With the Surface, Not the Design

The same tip can leave a dark, smooth line in basswood and a lighter, more broken line in a harder or more open-grained board. That is not a failure of the pen. It is the material telling you how much heat and dwell time it needs.

For early projects, choose clean, dry, unfinished wood with a smooth, even grain. Basswood is forgiving for lettering and line work because it burns consistently. Birch and similar harder woods can create beautiful contrast, but they ask for a slower hand. Sand the surface smooth before transferring your pattern, then remove dust so it does not interfere with your guide lines.

Make a small test area on the back or on a scrap from the same piece before starting the artwork. Draw a few lines, a curve, a shaded patch, and a row of dots. This quick test tells you whether the material needs a slower pace or a lighter touch.

Choose 30 Watt Woodburning Pen Tips by Mark Type

Tip selection is not about finding one “best” nib. Each shape transfers heat differently, so each one creates a different family of marks. Rather than switching tips for every small detail, choose the tip that does most of the work your design requires, then use one or two others for accents.

Use a universal point for outlines and controlled details

A pointed or universal tip is the practical all-around choice for tracing patterns, outlining silhouettes, and creating small details. Keep the pen moving at a measured pace. If you pause too long, the point can sink into the grain and leave a dark dot at the beginning or end of a line.

For smoother curves, rotate the workpiece instead of forcing your wrist to bend around every turn. The pen stays in a comfortable position, and your line weight is easier to keep consistent.

Use a shader for fills and tonal changes

A shading tip has a broad working face that can cover an area more efficiently than a point. It is useful for petals, backgrounds, feathers, leaves, and gradual shadows. Place the tip lightly on the surface and move it in overlapping strokes, similar to coloring with the side of a pencil.

A clean gradient comes from movement, not pressure. Start where you want the darkest value, then gradually increase your speed as you move toward the lighter area. If a patch looks streaky, let the work cool briefly and blend it with lighter overlapping passes rather than pressing down harder.

Use a calligraphy tip for lettering and borders

A flat or angled tip gives lettering more personality because the width of the mark changes as you turn the pen. It works well for bold initials, simple script, banner outlines, and decorative borders. The important part is orientation: keep the broad edge aligned with the stroke you want to create.

Practice a few alphabet strokes before burning directly on a finished plaque. You will quickly see how much a slight twist of the pen changes the width of the line.

Use specialty tips for texture, not every surface

Ball, spoon, leaf, and other specialty tips can create distinctive effects, from dotted centers to repeated scale patterns. They are most useful when the texture has a clear visual purpose. A ball tip, for example, can build a stippled shadow or give a flower center dimension, while a leaf-shaped tip can help suggest layered petals.

Use specialty marks sparingly around the main focal point. Too many competing textures can make a small project look busy, especially when every mark is dark.

Let Speed Control the Burn

On a fixed-output 30W pen, your travel speed acts like a temperature control. Move slowly and the burn becomes darker. Move more quickly and the mark stays lighter. This is the core skill behind controlled pyrography.

Pressure should stay gentle. Pressing harder does not create a better burn. It tends to dig the tip into soft wood, catch on grain changes, and make fine lines less predictable. Let the heated tip do the work while your hand guides it.

When an outline needs to be dark, make one controlled pass first. If it needs more contrast, add a second pass after the surface has had a moment to cool. Layering your color gives you more control than trying to achieve the darkest possible mark in one slow stroke.

Keep Tips Clean for Cleaner Color

Dark buildup on a tip can make burning feel uneven and can leave muddy-looking marks. Clean the tip only after the pen has cooled enough to handle safely. A soft brass brush or appropriate tip-cleaning material can remove residue without damaging the working surface.

Do not scrape a heated tip with a knife or other hard tool. That can mark the brass and alter how the tip glides across the project. A smooth tip produces smoother lines, especially on lettering and fine contours.

If your kit uses interchangeable brass tips, always allow the pen to cool fully before changing them. Install the new tip securely, then let the pen return to operating heat before testing it on scrap wood. Frequent changes are normal, but rushing them is not worth the risk of damaged threads or burned fingers.

Build Contrast Before Adding Detail

Many beginner projects become overworked because every section receives the same dark outline, texture, and shading. Instead, decide where the eye should land first. Give that area the strongest contrast, the clearest outline, or the richest texture. Let surrounding areas stay lighter and simpler.

For a name sign, the lettering may be the focal point, with a light border and only a few shaded leaves. For wildlife art, the eye and facial contours may need the deepest burns, while fur texture stays softer. This approach makes a 30W pen feel more capable because you are using value intentionally rather than relying on maximum darkness everywhere.

Set Up for Steady, Safe Work

A clean setup supports better technique. Work at a stable table with good lighting and ventilation, and keep your project supported so it does not slide as you draw. Rest the hot pen only in a proper metal or ceramic stand, with the cord positioned where it will not pull across your work area.

Keep a scrap piece nearby throughout the project. It is useful when you change tips, return to the pen after a pause, or need to test a stroke before committing to it. This small habit prevents many avoidable marks on finished work.

If you are burning leather, test in an inconspicuous area first. Leather responds differently from wood, and a light touch is especially important. Use a deliberate stroke, avoid lingering in one spot, and build depth gradually.

Know When a 30W Pen Is the Right Tool

A 30W woodburning pen is a practical choice for first projects, personalized gifts, craft tags, ornaments, simple signs, and regular hobby use. It rewards thoughtful technique and gives makers a direct way to learn line quality, shading, and texture. A well-equipped Stage 1 kit, such as a TRUArt 30W set with multiple tip options, also gives you room to explore different mark styles without building a collection one piece at a time.

For dense materials, very large shaded pieces, highly detailed portrait work, or sessions where you need to adjust heat precisely as you work, a higher-output tool with digital temperature control may be the better fit. That is not a reason to outgrow a 30W pen immediately. It simply means choosing equipment that matches the scale and detail level of the work you want to make.

The most useful upgrade you can make right now may be a practice board, not a more complicated tool. Spend twenty minutes making lines, gradients, dots, and curves with two or three tips. Those small, repeatable exercises will show up in every cleaner letter, smoother shadow, and more confident project you create next.

Posted on Leave a comment

Brass Letter Tips for Wood Burning That Print Cleanly

Brass Letter Tips for Wood Burning That Print Cleanly

A burned name on a cutting board, a date on a keepsake box, or a monogram on a wood tag can make a project feel distinctly handmade. Brass letter tips for wood burning make that personalization faster than drawing every character by hand, but a clean imprint depends on more than pressing a hot letter into wood. Tip compatibility, wood grain, heat, and timing all show up in the final result.

What Brass Letter Tips Do Best

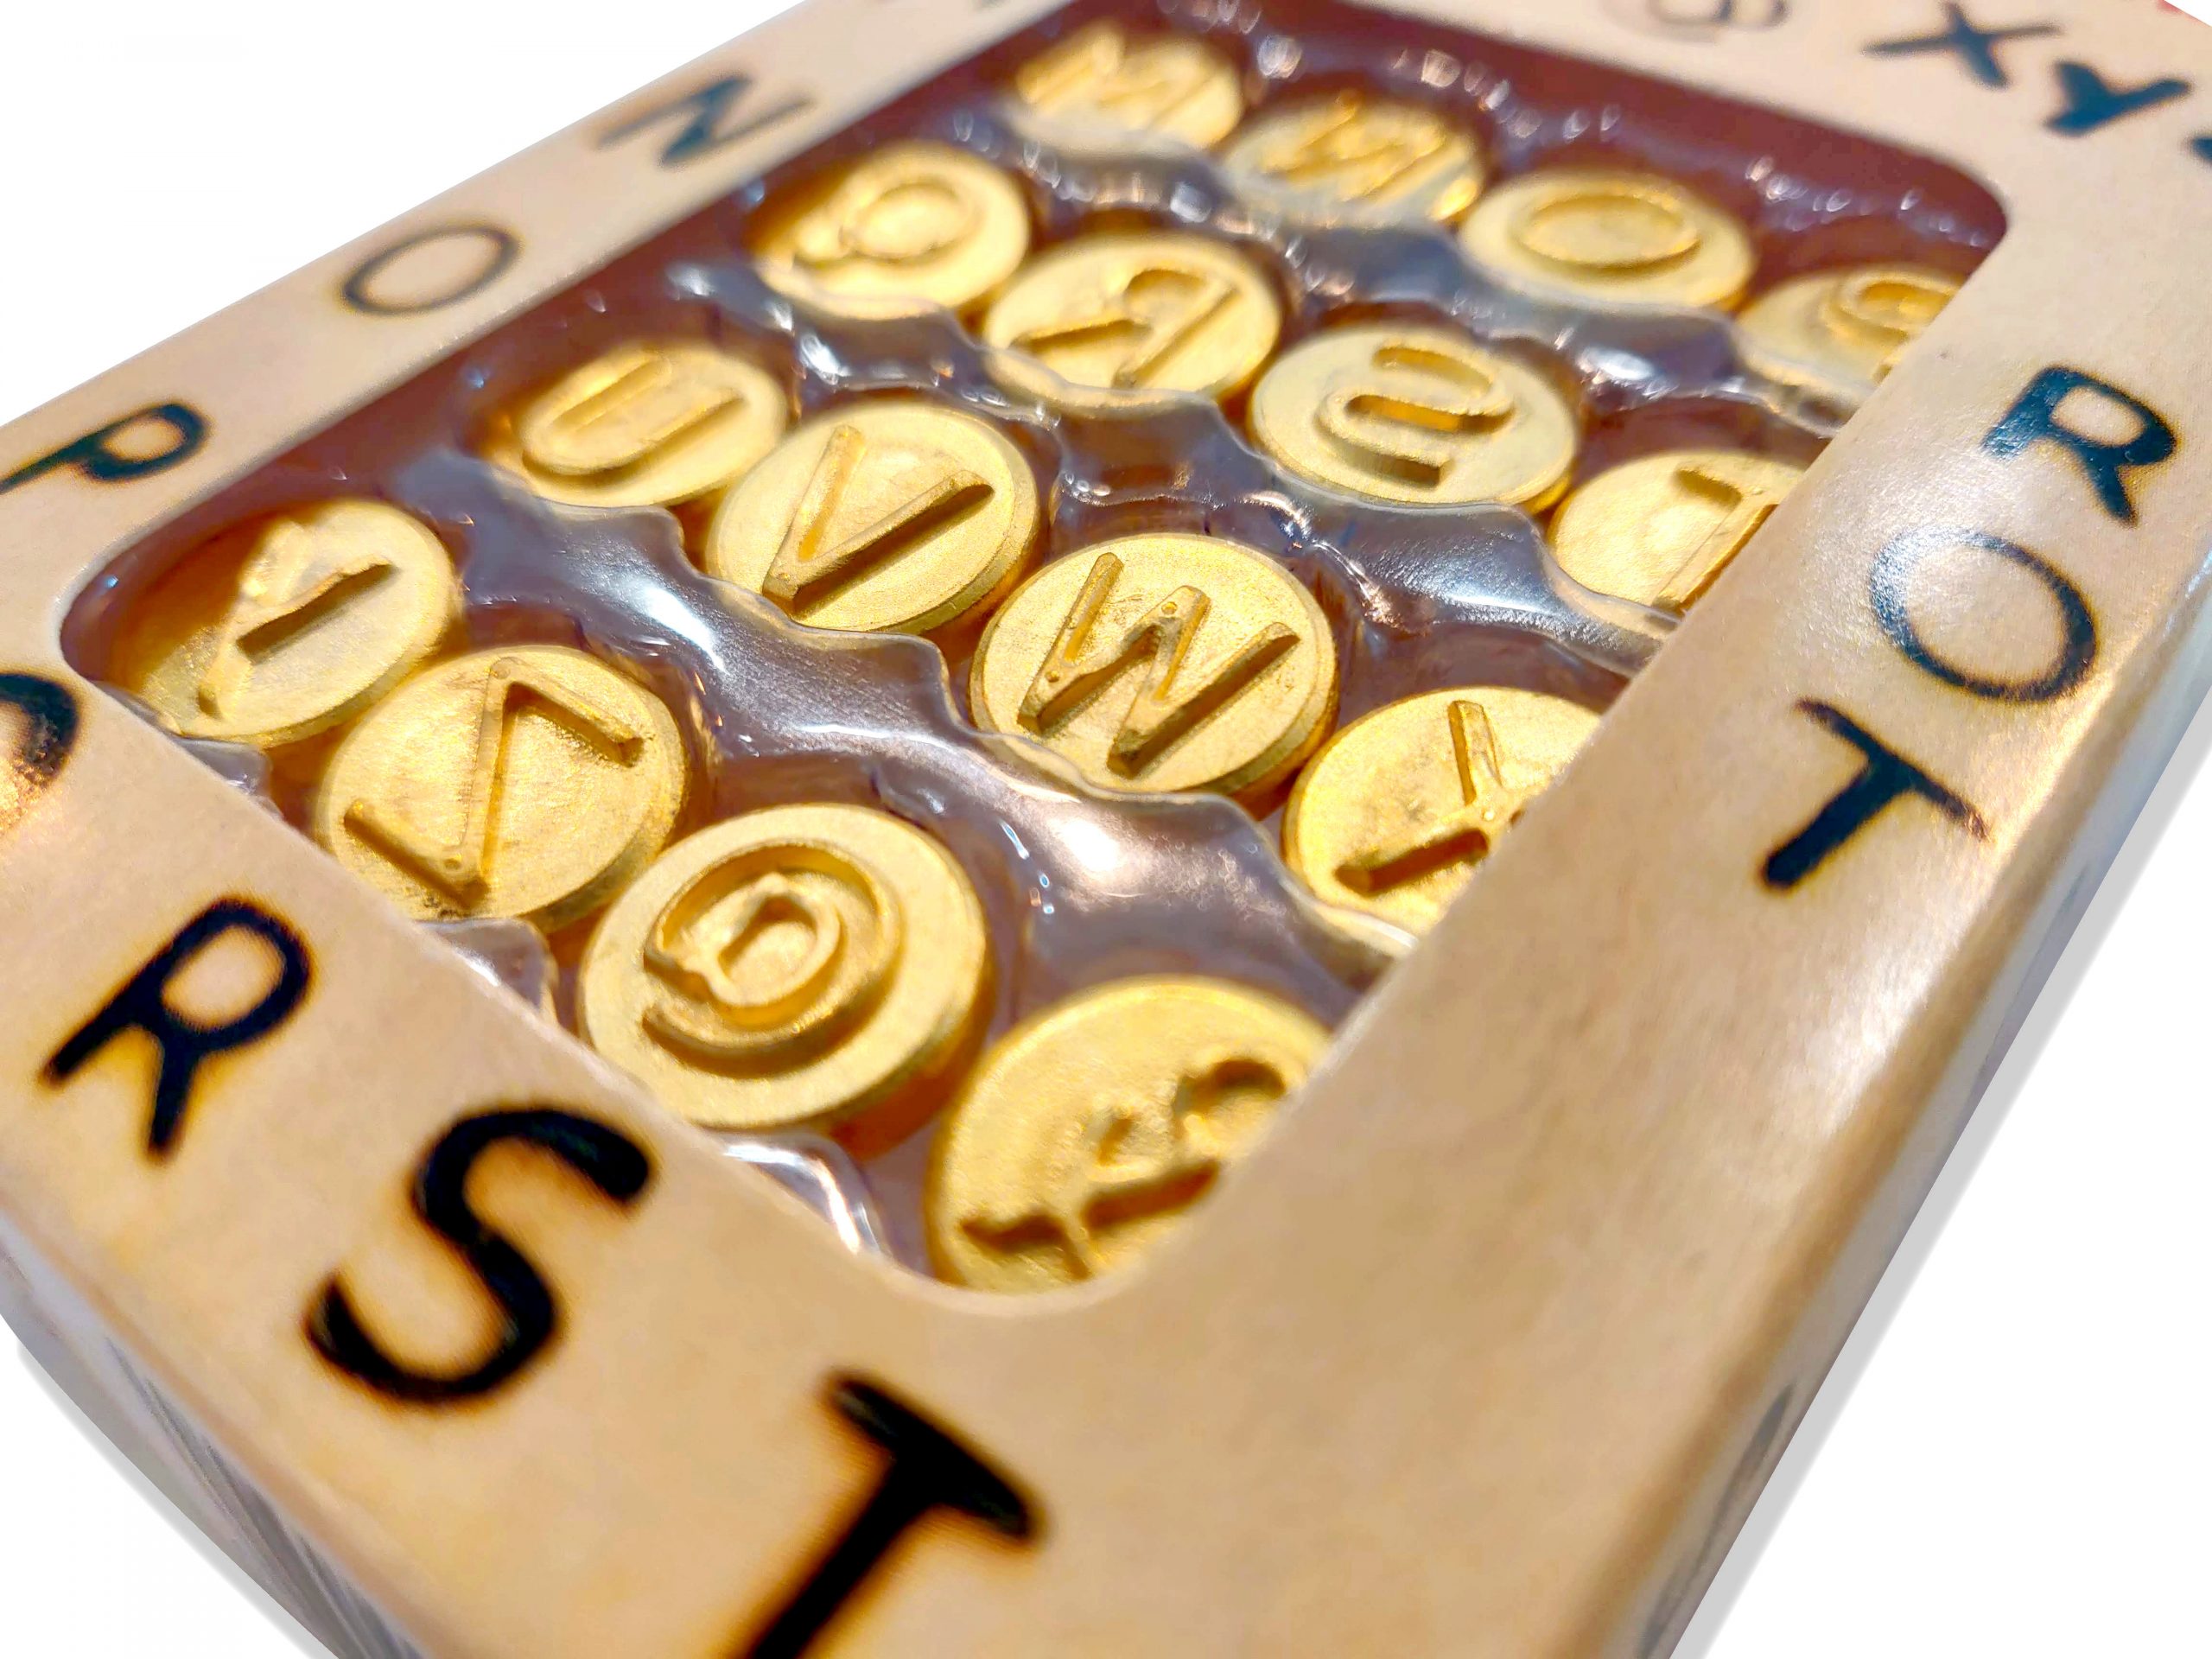
Brass letter tips are shaped stamps that transfer a single letter, number, or symbol to a burnable surface. They are especially useful when you need readable, repeatable text for gift tags, signs, ornaments, storage labels, wedding favors, and maker marks. Instead of building each character with a shading or writing tip, you use the heated face of the letter to create the form in one controlled press.

Their strength is consistency. A set keeps the letter style and size uniform across a project, which is difficult to achieve with freehand lettering. They also help newer wood burners add polished personalization before they are comfortable with calligraphy-style pyrography.

That said, letter tips are not designed for every text job. They work best for short names, initials, dates, and bold words. A detailed quote, a tiny address line, or curved script usually calls for a fine-detailing tip and a steady hand. Think of brass letters as a stamping tool, not a replacement for every kind of burned lettering.

Choose a Compatible Wood Burning Tool

Before planning a project, confirm that the letter tips fit your pen. Brass alphabet tips are commonly made for solid-point wood burning pens with threaded, interchangeable tips. They may not fit a professional wire-nib detailer, which uses shaped wire nibs rather than screw-in brass points.

Check the thread style, tip diameter, and the manufacturer’s compatibility guidance. Forcing a mismatched tip can damage the pen or leave the letter loose and uneven. Install and remove tips only when the pen is unplugged and fully cool. Once the tool is heated, hold it by its insulated grip and place it in a proper metal or ceramic stand whenever it is not in use.

A 15W or 30W solid-point pen can be a practical match for small lettering projects, especially on soft, unfinished wood. If you are producing repeated marks or working on denser hardwood, a tool with adjustable heat gives you more control. The goal is not maximum heat. It is enough heat to burn the character evenly without scorching the surrounding wood.

Start With the Right Wood Surface

The surface can make a letter stamp look crisp or frustratingly blotchy. Choose clean, unfinished wood that is smooth enough for the full face of the letter tip to contact it. Basswood is a friendly starting point because it burns readily and has a fine, even grain. Birch plywood made specifically for crafting can also work well when its top veneer is smooth and consistent.

Sand the project surface before burning, moving up to a fine grit so the stamp does not catch on raised fibers. Then remove sanding dust with a dry, clean cloth. Dust trapped under a letter tip can create pale gaps, while rough grain can pull the imprint out of shape.

Grain direction still matters. Long, open grain may burn darker in some areas of a letter than others. On a rustic sign, that variation can add character. On a formal monogram, it may look uneven. Test a letter on an offcut from the same piece before you commit to the finished surface.

Brass Letter Tips for Wood Burning: A Clean-Print Method

The easiest way to improve lettering is to treat each impression as a controlled test of heat, pressure, and time. Make several practice stamps on scrap wood, changing one variable at a time. This takes minutes and saves a finished project from an irreversible spelling mistake or a row of overly dark letters.

Begin by letting the pen reach a stable operating temperature in its stand. Position the wood on a firm, heat-safe work surface. Use a ruler and a light pencil guideline to establish the baseline for your text. For centered names or words, mark the middle point first, then work outward so the layout does not drift to one side.

Set the letter tip flat against the wood. Apply gentle, even pressure without rocking the pen. Hold it in place just long enough for the full character to brown, then lift straight up. Rocking creates doubled edges and dark corners, while twisting can smear the shape into the surrounding grain.

If the first stamp is pale, increase dwell time slightly before turning up the heat. If it is dark around the outside but light in the center, the tip may not be sitting level, the surface may be uneven, or the pen may be too hot. Let the tip cool completely before adjusting or changing it.

For most projects, a medium brown impression is more useful than a nearly black one. Medium burns keep the letterforms readable and leave room for surrounding line work, color, or finish. Very dark burns can look dramatic, but they often conceal detail in smaller letters.

Keep Spacing Consistent

Clean burning will not rescue crowded spacing. Brass stamps have a physical width, and the blank space around each letter is part of the design. Practice the full word on paper first, using the actual letter tips as a visual reference. Wide letters such as M and W need more room than narrow letters such as I and L.

Use a light pencil baseline and small vertical placement marks for each character. You can also make a simple spacer from a thin piece of scrap wood to repeat gaps between letters. This is particularly helpful for product batches, place cards, or sets of matching tags.

If you are stamping a word along a curve, work from the center letter outward. Rotate the wood or reposition yourself as needed so you can place each stamp squarely. Trying to reach around the project with an awkward wrist angle makes it harder to keep the letter face level.

Maintain the Tip Between Impressions

Resin and char can build up on the face of a brass tip, especially when you are making many stamps. That buildup softens the edges of the next letter and can leave tiny unburned pockets. With the tool unplugged and fully cool, clean the tip gently using fine abrasive material appropriate for the tool. Avoid aggressive scraping that can alter the letter face.

A dedicated set of letter tips is worth organizing in a labeled case or compartment box. Keep frequently used letters easy to find, and return each one after it cools. Missing letters have a way of appearing halfway through a personalized order.

When to Use Letter Tips With Hand-Burned Details

Stamped lettering does not have to look mechanical. Use brass letters for the primary name, date, or short message, then add borders, leaves, flourishes, or simple line art with a universal point or detailer tip. The combination gives the project structure while preserving the warmth of hand-burned work.

For a maker mark, try a stamped initial paired with a small freehand symbol. For a keepsake box, use letter tips for the recipient’s name and a fine tip for a meaningful date beneath it. If you are progressing from a Stage 1 solid-point kit toward more detailed work, this kind of mixed approach is a practical way to build lettering confidence while expanding your skills.

A successful letter burn is usually quiet and deliberate: smooth wood, a stable pen, a level tip, and one test before the final mark. Give each character that attention, and even a simple set of brass letters can turn an ordinary blank into a gift someone keeps.

Posted on Leave a comment

Digital Temperature Control Pyrography Pen Guide

Digital Temperature Control Pyrography Pen Guide

A digital temperature control pyrography pen gives you something a basic fixed-heat tool cannot: repeatable heat. Instead of adjusting your hand speed to compensate for a pen that runs too hot or too cool, you can set the output for the wood, leather, tip shape, and effect you want. That control makes a visible difference when a project moves from simple outlines to fur, feathers, lettering, portraits, or layered shading.

For a first-time maker, digital control can shorten the trial-and-error phase. For an experienced artist, it can make detailed work faster and more consistent across a long session. The right setup is not automatically the highest-powered one, though. It should match the type of work you want to create and leave room for your skills to grow.

What Digital Temperature Control Changes

Heat is one of the main variables in pyrography. The other two are tip choice and speed. When the temperature stays consistent, you can better predict how a line or shaded area will develop. A hot setting combined with a slow pass creates a deeper, darker mark. A lower setting or quicker pass produces a lighter result. Once the heat is stable, your hand movement becomes a creative choice rather than a constant correction.

Digital controls are especially useful when working across different natural, unfinished surfaces. Softer woods often accept a mark quickly, while denser woods may need more heat or a slower stroke. Leather also responds differently from wood and benefits from a careful test on a scrap piece first. A precise temperature setting lets you make small adjustments instead of jumping between broad, unpredictable heat levels.

This is also where a professional-style wire-nib detailer differs from a solid-tip craft pen. Fine wire nibs heat quickly and respond quickly when you change the setting. That responsiveness supports delicate textures, controlled gradients, and crisp details. Solid-tip tools remain a practical choice for beginners, bold lettering, and general hobby projects, but their tips retain more heat and can feel less immediate in highly detailed work.

Choosing a Digital Temperature Control Pyrography Pen

Start with the kind of marks you want to make most often. If you are learning basic line work, decorative signs, simple ornaments, or rustic designs, an entry-level woodburning kit may be the right place to begin. A complete kit with a comfortable pen, several brass tips, a stand, and useful accessories gives you room to practice without overcomplicating the setup.

If your goal is realistic wildlife, portrait work, fine calligraphy, detailed leather designs, or subtle background shading, a higher-output detailer is worth considering. A 60W system with digital temperature control is designed for serious pyrography work, with the reserve power needed to keep a fine nib performing as you work. The benefit is not simply hotter heat. It is controlled heat that supports a wider range of marks.

Look at the full tool system rather than the control box alone. A good purchase decision includes the pen configuration, compatible tips, comfort of the handpiece, included pen holder, replacement availability, and whether the kit supports the projects you actually plan to make. A large accessory count is helpful when it includes useful tip shapes, but a smaller selection of quality tips can be better than a crowded case of shapes you will never use.

Single-Pen or Dual-Pen System?

A single-pen detailer is a focused choice for artists who work through one tip at a time. It is straightforward, takes up less space, and gives you the precision needed for a wide range of projects. It also makes sense if you are still discovering which nib shapes fit your style.

A dual-pen system is built for workflow. You can keep one pen fitted with a writing or spear tip for lines while a second pen holds a shader, spoon, or ball tip for tonal work. That reduces cooling time and tip changes during detailed projects. It is particularly useful for artists who regularly switch between fine outlines and broad shading.

There is a trade-off. Dual-pen equipment is a larger investment, and it delivers its best value when you genuinely use two tip profiles during the same session. If most of your work is simple monogramming or bold sign lettering, a single pen and a thoughtfully chosen tip set may serve you better.

Heat Range Is Only Part of the Story

Temperature numbers matter, but they do not tell the whole story. The working feel of a pen depends on the power supply, nib material, nib gauge, tip shape, cord flexibility, and the surface being burned. A heavy shader transfers heat differently from a fine writing tip, even at the same setting.

That is why test marks are part of a reliable process. Before beginning a finished piece, use a scrap from the same unfinished wood or a similar piece of natural vegetable-tanned leather. Try several settings and strokes. Make a small reference strip with light, medium, and dark marks. This takes only a few minutes, and it gives you a practical heat map for the project in front of you.

Match Tips to the Marks You Need

A digital tool performs best when paired with the right tip. For simple projects, a universal point, rounded shader, and lettering tip can cover a lot of ground. As your work becomes more detailed, premium wire nibs offer more specialized control.

Fine writing and spear-style tips are useful for clean outlines, hair, veins, and small lettering. Shader tips create smooth tonal transitions and background areas. Ball tips can add controlled texture, while knife and skew-style nibs can make sharp lines or patterned strokes. The goal is not to collect every available shape. Choose tips that reduce strain and help you create your most common marks with fewer repeated passes.

Tip care also affects performance. Let the pen cool fully before changing a nib, and keep tips clean according to the tool instructions. Residue can interfere with heat transfer and leave uneven marks. Store cooled tips where their fine points will not be bent or damaged.

A Better Workflow for Cleaner Results

Digital heat control is most effective when your process is organized. Transfer or lightly sketch your design before heating the pen. Set up on a stable, heat-safe work surface with clear space around the control unit and cord. Keep the handpiece in its proper metal or ceramic stand whenever it is not in your hand.

Begin with the lowest practical setting for the mark you need. It is easier to deepen a burn with another pass than to erase a line that became too dark too quickly. Work from lighter values to darker values, especially with portraits, landscapes, and realistic animal subjects. This protects highlights and gives your shading more dimension.

For line work, use a relaxed grip on the insulated handle and pull the pen in the direction that feels most natural. Avoid forcing the nib into the surface. A properly heated tip should glide with light pressure. If you need to press hard, adjust the heat slightly, slow your pace, or reconsider the tip shape.

For shading, think in layers rather than one dark pass. Use overlapping strokes, gentle circular movement, or controlled sweeps depending on the nib. Let each layer establish the value gradually. This approach can keep wood grain from becoming distracting and helps preserve a more even finish.

Common Problems Digital Control Can Solve

When marks are scorching too fast, lower the temperature before changing your technique. If the tip drags or leaves faint, scratchy lines, raise the setting in small increments or move more slowly. If a broad shader creates streaks, reduce the heat a little and build the tone in multiple passes.

Uneven results are not always a temperature issue. Wood grain, moisture variation, and surface preparation can all change how a burn develops. Sand unfinished wood evenly before transferring a design, then test your settings on a scrap piece. For leather, make sure the material is suitable for pyrography and test an inconspicuous scrap before committing to the finished design.

A digital display should support your judgment, not replace it. The same setting can look different on two pieces of wood. Your test marks, hand speed, and chosen nib remain part of the equation.

When It Is Time to Step Up

You may be ready for a digital detailer when you are spending more time correcting inconsistent marks than creating, when your projects need finer shading, or when tip changes interrupt your momentum. Serious hobbyists often find that controlled heat makes practice more rewarding because the results better reflect the technique they are trying to learn.

TRUArt’s Stage 2 detailers are designed for makers who want that next level of precision, with digital temperature control, professional-style pens, and tip options that support refined work. A complete system can help you spend less time piecing together compatible parts and more time building skill.

Choose the tool that fits your next project, not just your current comfort zone. With a steady setting, a well-matched tip, and a few test marks on scrap material, every practice board can become a more confident step toward the work you want to make.

Posted on Leave a comment

How to Choose a Wood Burning Kit for Leather

How to Choose a Wood Burning Kit for Leather

A crisp monogram on a wallet, a shaded floral panel on a journal cover, or a custom patch for a bag all start with the same decision: choosing a wood burning kit for leather that gives you control rather than just heat. Leather responds quickly, and it does not leave much room for correcting a line that is too dark, too wide, or accidentally scorched.

For most makers, the right tool depends less on the size of the project and more on the kind of marks they want to make. A simple nameplate has different demands than layered wildlife art, fine lettering, or repeated production work. Start with your material, your preferred style, and the level of heat control you need to work confidently.

What Makes Leather Burning Different

Leather burning, often called pyrography on leather, is best done on clean, natural vegetable-tanned leather. This surface accepts heat in a predictable way, allowing you to create dark outlines, soft shading, textures, borders, and lettering. Different hides, thicknesses, and finishes can react differently, so a scrap from the same piece is your best place to test before beginning the final design.

Unlike wood grain, leather has a smoother and more uniform surface. That can make detail work feel approachable, but it also means every hesitation is visible. Hold the pen steadily, move at a consistent pace, and let the heated tip create the mark. Pressing hard is not a substitute for proper temperature.

Heat, dwell time, and tip shape work together. Higher heat or a slower pass produces a darker mark. A lower setting and a faster hand produce lighter tones. Once you understand that relationship, leather becomes a highly expressive surface for custom accessories, keepsakes, and art panels.

Choosing a Wood Burning Kit for Leather

The best wood burning kit for leather is one that matches your current skill level while leaving enough room to grow. A beginner does not need every specialty tip on day one, but a kit should include the essentials needed to practice lines, letters, borders, and basic shading.

A Stage 1 style kit is a practical starting point for hobbyists. A 15W or 30W pen with interchangeable brass tips can handle introductory leather projects well, especially when you are building hand control and learning which tip shapes suit your designs. Look for a comfortable pen body, a stable pen stand, a useful tip selection, and a case that keeps your tools organized between projects.

Serious artists and frequent makers may outgrow a basic solid-point tool. A higher-output detailer with adjustable or digital temperature control offers more consistent results across different leather weights and project sizes. It also gives you the freedom to work with fine wire-style nibs designed for specific tasks, such as delicate outlining, broad shading, feathers, fur textures, or script lettering.

More wattage is not automatically better. The benefit of a professional 60W system is controlled, responsive heat, not simply burning at the highest setting. On leather, too much heat can create a harsh, overly dark mark before you have time to shape it. The goal is a tool that responds precisely to your hand and your chosen tip.

Start With the Tips You Will Actually Use

Tip variety matters because one point cannot do every job well. A small set of versatile tips is more useful than a large collection you never take out of the case.

For leather projects, a fine point is helpful for outlines, signatures, small lettering, and tiny accents. A shader creates gradual tonal areas in petals, leaves, backgrounds, and portrait work. A rounded or ball-style tip is useful for soft texture and decorative dots, while a flat or knife-style tip can create borders, clean strokes, and selective shading.

Interchangeable brass tips are an accessible option for many beginner kits. They are effective for stamping, lettering, and simple decorative work. Premium detailing tips on a variable-temperature system give experienced artists more flexibility because the tip shape, heat setting, and hand speed can be tuned for a specific effect.

Do not switch tips while the pen is hot. Allow the tool to cool fully first, then use the appropriate tip-changing tool if your kit includes one. Keeping tips clean and properly seated helps maintain consistent heat transfer and more predictable marks.

Heat Control Is the Feature That Builds Confidence

If you plan to burn leather regularly, temperature control is one of the most valuable features to consider. A fixed-temperature pen can teach you fundamental technique, but it asks you to manage darkness mostly through speed and pressure. That is workable for simple projects, yet it can become limiting as your designs become more detailed.

Adjustable temperature gives you a wider creative range. You can lower the heat for pale shading and controlled lettering, then increase it when a bolder outline or deeper contrast is needed. Digital temperature control is especially useful when you want repeatable results across a multi-piece project, such as a matching set of coasters, key fobs, or leather tags.

Test your setting before touching the finished piece. Make a few strokes on scrap leather, using the same tip, angle, and pace you intend to use in the design. This small step saves material and helps you identify the heat level that produces the color you want.

Match the Tool to Your Project Workflow

A compact pen kit is easy to bring to a worktable for an evening project. It is a good fit for occasional makers, personalized gifts, and beginners who want a clear introduction to pyrography without a complicated setup.

A professional detailer makes more sense when you spend extended sessions on artwork, take custom orders, or need refined control for intricate designs. Single-pen systems are excellent for focused work. Dual-pen systems can improve efficiency when you regularly alternate between two nibs, such as an outlining tip and a shader, without stopping to cool and change the pen.

Consider replacement parts and accessories, too. Tips are working components, and having the right shapes available keeps your projects moving. A dependable holder or metal or ceramic stand gives the hot pen a designated resting place. Stencils can speed up layout work, while unfinished practice pieces are useful for learning new patterns before committing to a final leather item.

TRUArt organizes its tools by skill level, making it easier to choose an approachable starter kit or step into a professional temperature-control system when your work calls for finer detail.

Set Up for Better Results

Your setup affects the quality of your work as much as your tool selection. Work on a stable, heat-safe surface in a well-ventilated area. Keep your leather flat and supported so it does not shift while you are outlining. Use the pen stand every time you pause, even if you only stop to reposition the project.

Good lighting is especially important for leather burning because subtle tonal changes can be hard to see until the surface cools. Position the light so it reveals the design without casting a shadow from your drawing hand. Keep scrap leather nearby for quick heat checks throughout the session.

Transfer your pattern lightly and begin with the least visible areas. That gives you a chance to settle into the tool before moving to the focal point of the design. For lettering, practice the word or monogram first. Letter spacing and stroke speed have a major effect on the finished look.

A Smart First Leather-Burning Project

Start with a project that teaches several core skills without requiring perfect realism. A small leather tag, bookmark, patch, or key fob is ideal. Choose a simple botanical outline, geometric border, initials, or a short word with open lettering.

Outline the design first using a fine tip and moderate heat. Then add a small amount of shading in one area rather than trying to shade the entire piece. This lets you compare light and dark values while keeping the design clean. A first project should build control, not test every technique at once.

As your hand becomes more consistent, experiment with layered shading, textures, and more varied tip shapes. Keep your early test pieces. They provide a useful record of how your control, line quality, and design choices improve over time.

The right kit does more than make marks on leather. It gives you a dependable way to turn a plain piece of material into something personal, useful, and unmistakably made by hand.

Posted on Leave a comment

Is a Dual Pen Wood Burning Machine Worth It?

Is a Dual Pen Wood Burning Machine Worth It?

A dual pen wood burning machine changes the rhythm of a serious pyrography project. Instead of stopping to cool one pen, swap a tip, adjust heat, and test the next mark, you can keep two purpose-built pens ready for the work in front of you. One can handle a broad background texture while the other stays fitted for fine fur, lettering, or precise contour lines.

For makers moving beyond simple beginner projects, that is more than a convenience. It supports cleaner transitions, more consistent burn quality, and a workflow that feels closer to drawing with a well-organized set of tools. The right setup will not replace practice, but it can remove many of the interruptions that slow down detailed work.

What a Dual Pen Wood Burning Machine Does Differently

A dual-pen system powers two handpieces from one control unit. Both pens remain connected, so you can move from one tool to the other without disconnecting a cord or changing a hot tip mid-project. With a professional detailer, the control unit typically provides digital temperature control, allowing you to set heat based on the material, the tip shape, and the effect you want to create.

This matters because different marks ask for different tools. A shader can cover an area with soft, even tone, while a fine writing tip creates crisp details. A spear-shaped tip can establish a clean edge, and a ball tip can build small, controlled marks. When two pens are ready at once, you can assign each one a job instead of repeatedly reconfiguring a single pen.

Think of it as setting up two brushes before painting. The benefit is not that you must use both at every moment. The benefit is that your preferred tools are ready when the design calls for them.

A dual-pen machine is especially useful for long projects with frequent shifts between linework and shading. Portraits, wildlife scenes, layered landscapes, detailed signs, and custom leatherwork often involve those shifts. If your work is mostly simple outlines or occasional gift tags, a single-pen tool may still be the more practical fit.

Where Two Pens Save Time

The most obvious advantage is less downtime. Tip changes are part of pyrography, but they interrupt your momentum. Even when a tip is easy to change, you need to pause, let the pen cool as needed, select the next tip, secure it, bring the pen back to temperature, and make a few test marks before returning to the artwork.

With two pens, a common arrangement is to keep a detail tip in one handpiece and a shader in the other. You can establish outlines, switch to shading, then return to details while the values and texture choices are still fresh in your mind. That is helpful when creating natural textures such as feathers, hair, bark, or delicate floral petals.

The second advantage is consistency. A pen fitted with a fine tip can stay at the heat level that produces your preferred line weight. Your shading pen can be set for the slower, softer pass you need for gradients. You are not constantly resetting one tool to serve two very different roles.

There is a trade-off. A dual-pen setup adds cost and takes more bench space than a basic beginner kit. It also asks you to be more deliberate about organization. Each hot handpiece belongs in a proper metal or ceramic pen stand when it is not in use, and each selected tip should have a clear purpose. For an artist who works regularly, that extra structure becomes part of an efficient routine. For a casual maker, it may be more capability than necessary.

Digital Temperature Control Is the Real Working Advantage

Two connected pens are valuable, but temperature control is what gives a professional machine its range. Heat affects how quickly a mark develops, how dark it appears, and how easily you can repeat it across a project. Digital control gives you a dependable starting point rather than forcing you to work from guesswork alone.

No temperature number is universally correct. Wood species, grain direction, surface density, moisture, and tip selection all affect the burn. Leather responds differently than wood, too. The smart approach is to make a few test marks on a scrap of the same material before touching the final piece.

Once you find a setting that gives you the line or shade you want, digital control makes it easier to return to it. That is particularly valuable for commission work and repeat designs, where a consistent look matters. It also encourages better technique: use a controlled pace and light pressure rather than relying on excessive heat to force a dark mark.

For refined shading, lower-to-moderate heat with patient, overlapping passes often gives more control than one aggressive pass. For fine details, enough heat to create a clean mark without dragging helps preserve sharpness. The exact result depends on your material and tip, which is why a test board is one of the most useful accessories on any worktable.

Choosing Tips for a Two-Pen Workflow

A dual-pen machine becomes more useful as your tip selection becomes more intentional. You do not need every tip shape at once. You need a few dependable options that match the marks you make most often.

For example, one handpiece might carry a fine detail tip for outlines, small lettering, whiskers, veins, and edge cleanup. The second can hold a shader for backgrounds, larger lettering fills, gradients, and smooth tonal work. That pair covers a surprising amount of artwork.

As your style develops, you may prefer a different combination. A texture-focused artist might keep a spear or spoon-style tip ready beside a fine point. A sign maker may pair a writing tip with a broader tip for filling letters. Someone working on small ornaments may use two detail-oriented tips at different heat settings to move between delicate lines and deeper accents.

Premium detailing tips are worth considering when precision is central to your work. Their value is not simply variety. A well-chosen tip gives you a more predictable mark, which makes it easier to build muscle memory. Over time, you begin to recognize how a particular tip behaves on a favorite wood surface and can design around its strengths.

Who Should Consider a Dual-Pen Setup?

A dual-pen system is a natural next step for makers who already enjoy pyrography and want fewer tool-change interruptions. It is well suited to artists creating detailed wall art, personalized keepsakes, custom signs, ornaments, leather projects, and pieces with extensive shading or texture.

It also makes sense for makers who have outgrown a fixed-temperature craft pen. If you are beginning to notice that certain lines burn too quickly while other areas need more gradual control, adjustable heat can make a meaningful difference. The goal is not to make the tool more complicated. It is to give you better control over your decisions.

For first-time woodburners, a Stage 1-style kit can be a more comfortable place to start. It gives you the chance to learn the basics of tip handling, line control, shading pressure, and material response without investing immediately in a professional workstation. A dual-pen detailer is best when you know you will use its speed, precision, and flexibility.

Before choosing, consider how often you burn, the size and detail level of your typical projects, and whether you regularly switch between techniques. If you spend most sessions wishing your current pen could stay set up while you use another tip, you have already identified the problem a dual-pen machine solves.

Set Up for Better Results From the First Project

A capable tool performs best in a focused workspace. Keep your project supported on a stable surface, place each handpiece in its dedicated stand when you pause, and arrange your tips so you can identify them quickly. Good lighting helps you read tone and grain direction before a line becomes permanent.

Start each session with a small test area. Use it to check your heat setting, practice the stroke you need, and confirm how the selected tip responds. This is a fast habit that prevents avoidable surprises on finished work.

It also helps to plan pen assignments before you begin. Decide which pen will handle your primary linework and which will handle shading or texture. You can always change the plan, but starting with clear roles keeps the dual setup from becoming cluttered.

A dual-pen wood burning machine earns its place when it helps you stay present with the artwork instead of stopping to manage the tool. Choose the tips you reach for most, test your marks with intention, and let the second pen keep your creative momentum moving.