

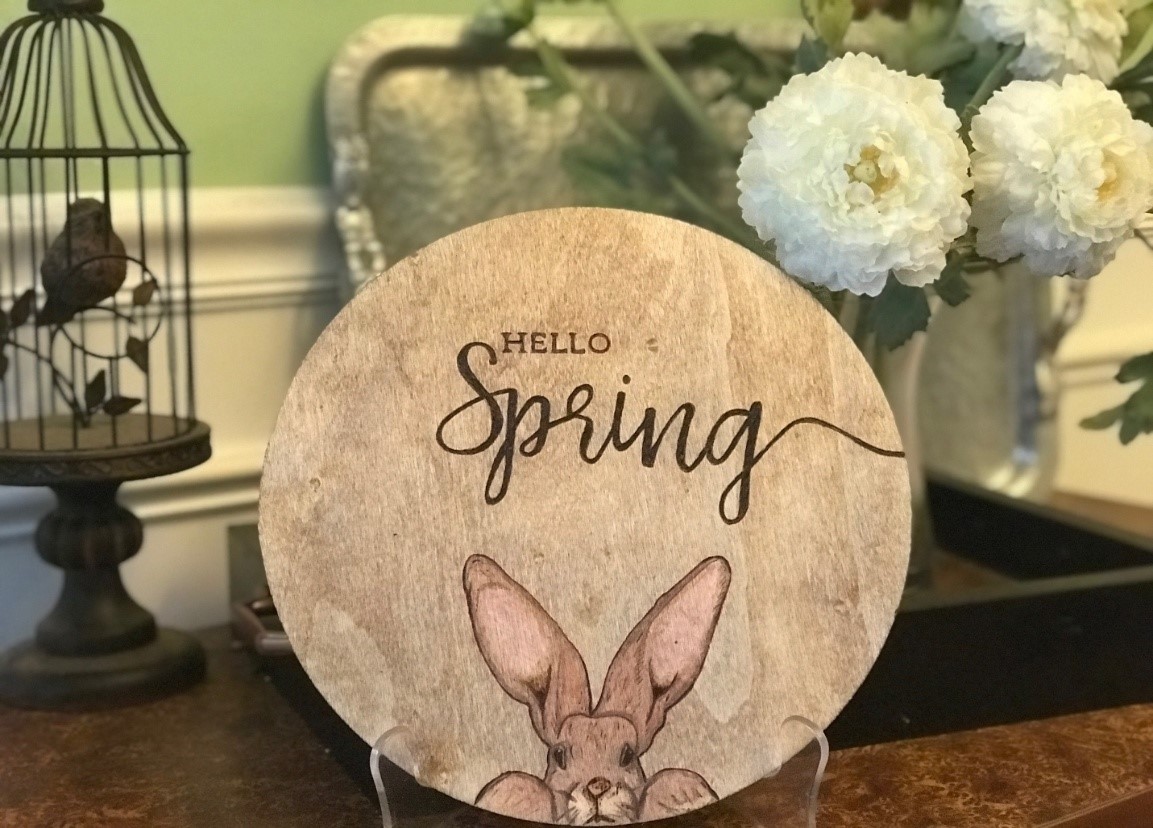
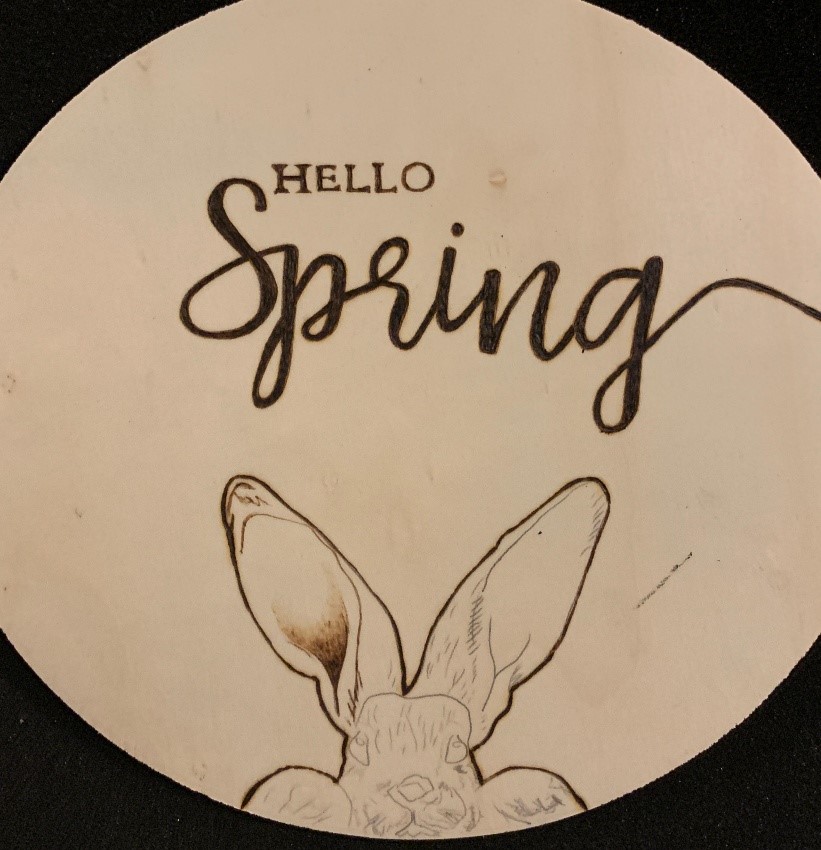
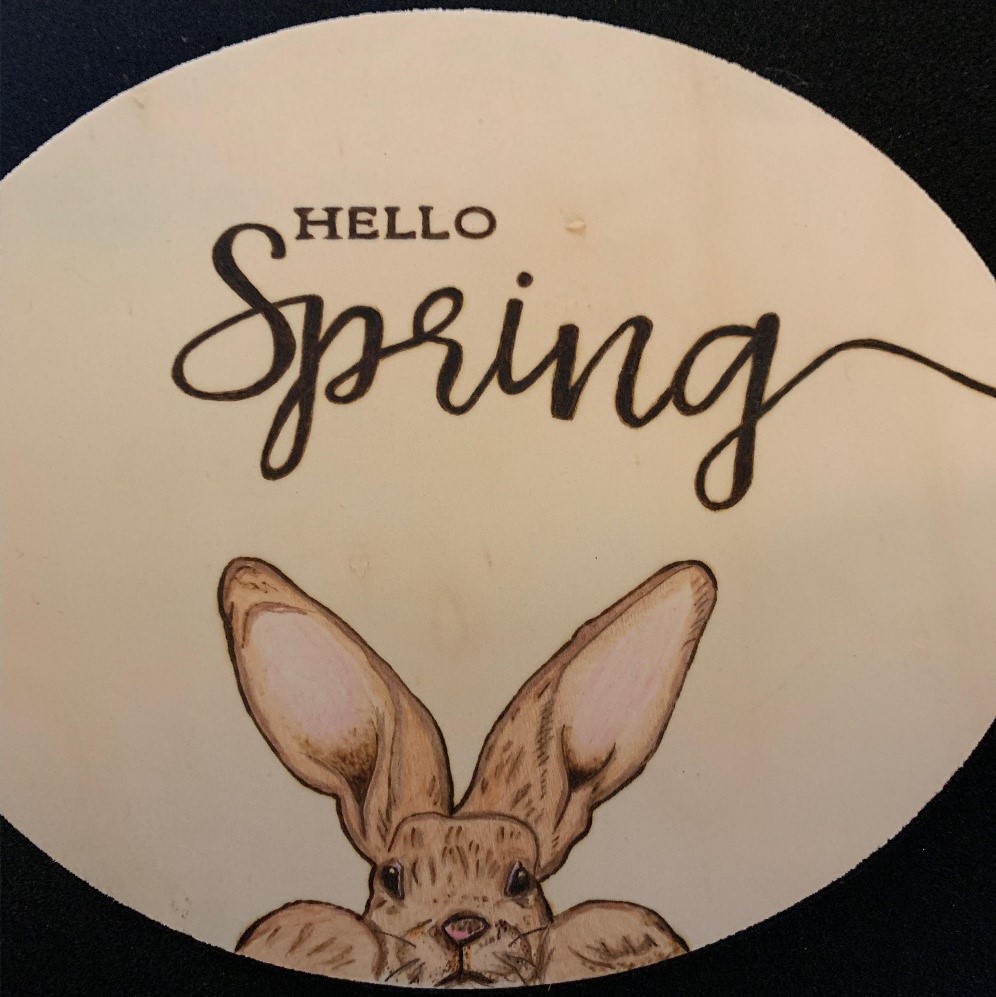
I’d have to say that Spring is one of my favorite seasons that just warrants a complementing Spring Decor. Baby birds are chirping, fragrant and colorful flowers are blooming, and butterflies are gracefully fluttering about. Everywhere you look, it is bursting with life. When thinking of Spring, naturally, thoughts of cute little rabbits come to mind. I wanted to create a cute design that displays a traditional representation of spring. In this piece, you will combine some simple shading techniques as well as applying multiple colors to your design.

• Wire-nib pyrography pen or solid-point pyrography pen
• 10in x 0.13in (254 mm x 3.302 mm) diameter plywood circle
• Colored ballpoint pen for tracing
• Scissors
• Scotch tape
• Measuring tape or ruler
• Graphite paper for tracing
• Sponge
• Melamine foam eraser (magic eraser)
• Colored pencils (dark brown, light brown, pink, black, white)
• Stain (optional)
• Spray sealant (ex. polyurethane)
• Old rag for staining
Your pyrography pen needs to be set at a low to medium-low heat. The letters on this sign are rather thin so you will need to be aware of your pen settings and you need to be careful with the amount of pressure applied to your pyrography pen while burning. Be sure your letters are not burned at such a low temperature that the burn marks appear to be faint. When you reach the larger words, you can slowly increase your heat and/or pressure as needed.
Remember, sometimes it is easier to burn the outline of your letters first and then go back to fill in the empty space. This helps you stay within the parameters of your image and minimizes any stray marks. When you are burning your letters, if you come across any gaps where you should have a solid burning, go back to fill those gaps in at a very low heat so that you don’t burn outside the lines.
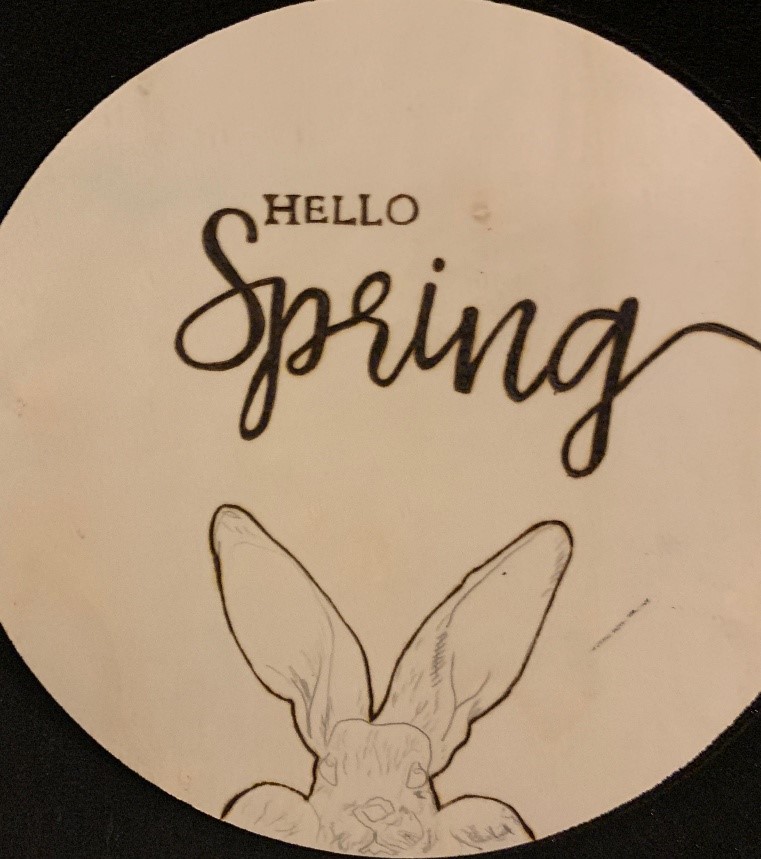
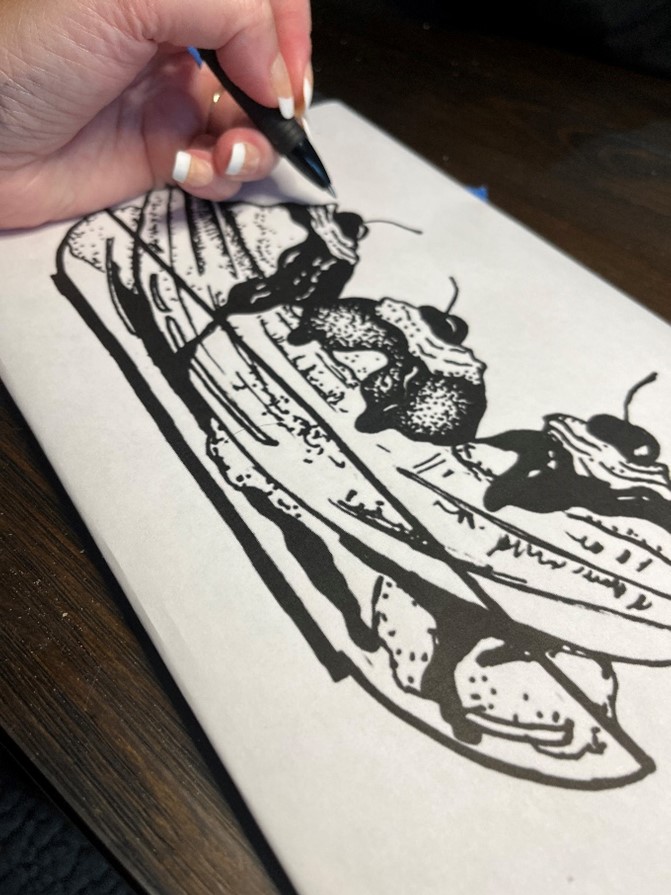
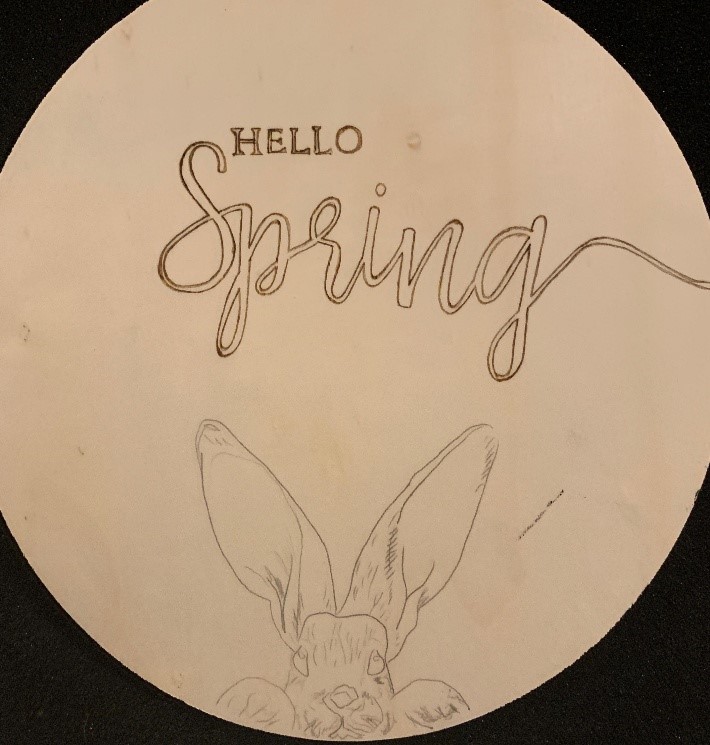
Let’s hop to it! It’s time to burn our image of the rabbit. Start off by tracing the outline. You want your outline to be burned in medium thickness. The purpose of the medium thickness is to have the outline dark enough for the image to stand out if you were to stain your sign.
It’s now time to work on the rabbit’s ear. You will notice the inside of the ear has a “Y” shape pattern. Burn the stem of the “Y” and at the tip of the crevice – start a dark burn. As you work your way up the ear, slowly decrease your temperature to create a lighter, softer burn. As you burn softer, you should not apply much pressure to your pyrography pen. Repeat the same process on the opposite side.
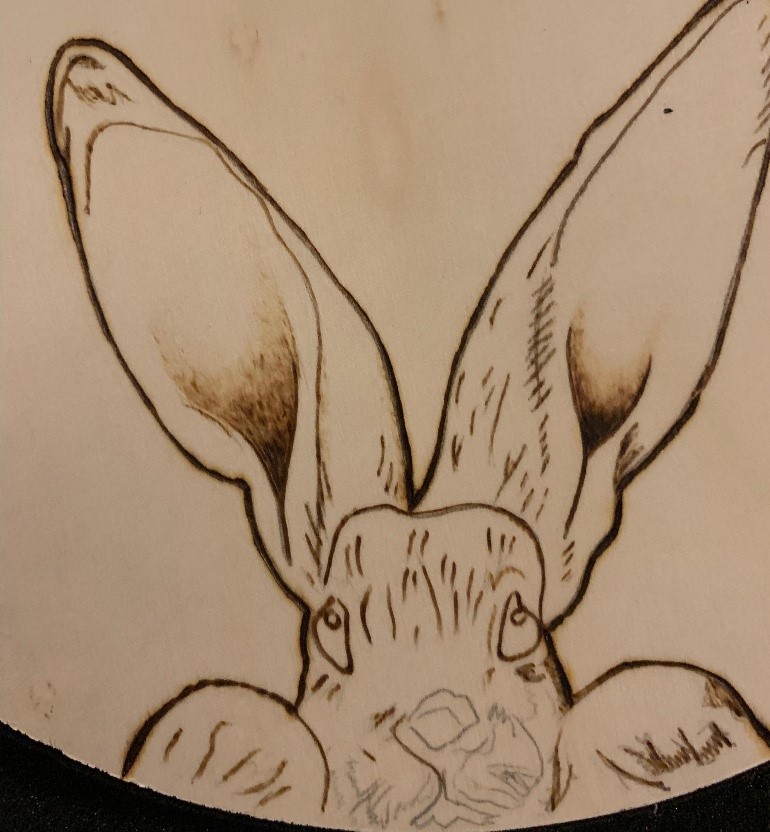
Start burning the marks and lines that indicate fur patterns within the rabbit design. Darken the area around the rabbit’s nose and darken the eyes.
Now it’s time to stain your wood. Be sure to cover the surface completely. Since your image has some fine lines, be cautious not to add too much stain or your image will not be easily visible.
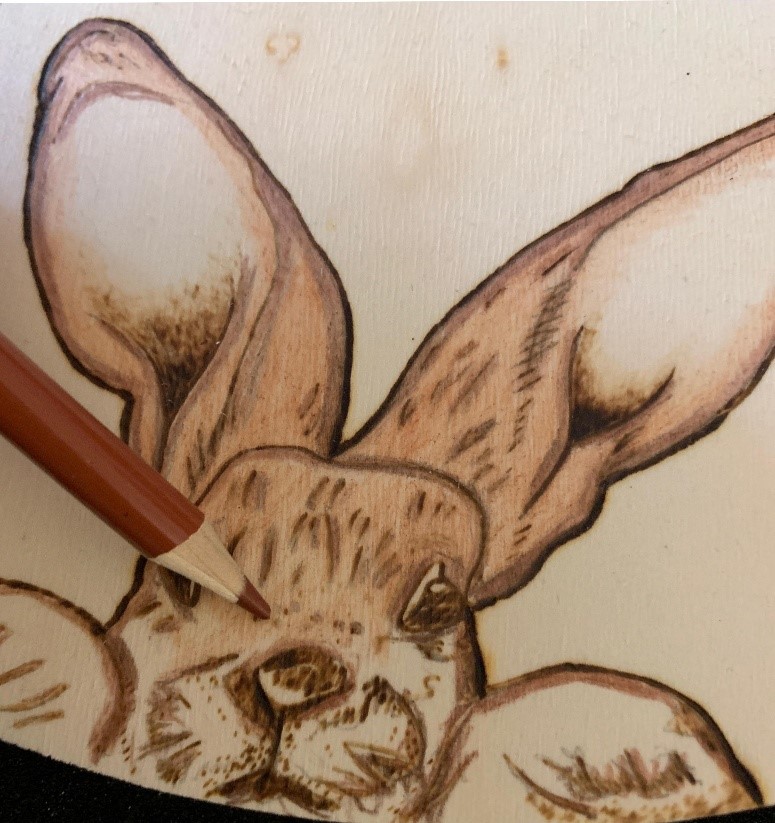
If you do not wish to stain your wood you can go ahead and color your design. Once your design is colored, I recommend using a spray sealant to protect your image once completed. You can go ahead and color your design first and then stain your wood if you prefer, but it will leave your image looking dull and minimizes the details in the drawing.
Take out your box of colored pencils. You will need a dark brown, light brown, black, white and pink. Start by taking your dark brown colored pencil and tracing the outline of the rabbit. Continue to add the dark brown colored pencil to the fur lines and marks within the image of the rabbit.
Color the rabbit softly with the light brown. Do not color the inside of the ears brown. Leave that area untouched for now. Once the light brown has been applied to the rabbit’s fur, take your white colored pencil and softly blend it into the light brown areas. This blends the colored area more evenly and softens any harsh lines. Never use a lot of pressure when coloring. You do not want hard scratch lines that are hard to smooth out.
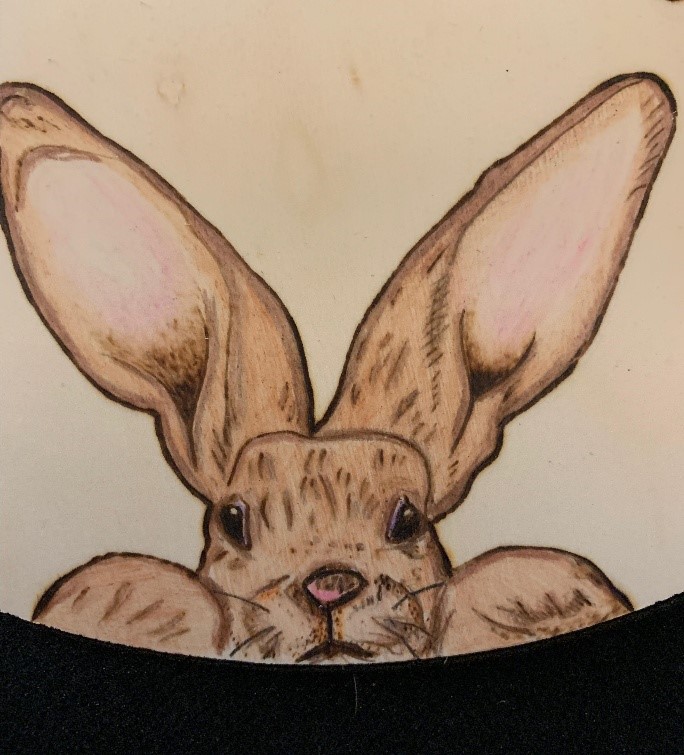
Add a light pink to the nose and ears. Again, burn lightly and add white to smooth and soften the colors.
Take a black colored pencil and color in the eyes and outline the nose and mouth. If you need to enhance your image, you can go back over the design and retrace your image using the black or dark brown colored pencil.
Once your rabbit is complete, spray sealant over everything and allow it to dry. This protects everything.
Every bunny will love the finished product.
If you have any questions, suggestions or anything you would like to comment on, please do so in the comment section below and I’ll get right back to you as soon as possible.
See you next time,
Andrea Pate
Pate’s Pyrography
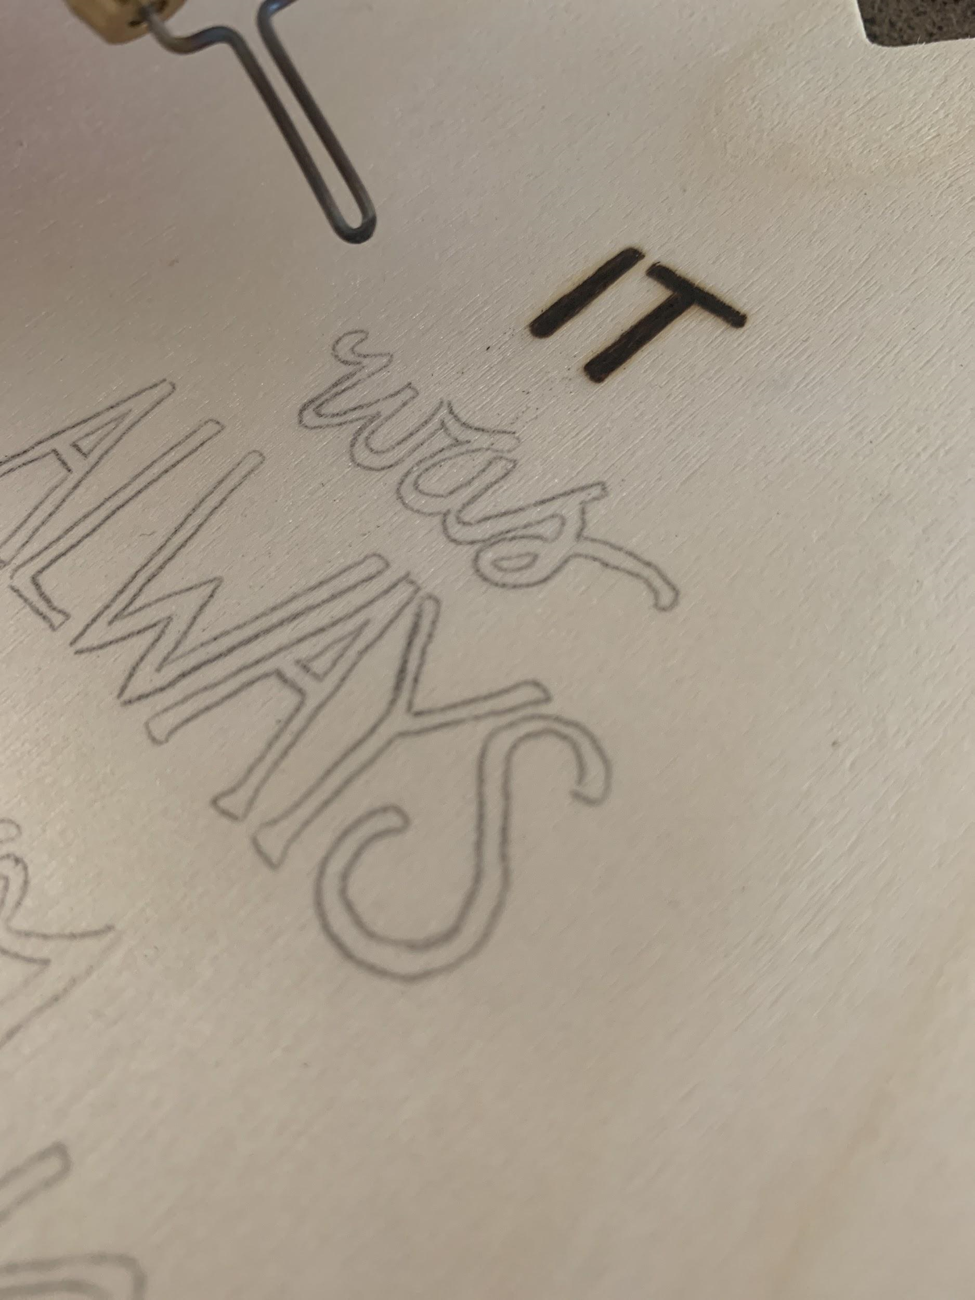
With Valentine’s Day just around the corner, a Valentine pyrography project is called for. Here are some inexpensive and fun ideas to spruce up your home.
I have found several seasonal wood cutouts available at my local dollar store and for Valentine’s Day, I picked two different types of heart-shaped wood cutouts.
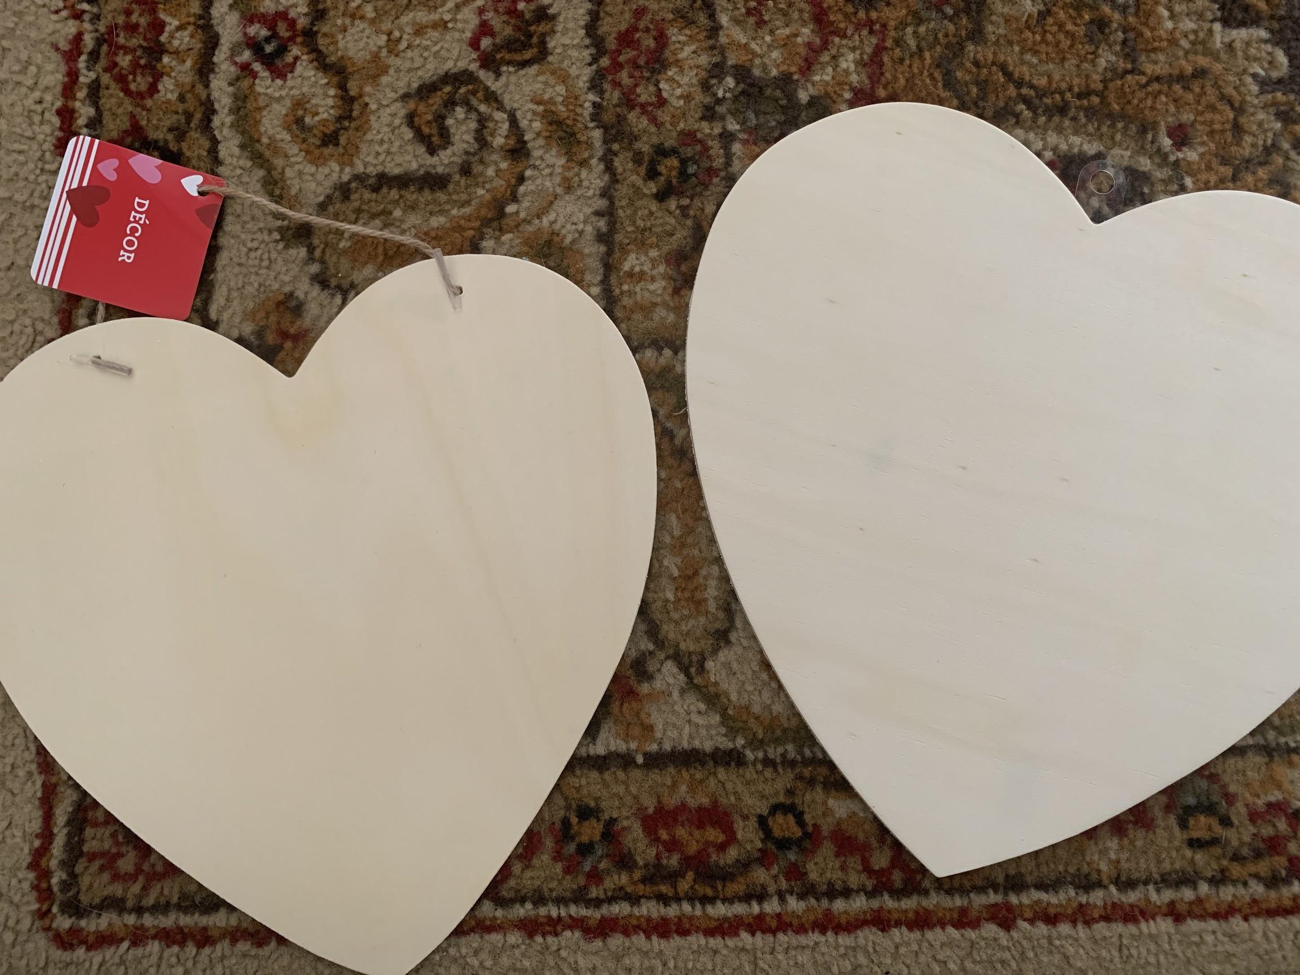
You can also create your own cutouts with varying sizes out of scrap plywood or other pieces of wood lying about. Simply find a template, print it out and transfer it to your wood with transfer paper. For detailed instructions on how to do the transfer, check out a previous post I made.
I recommend going online to find various quotes and fonts to burn onto the wood. Another suggestion is to find a stencil or letter stamps and create your own conversational candy hearts. These would look great displayed over a fireplace or hung outside your door.
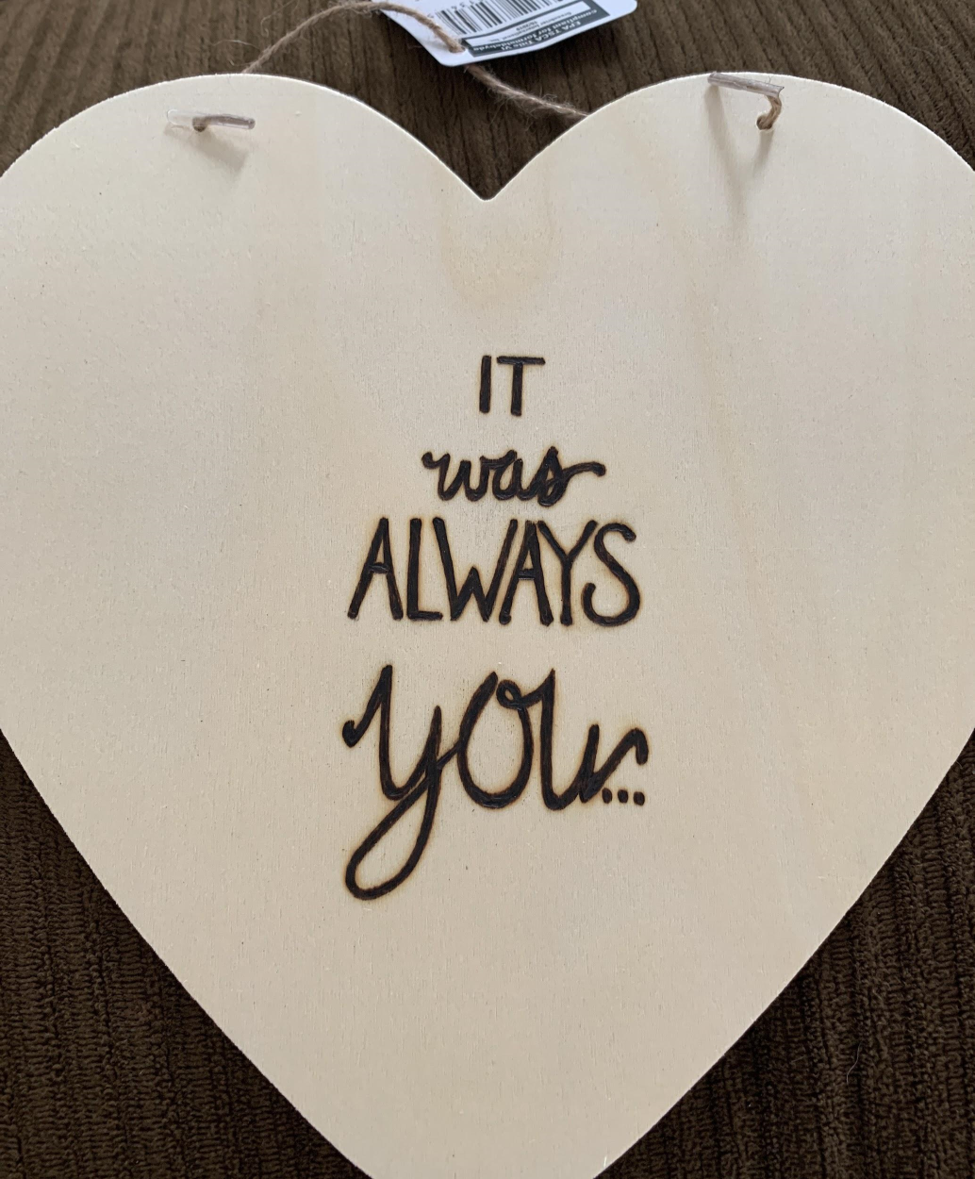
Add some color to them or a little bit of stain to make them pop.
The possibilities are endless and you can’t beat the price. I suggest looking around your local dollar store a month prior to the holiday. These wood cutouts don’t stay on the shelf long as they will make wonderful gifts for those you love and hold dear just like this Valentine pyrography project. This would be a great project for any age group.
As always, if you have any comments or suggestions for a project, I’ll be very glad to hear about it.
Andrea
Feel free to read a review on our woodburner here
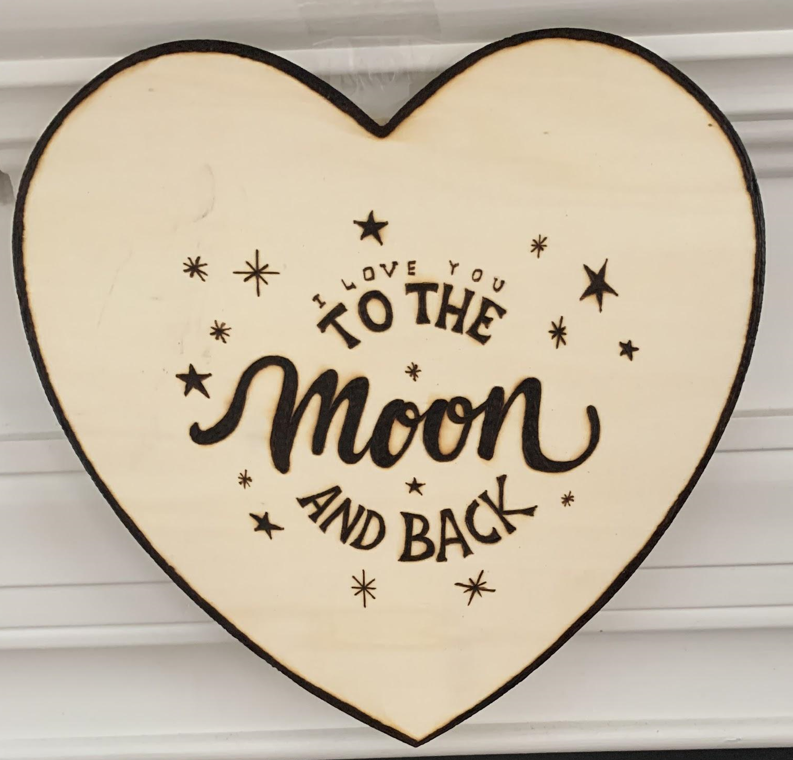
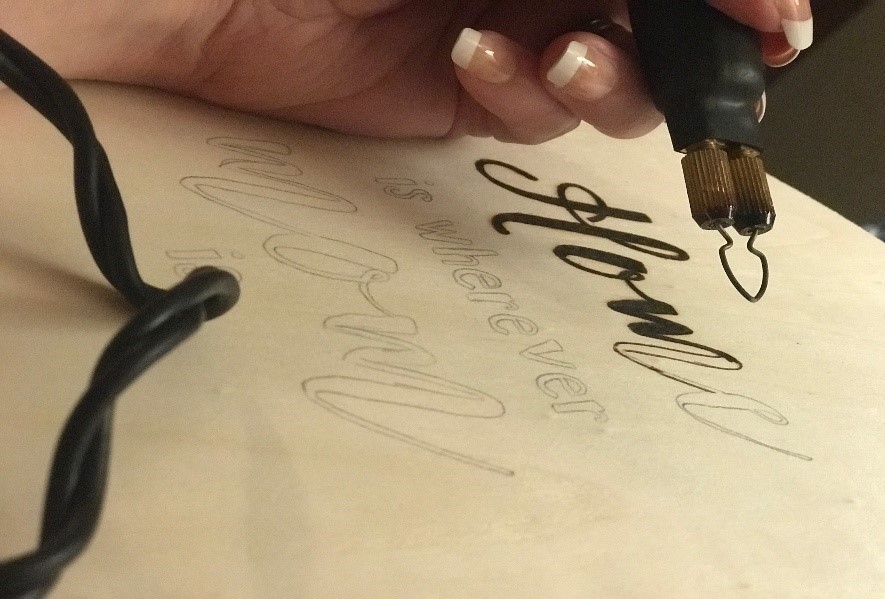
This Mother’s Day, make your mom something special! What I love about pyrography is that it is unique and beautiful and burnings make excellent gifts. Much like painting, you can literally wood burn anything from quotes and designs to images of animals and people or whatever you fancy.
Let’s get started. First, take your pattern of choice and transfer it onto your wood (see transfer instructions on Wood burning tutorial).
When burning fine, delicate lines into your wood, be careful not to press too hard. This will create a splotchy, uneven image. Also, don’t start burning with your pen at a high temperature, start low and work your way up so your strokes don’t run outside of your design ( for more how to instructions see Shading Technique in Pyrography).
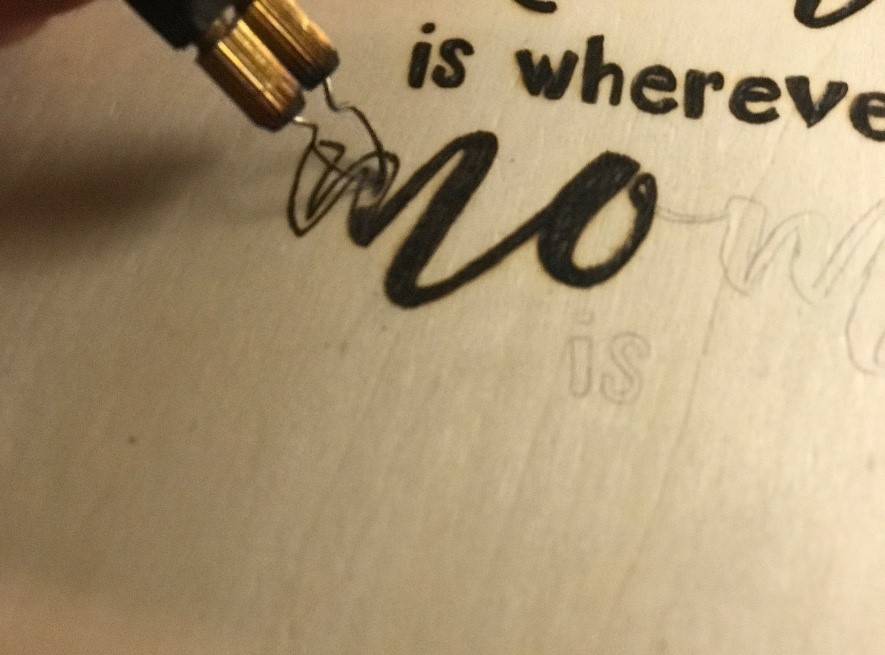
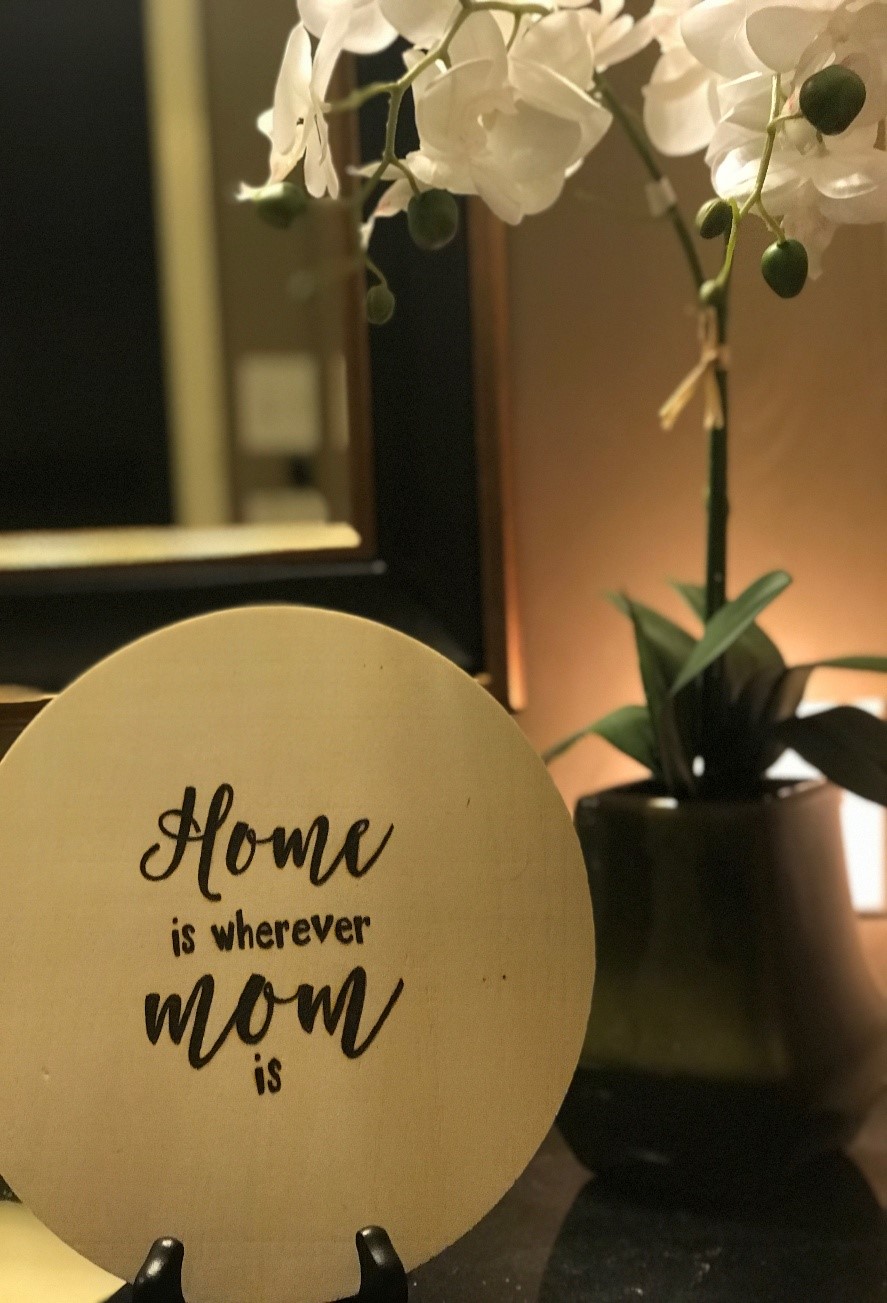
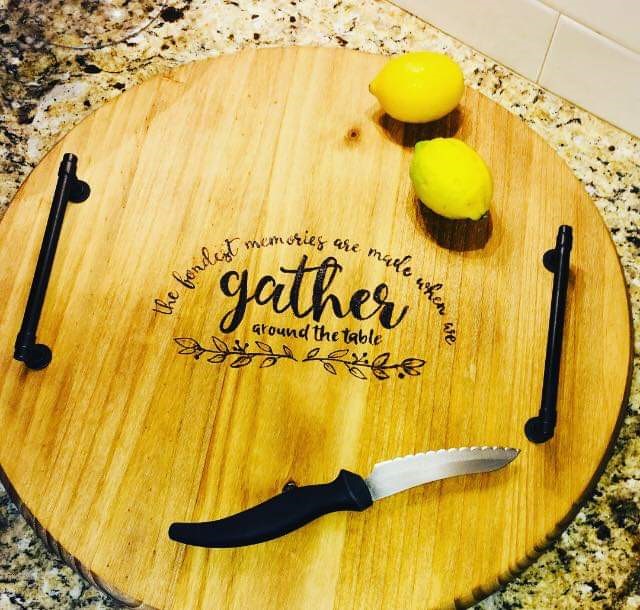
When choosing your wood, think about mom’s sense of style and choice of décor. Does she like serving trays or cheese boards? Does mom like to decorate her dining room with a beautiful tablescape or does she like to display decorative signs in her home?
 |
 |
Take your design and burn it onto any piece of unfinished wood. At your local hardware or craft store, you can find large pieces of wood that are perfect for creating serving trays. Once your image is burned, stain your wood, add a coat of mineral oil and attach the handles.
Another meaningful gift idea that works well for a mom with young children is to get the young child to draw or write a note to mom. Simply transfer the image onto the wood and burn the design. This will make a wonderful keepsake for years to come.
Wood spoons to rolling pins, picture frames to coasters. Think about what mom likes and let your imagination go wild. There are so many functional items available out there that you can personalize just for mom.
I hope you found these Mother’s day gift ideas useful. Take your time when first starting out. You will feel more confident and at ease as you work your way through your project. Have fun and enjoy the process.
See you next time!
Andrea Pate
Pate’s Pyrography

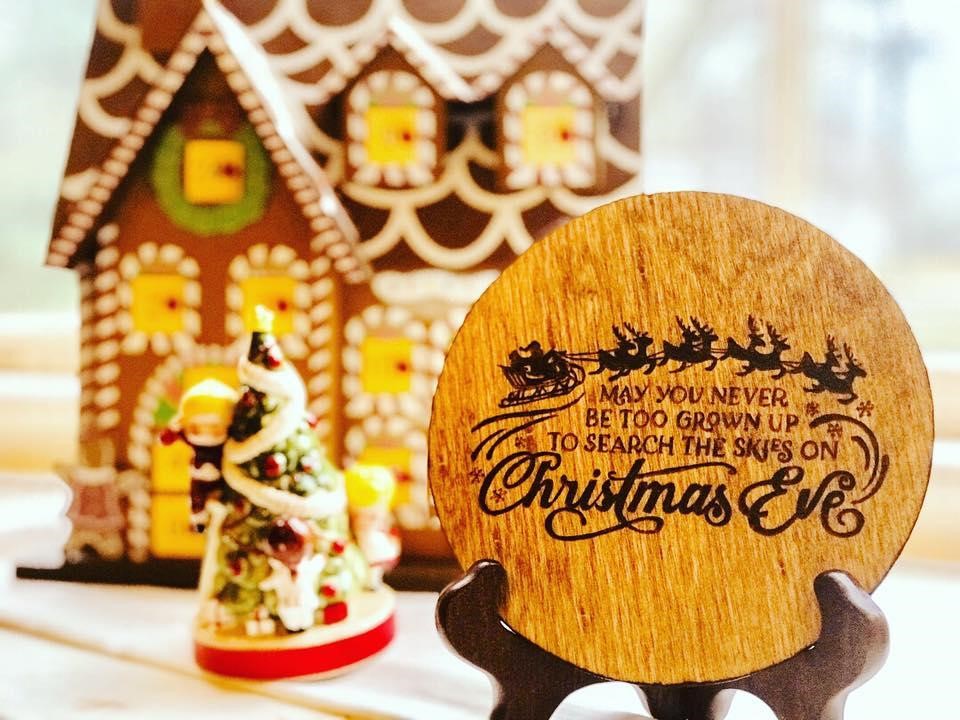
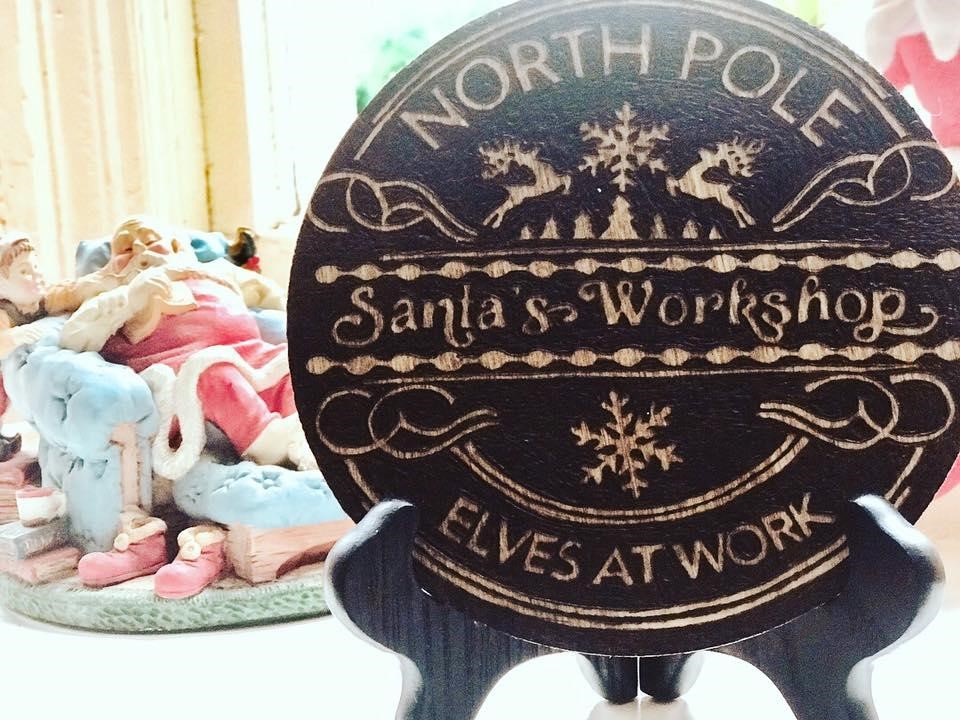
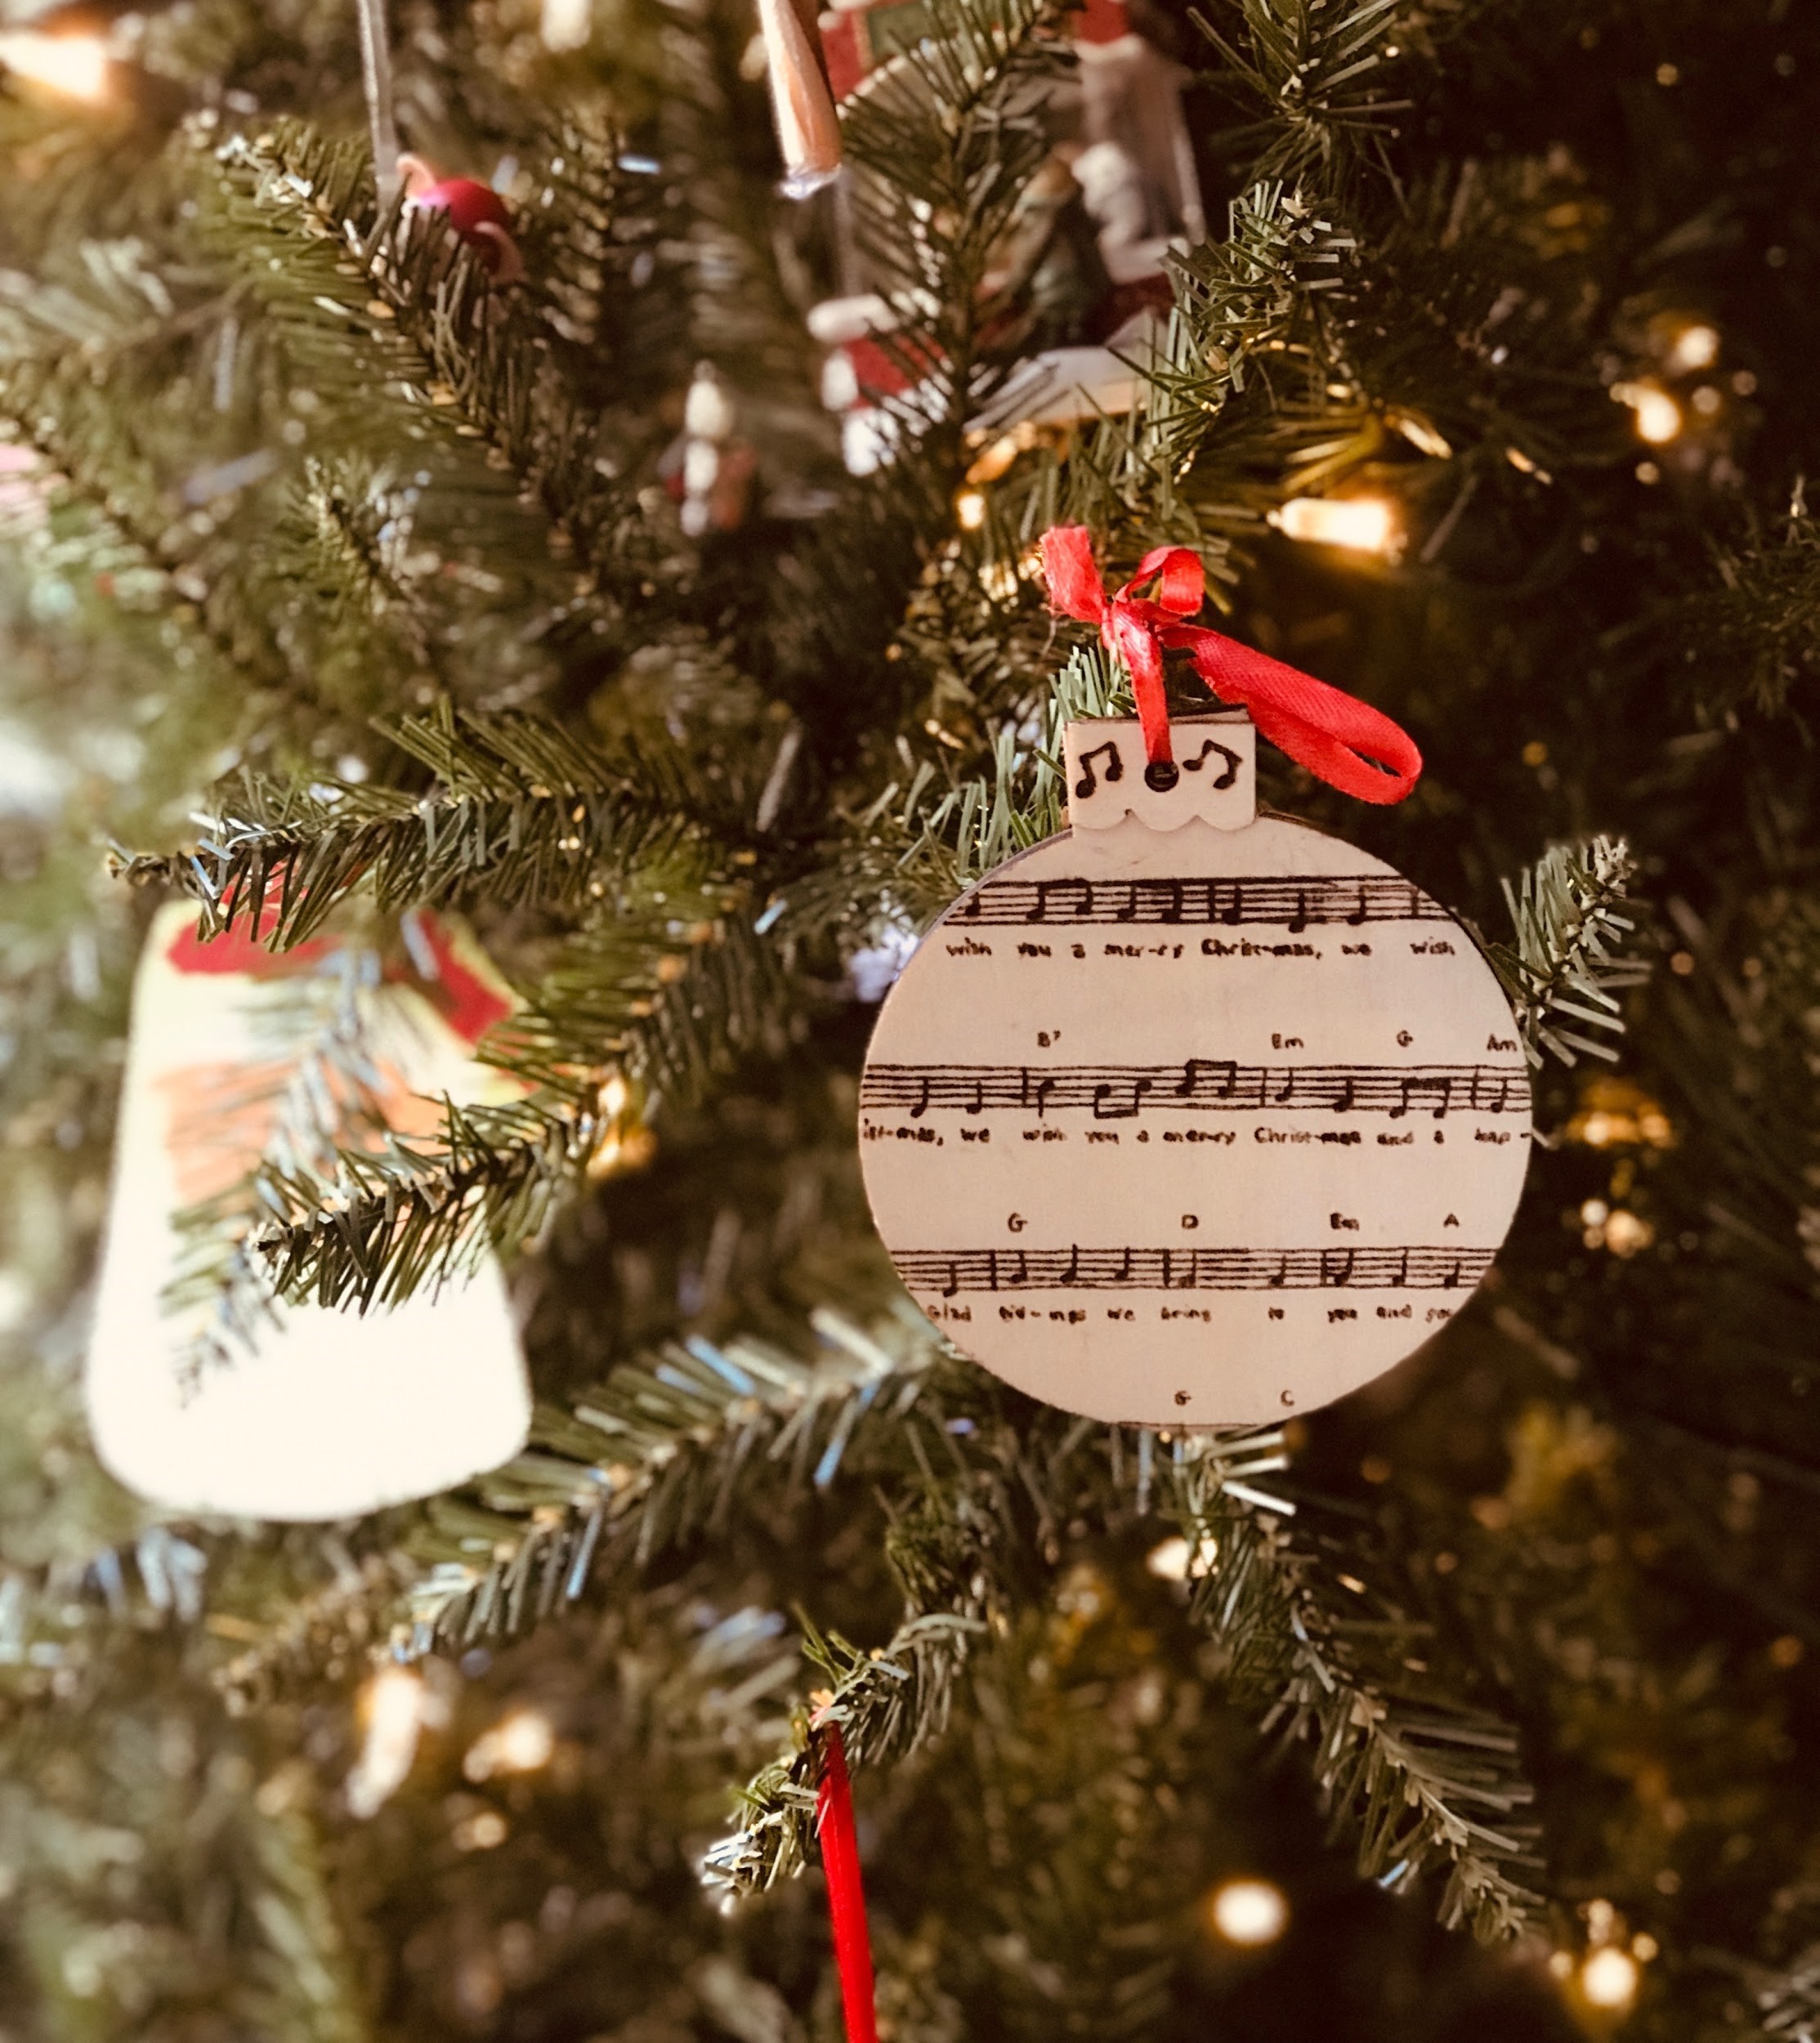
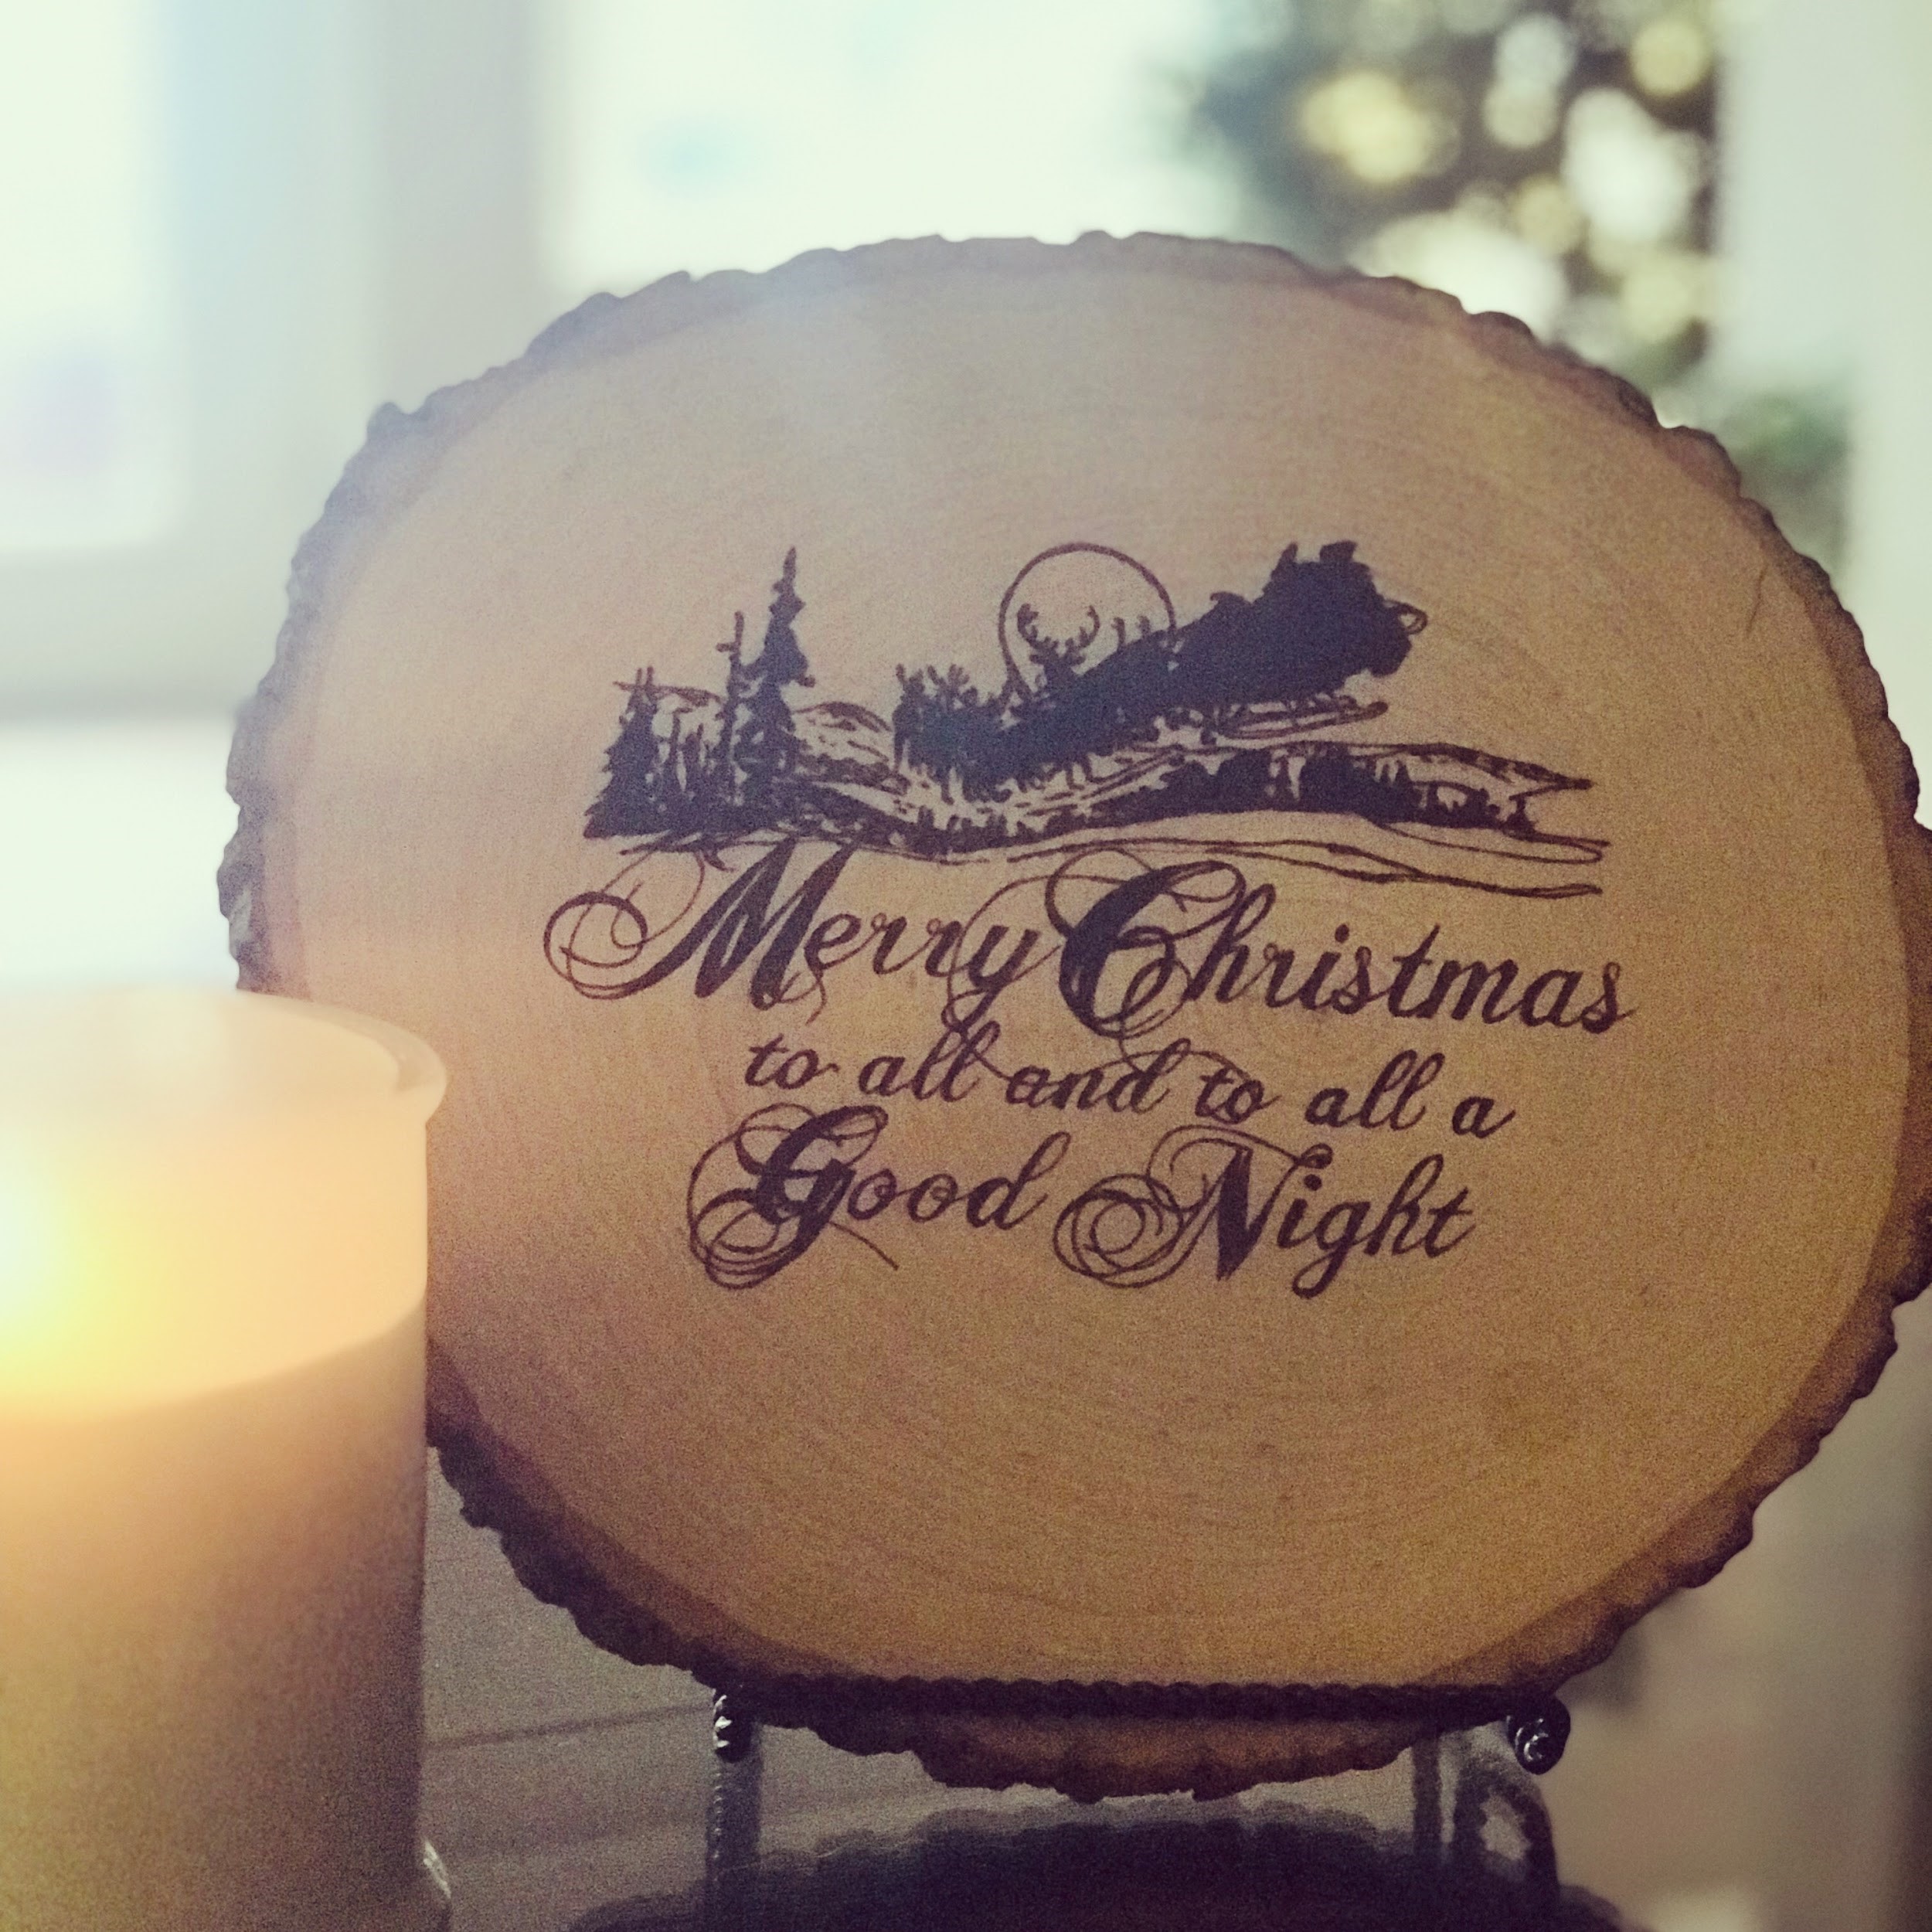
I love the Holidays! The decorations are beautiful, the food is plentiful as well as delicious, and I am constantly busy. Ever since I started my pyrography business, I have been commissioned to make an unbelievable amount of gifts. If you are looking for some inspiration for creating something beautiful and affordable, I’ve got some amazing ideas.
This Holiday Season, go to your local craft store. In the wood section, they have a large selection of wood that is easy on the pocket and there are several items that are packaged with multiple pieces. These stores often offer discounts and many of these items are available in their holiday section which is often marked down.
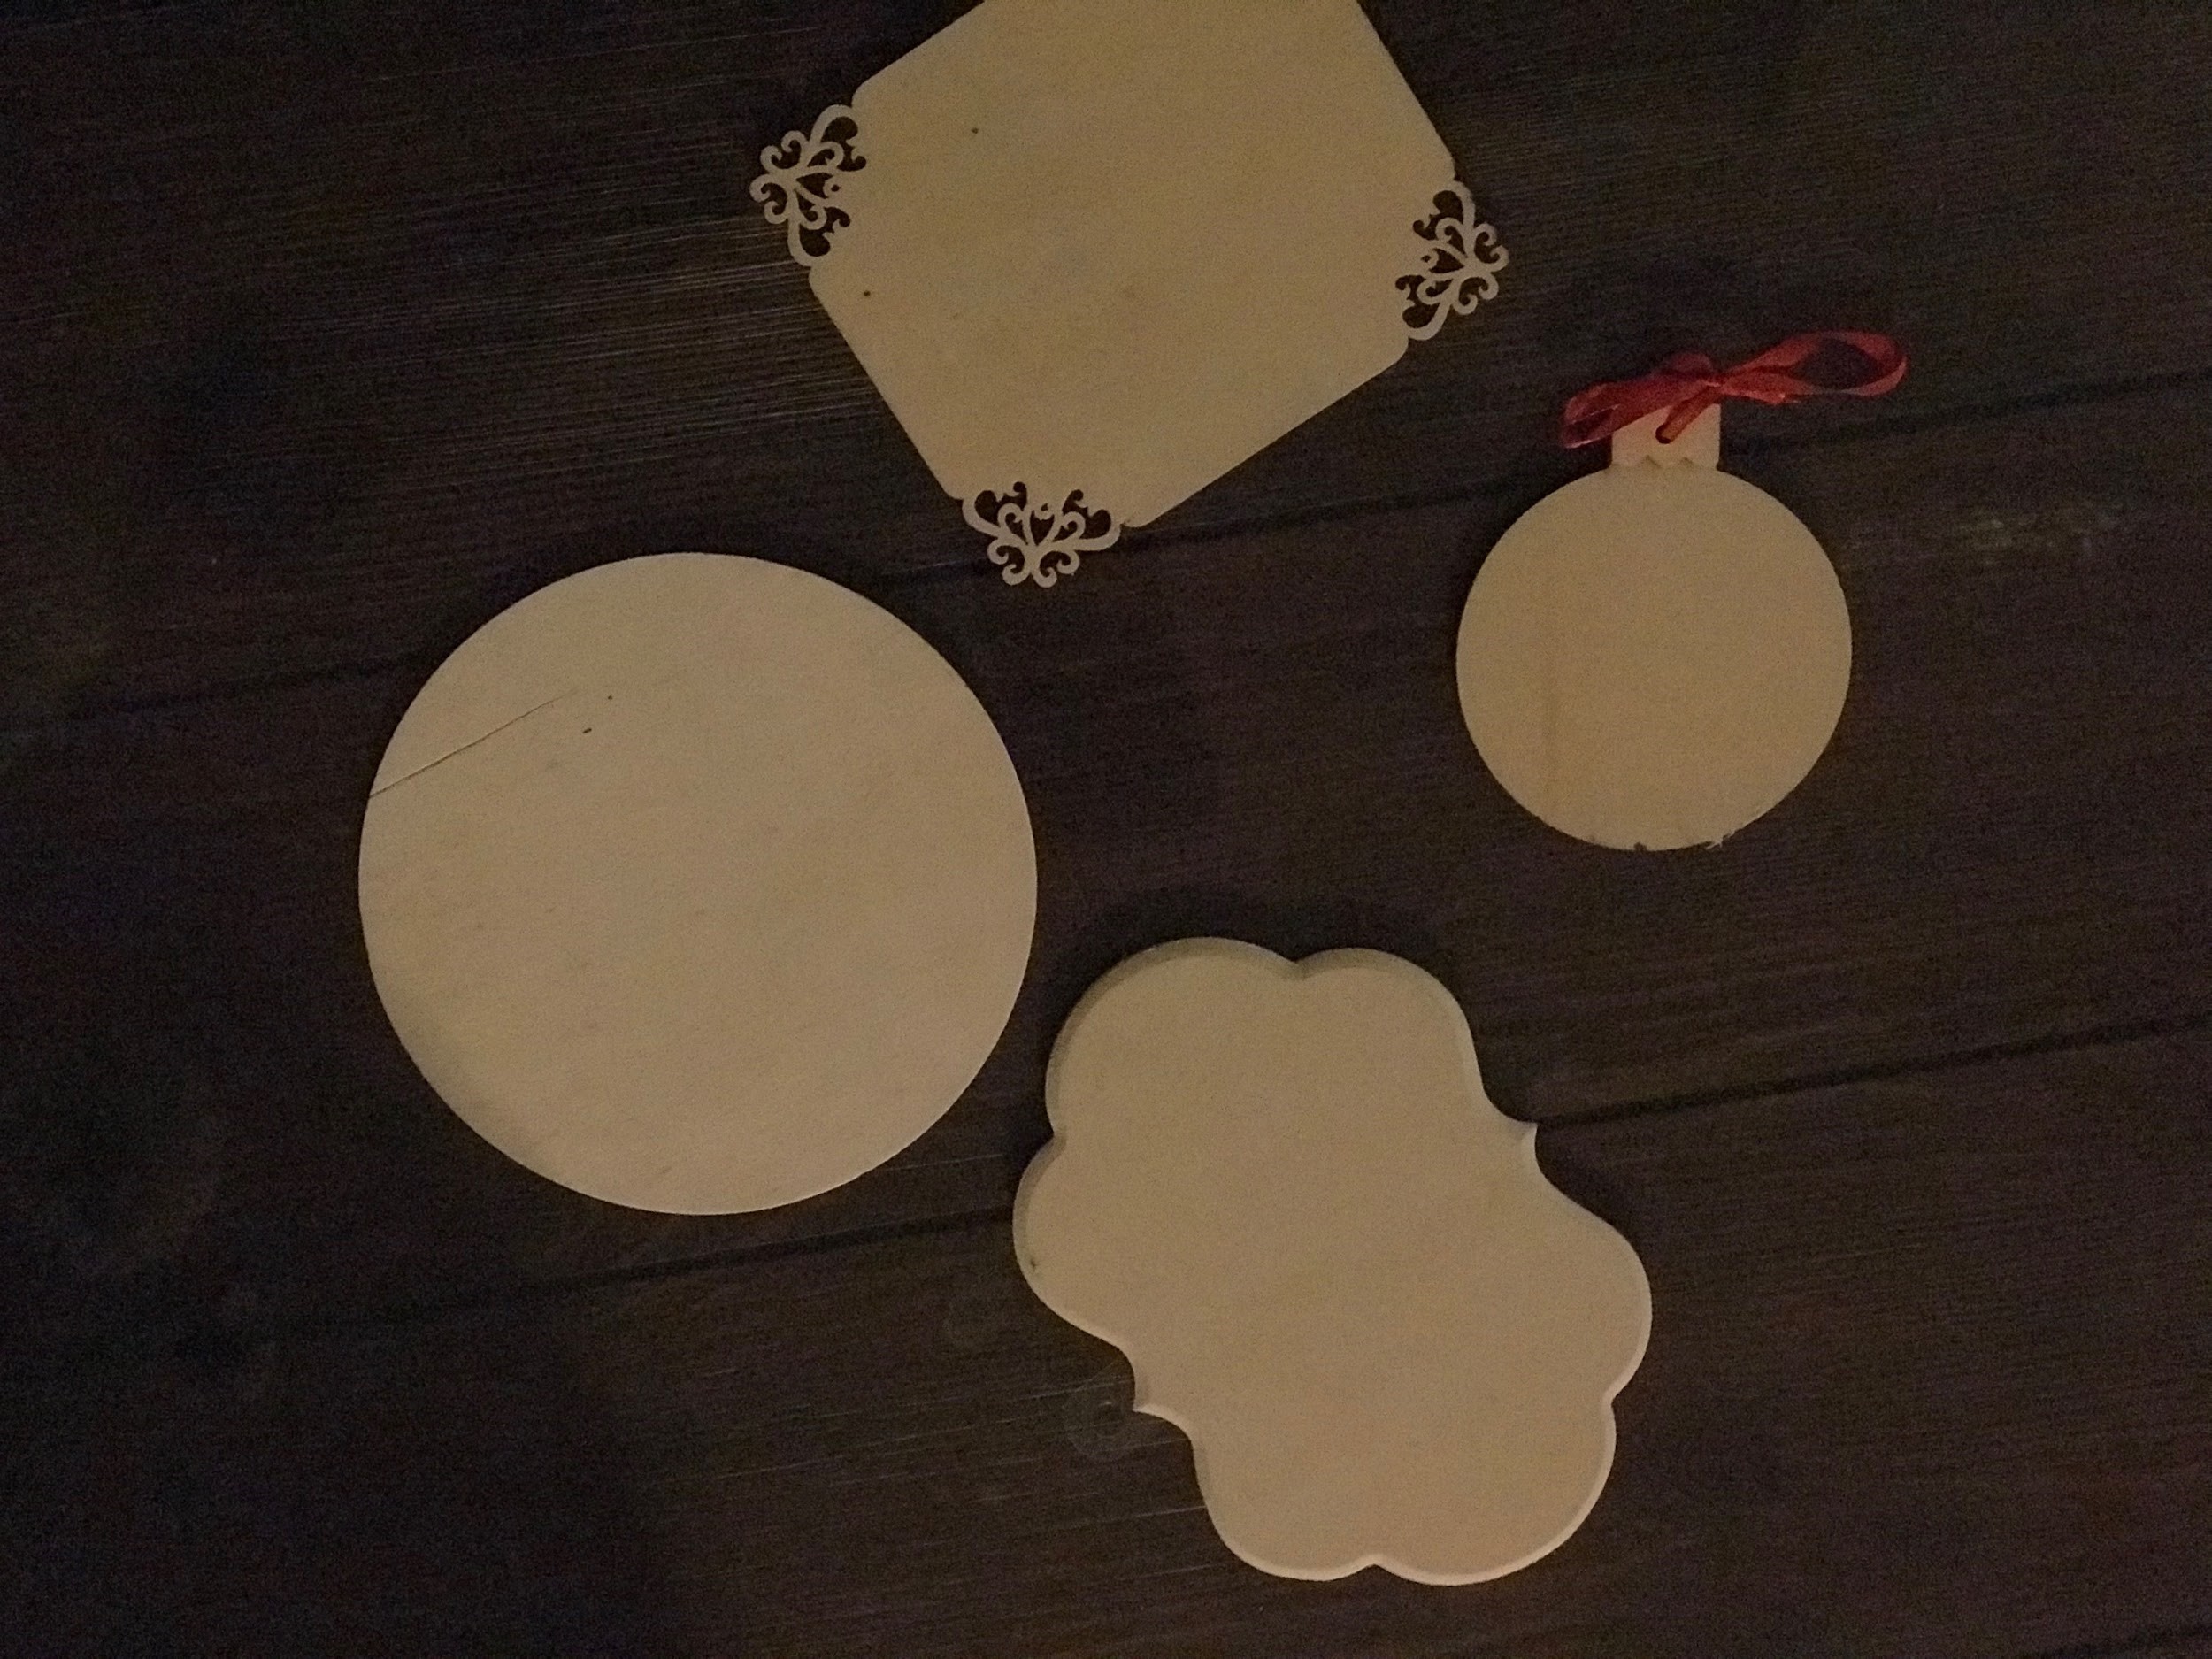
I always create ornaments for my neighbors and my children’s teachers. You can also get some plywood rounds in various sizes that are sold as a set of 4 or more. I purchase these plywood rounds along with some stands and they make a great gift for any occasion. You can create a sign with Holiday decorations or even something a little easier such as an inspirational quote or their last name. TRUArt also has supplied some easy-to-burn Christmas stencils that you can download for free.
I also purchased wood slabs from a local lumberyard for an amazing price. You can find a sanded wood slab, ready to use, at your local craft store as well. These make amazing cutting boards, serving trays, display pieces, signs and chargers for your tablescape.
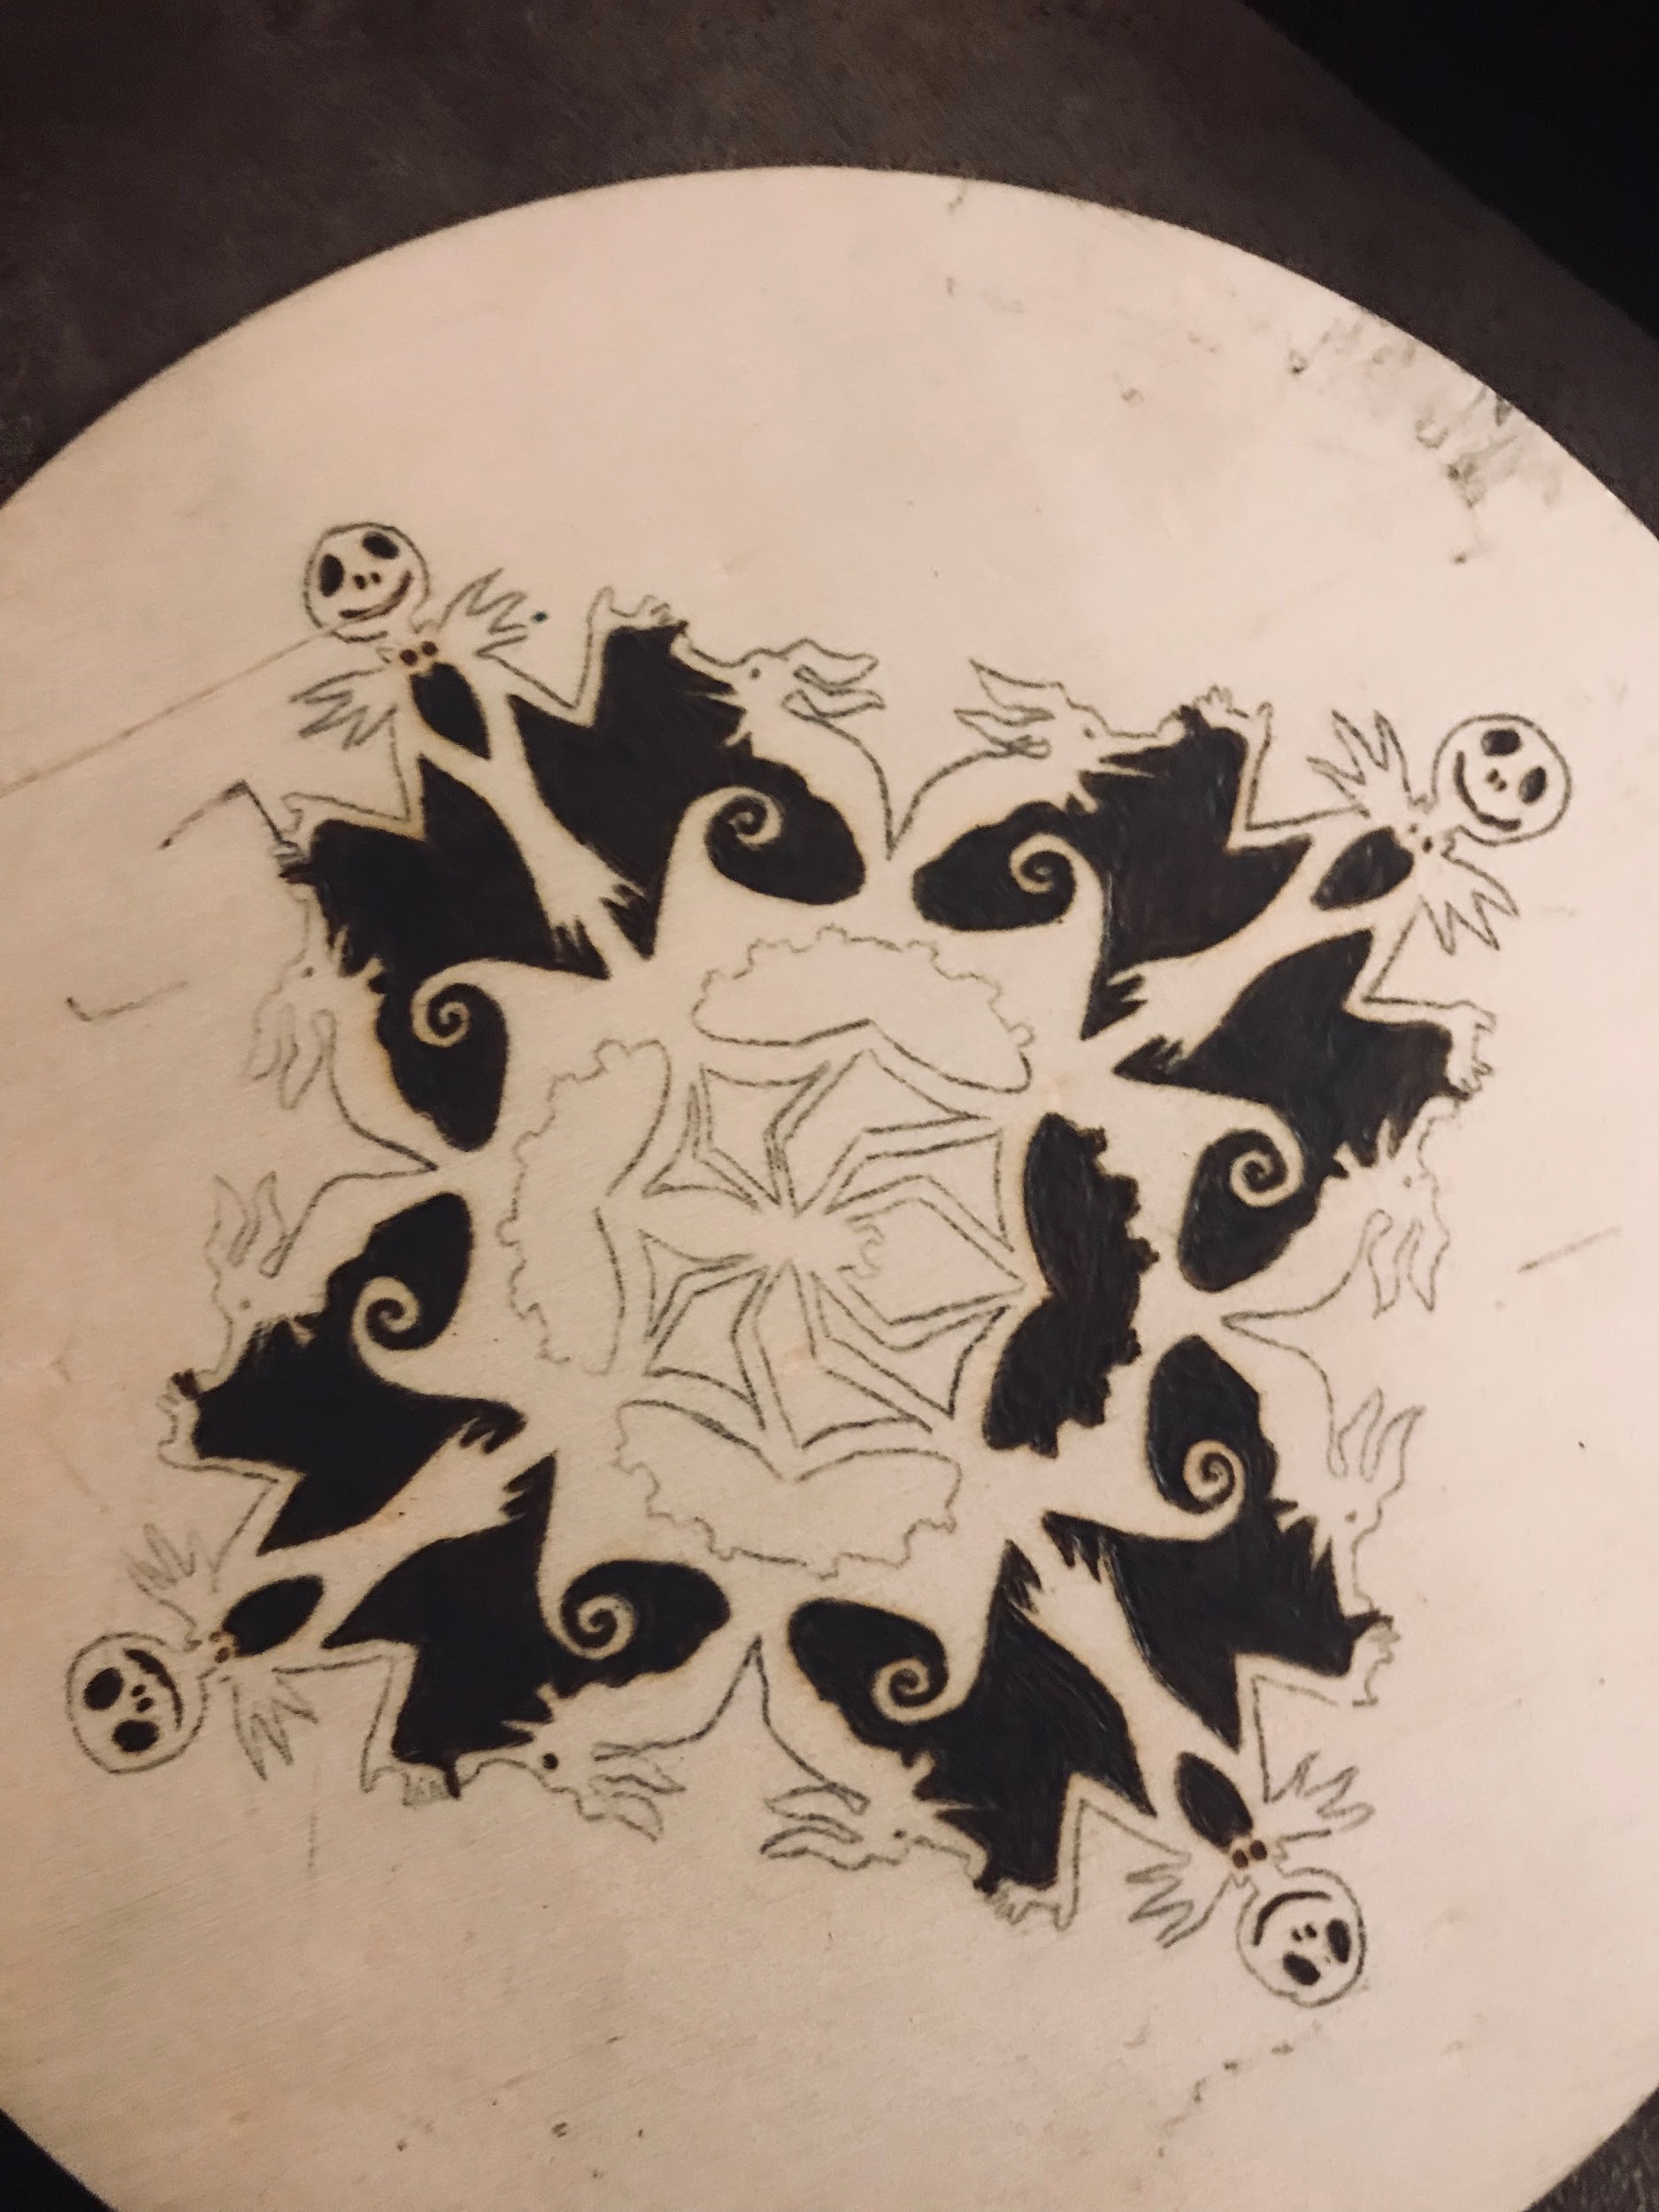
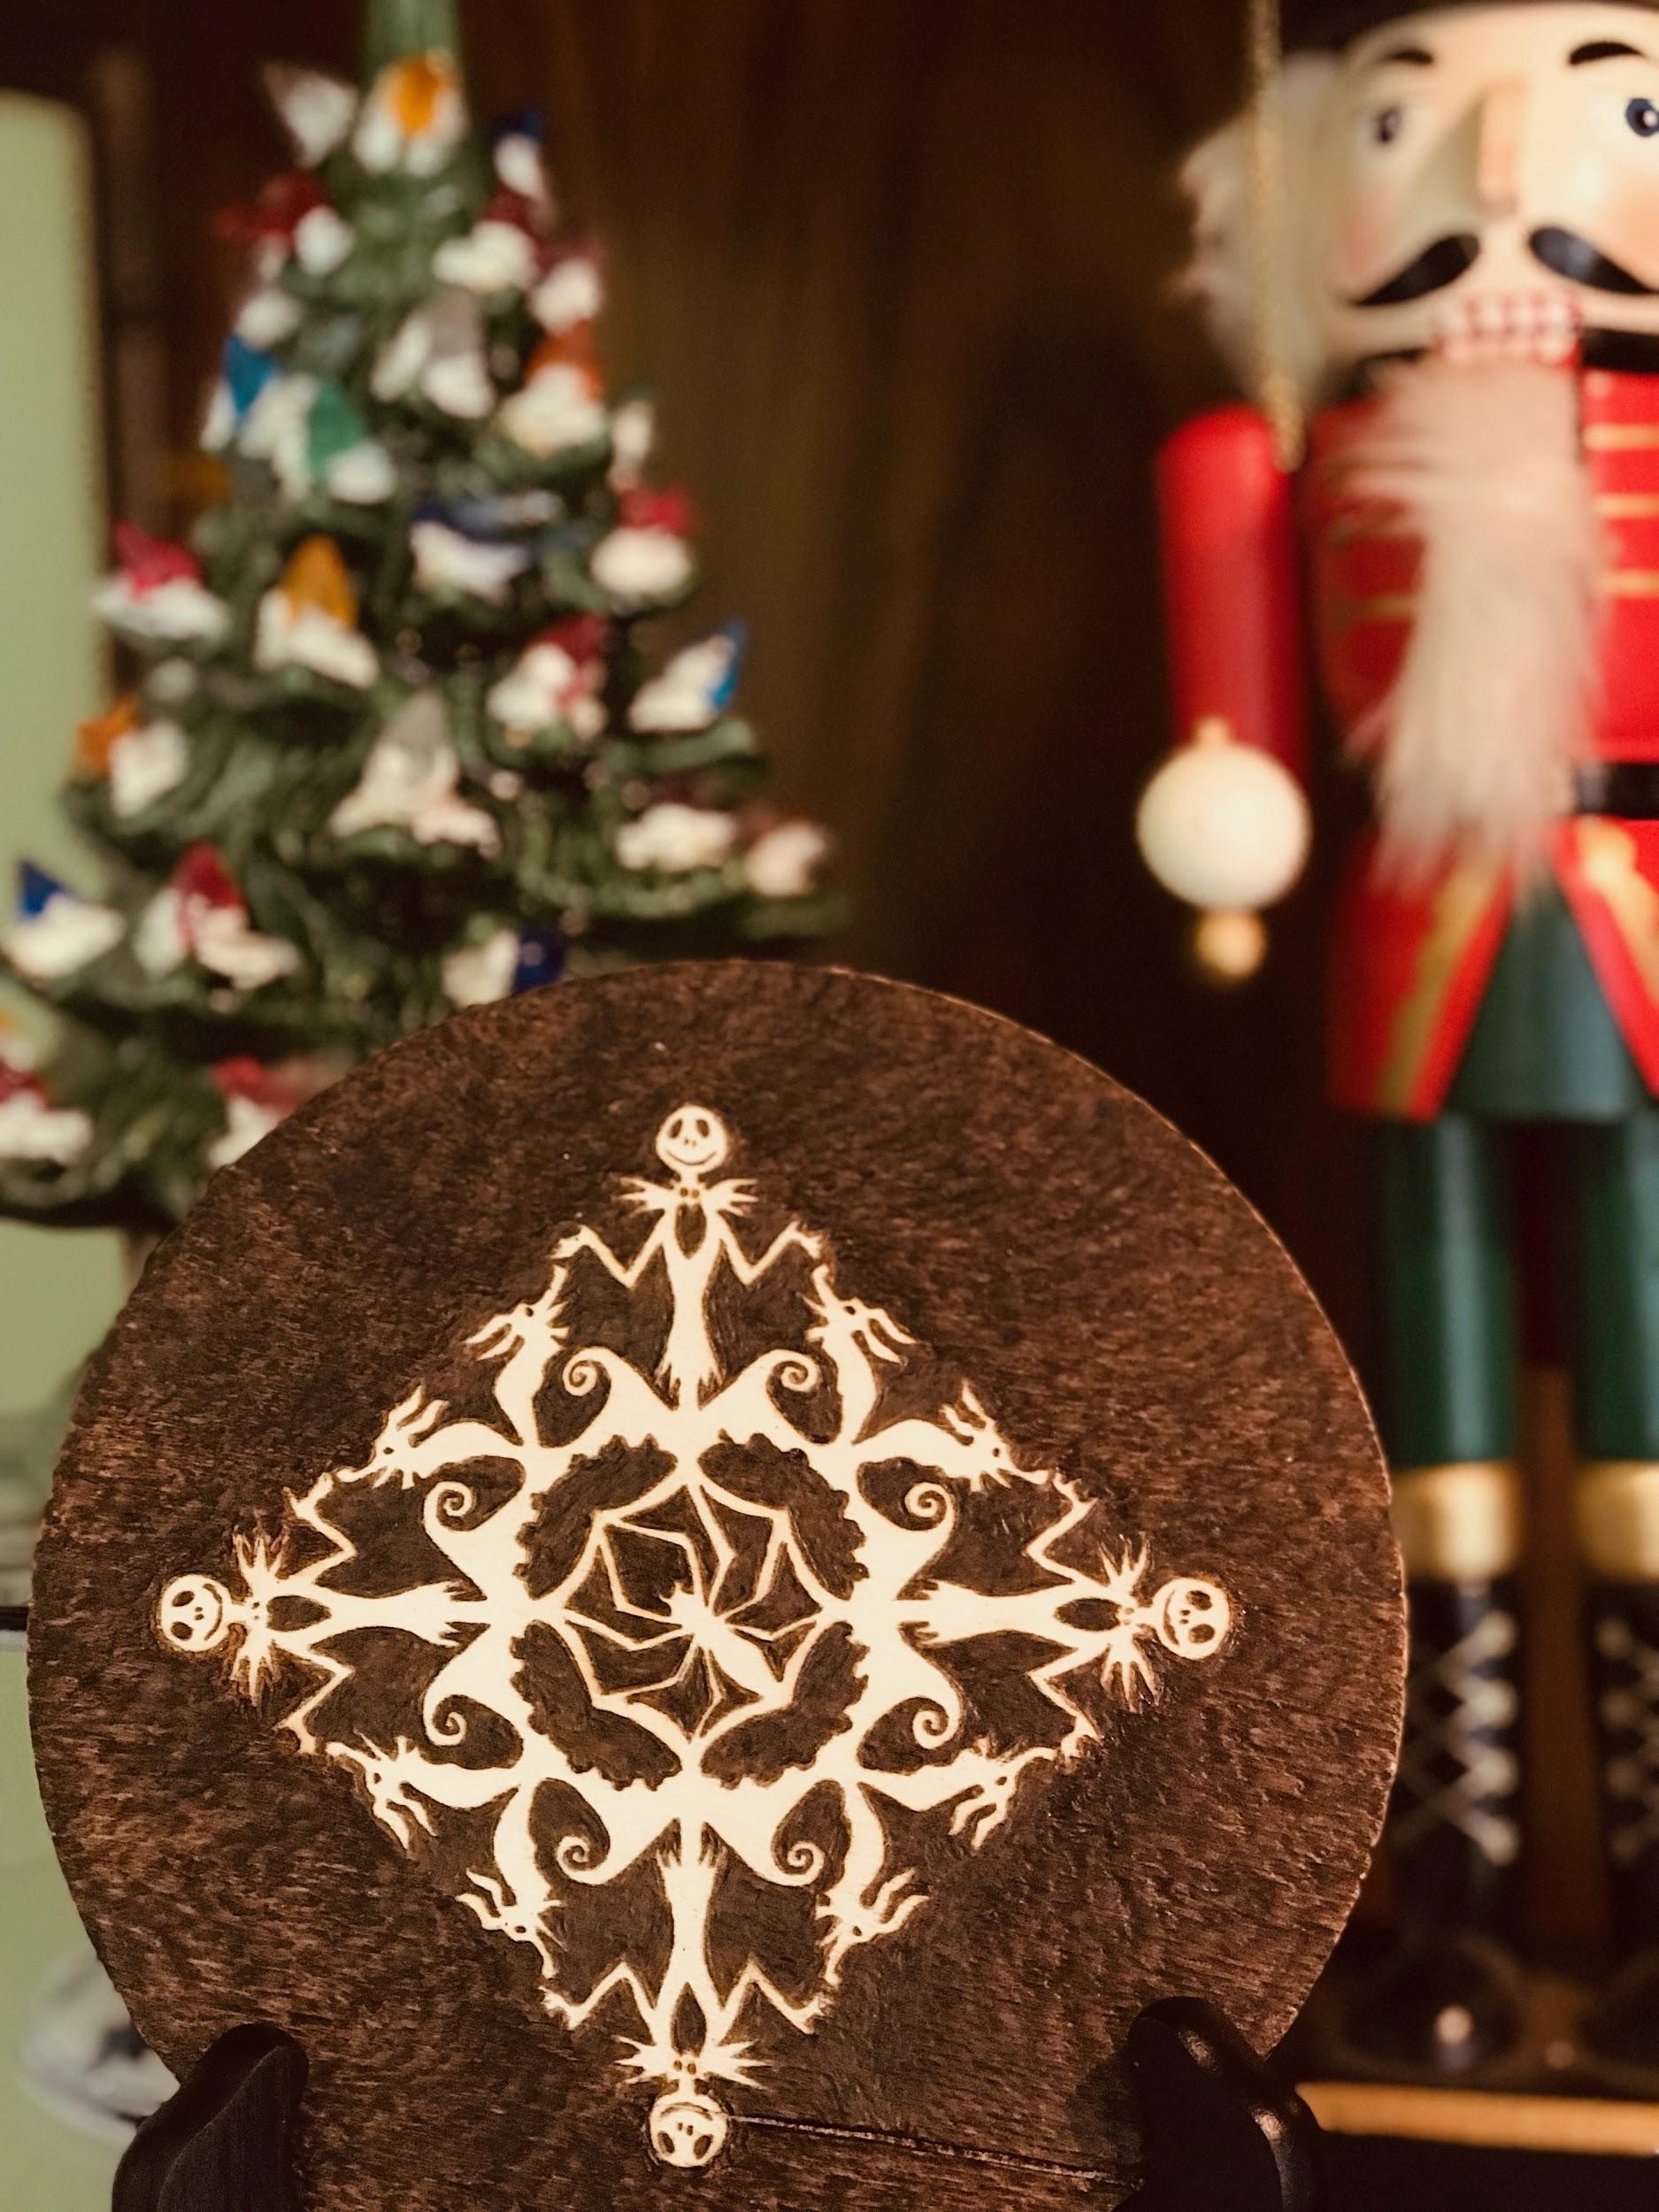
For my sample, I looked online for some clip art images of snowflakes. You can also search for snowflake patterns and find other great images to use.
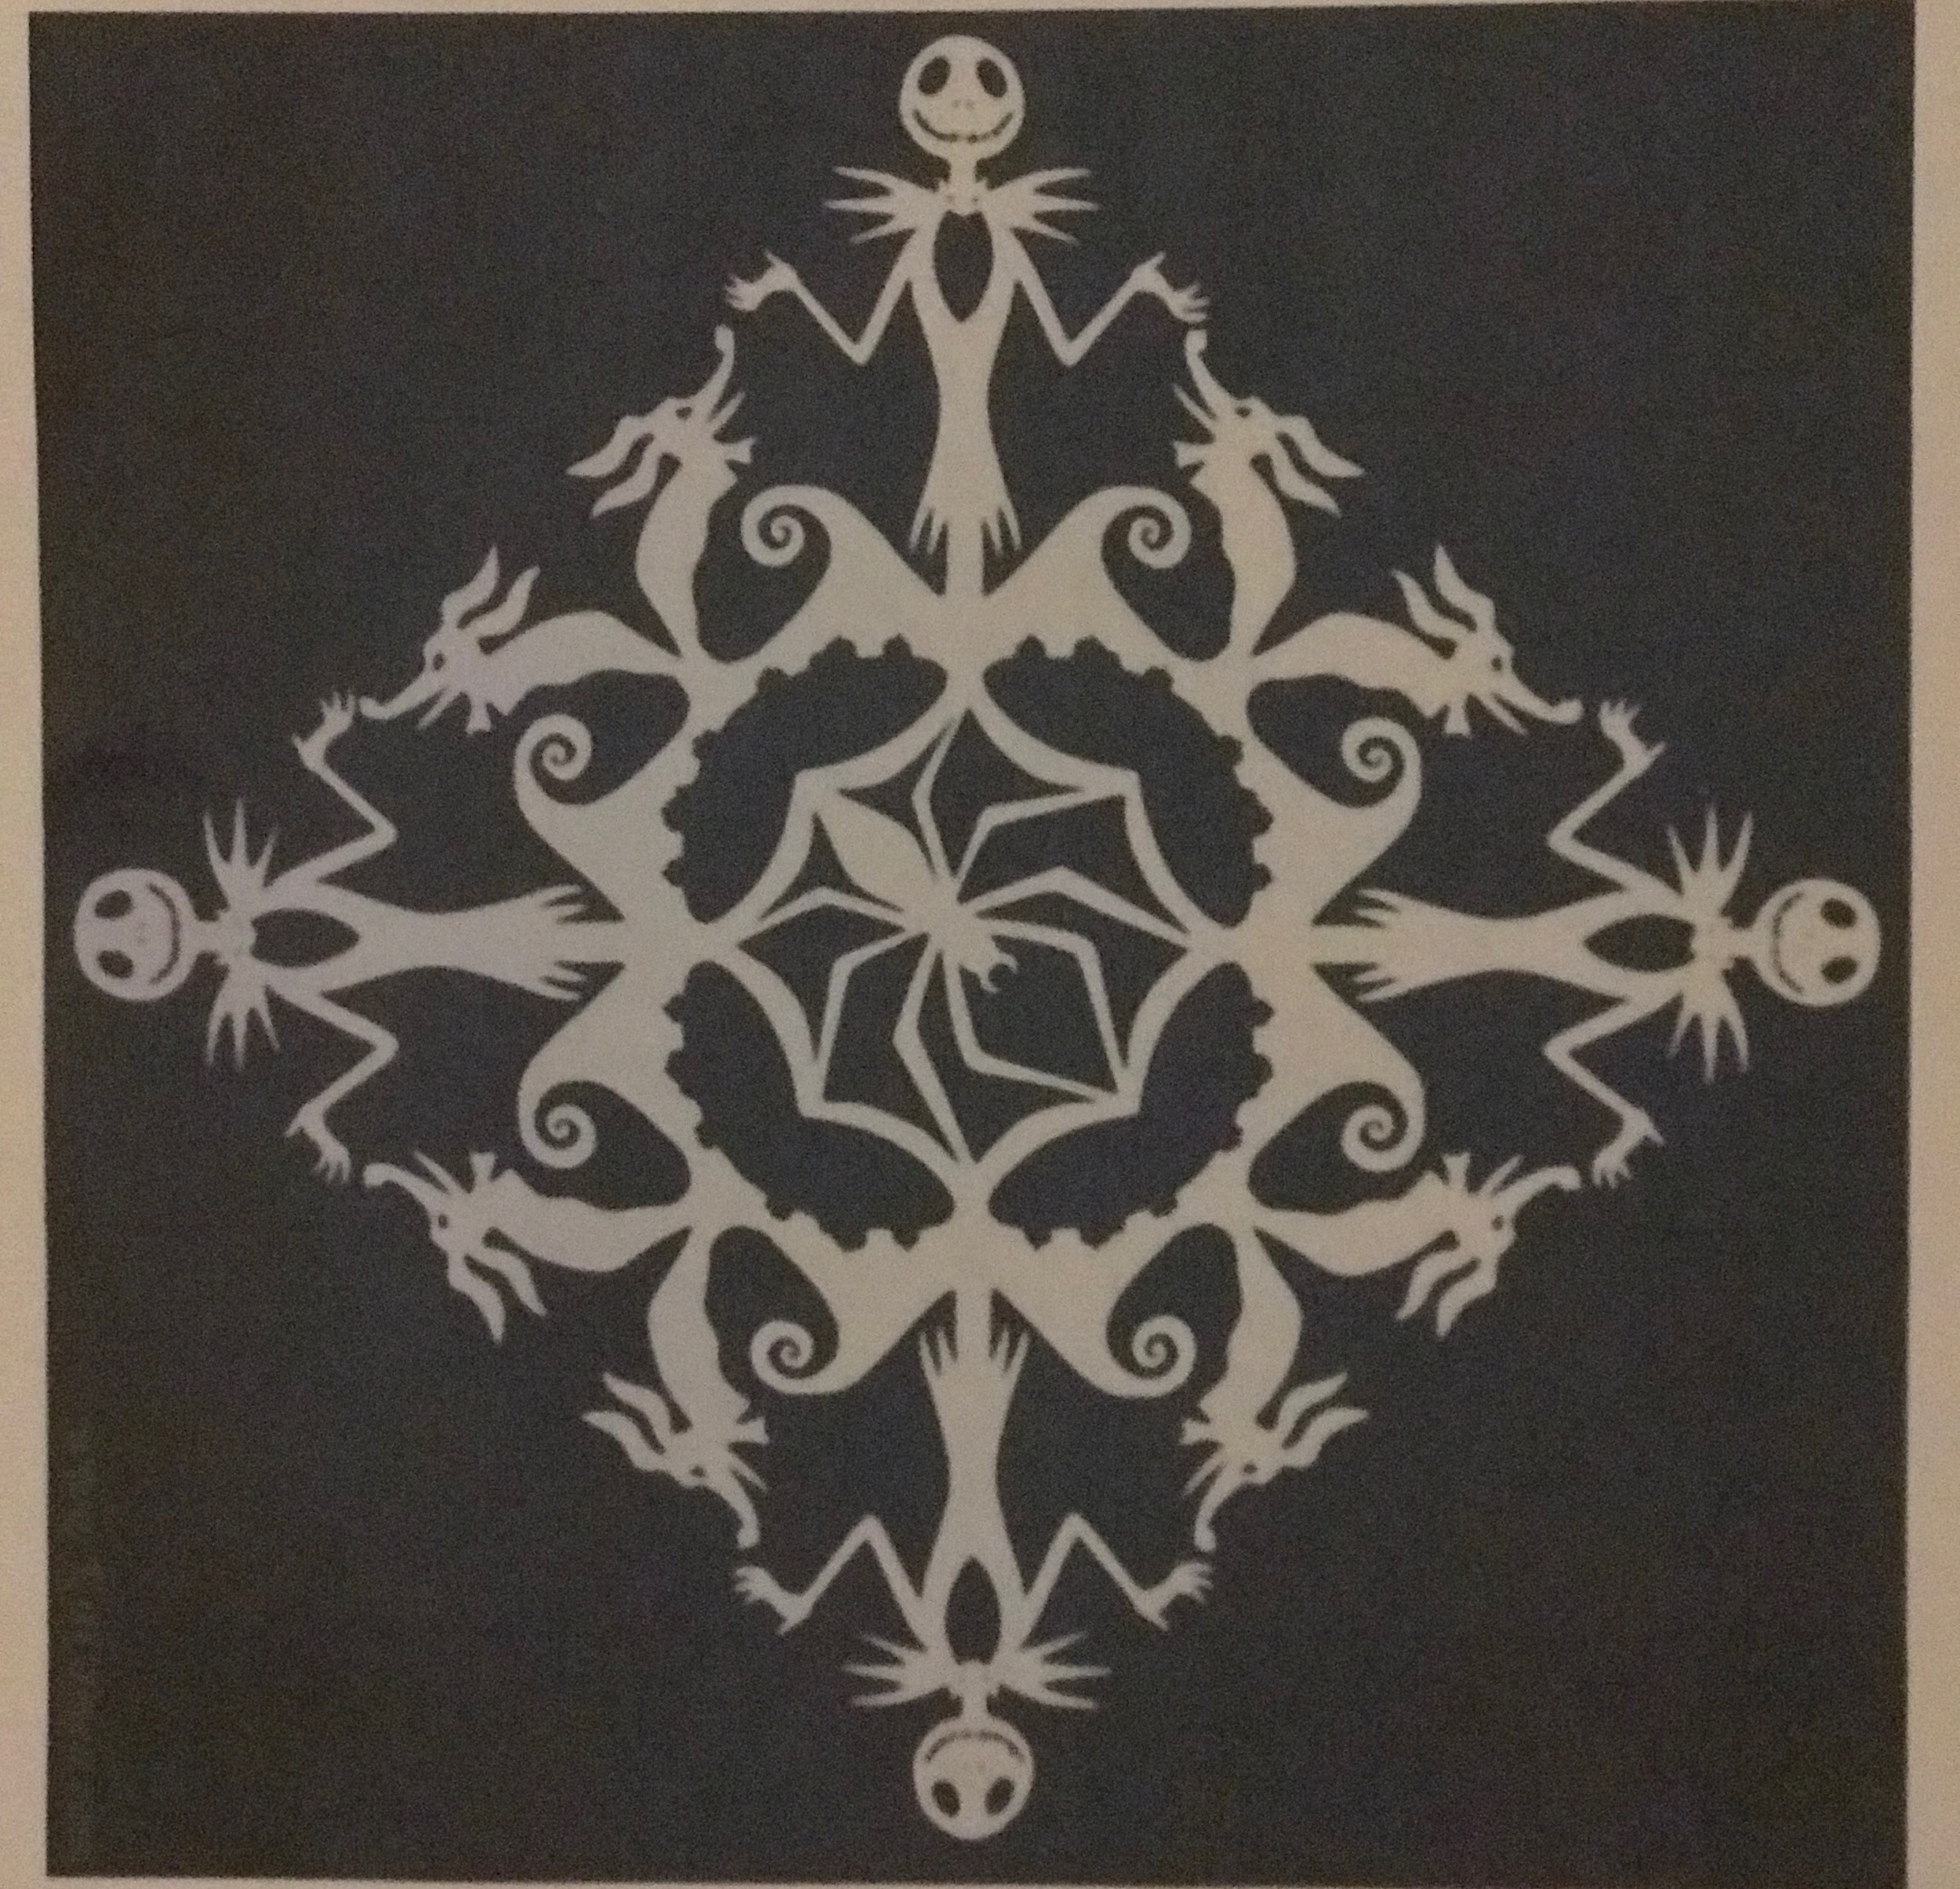
Once you have found your image, transfer the design onto the wood (see my post on Wood Burning Tutorial for instructions on how to do this).
There are two ways you can burn this image.
Option 1: You can burn the actual design and leave the background bare
Option 2: You can burn the background and leave the actual design untouched
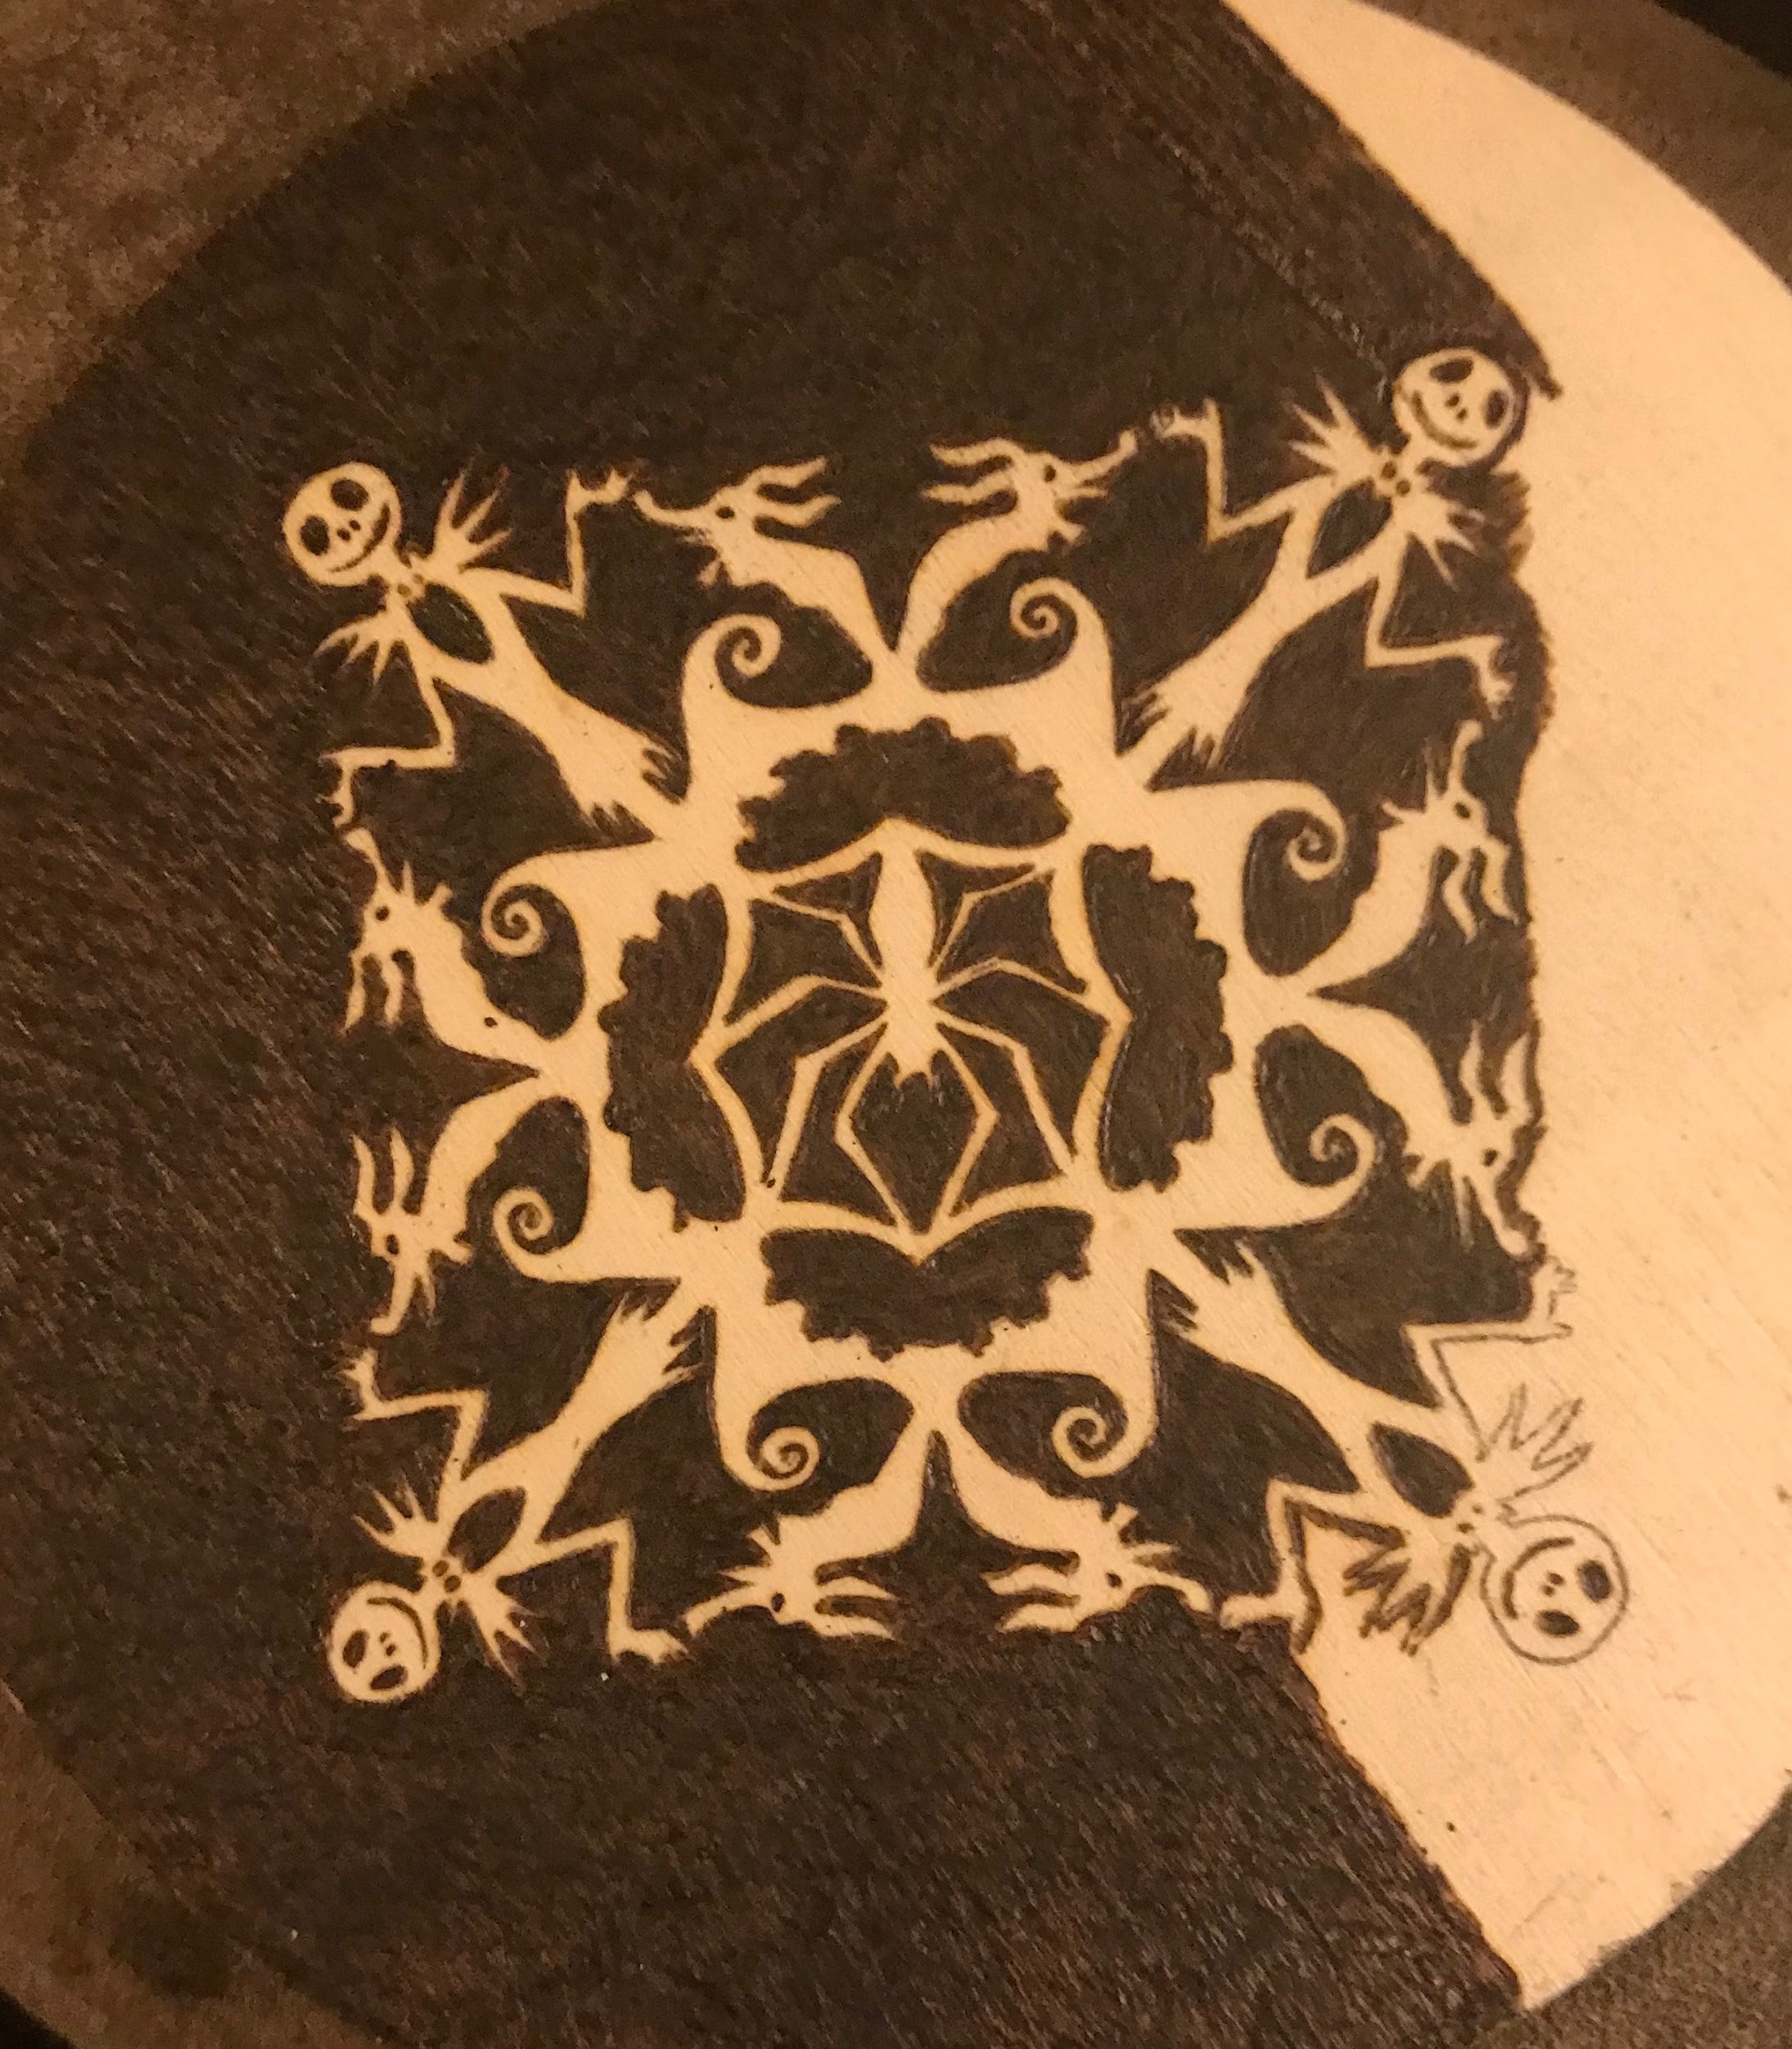
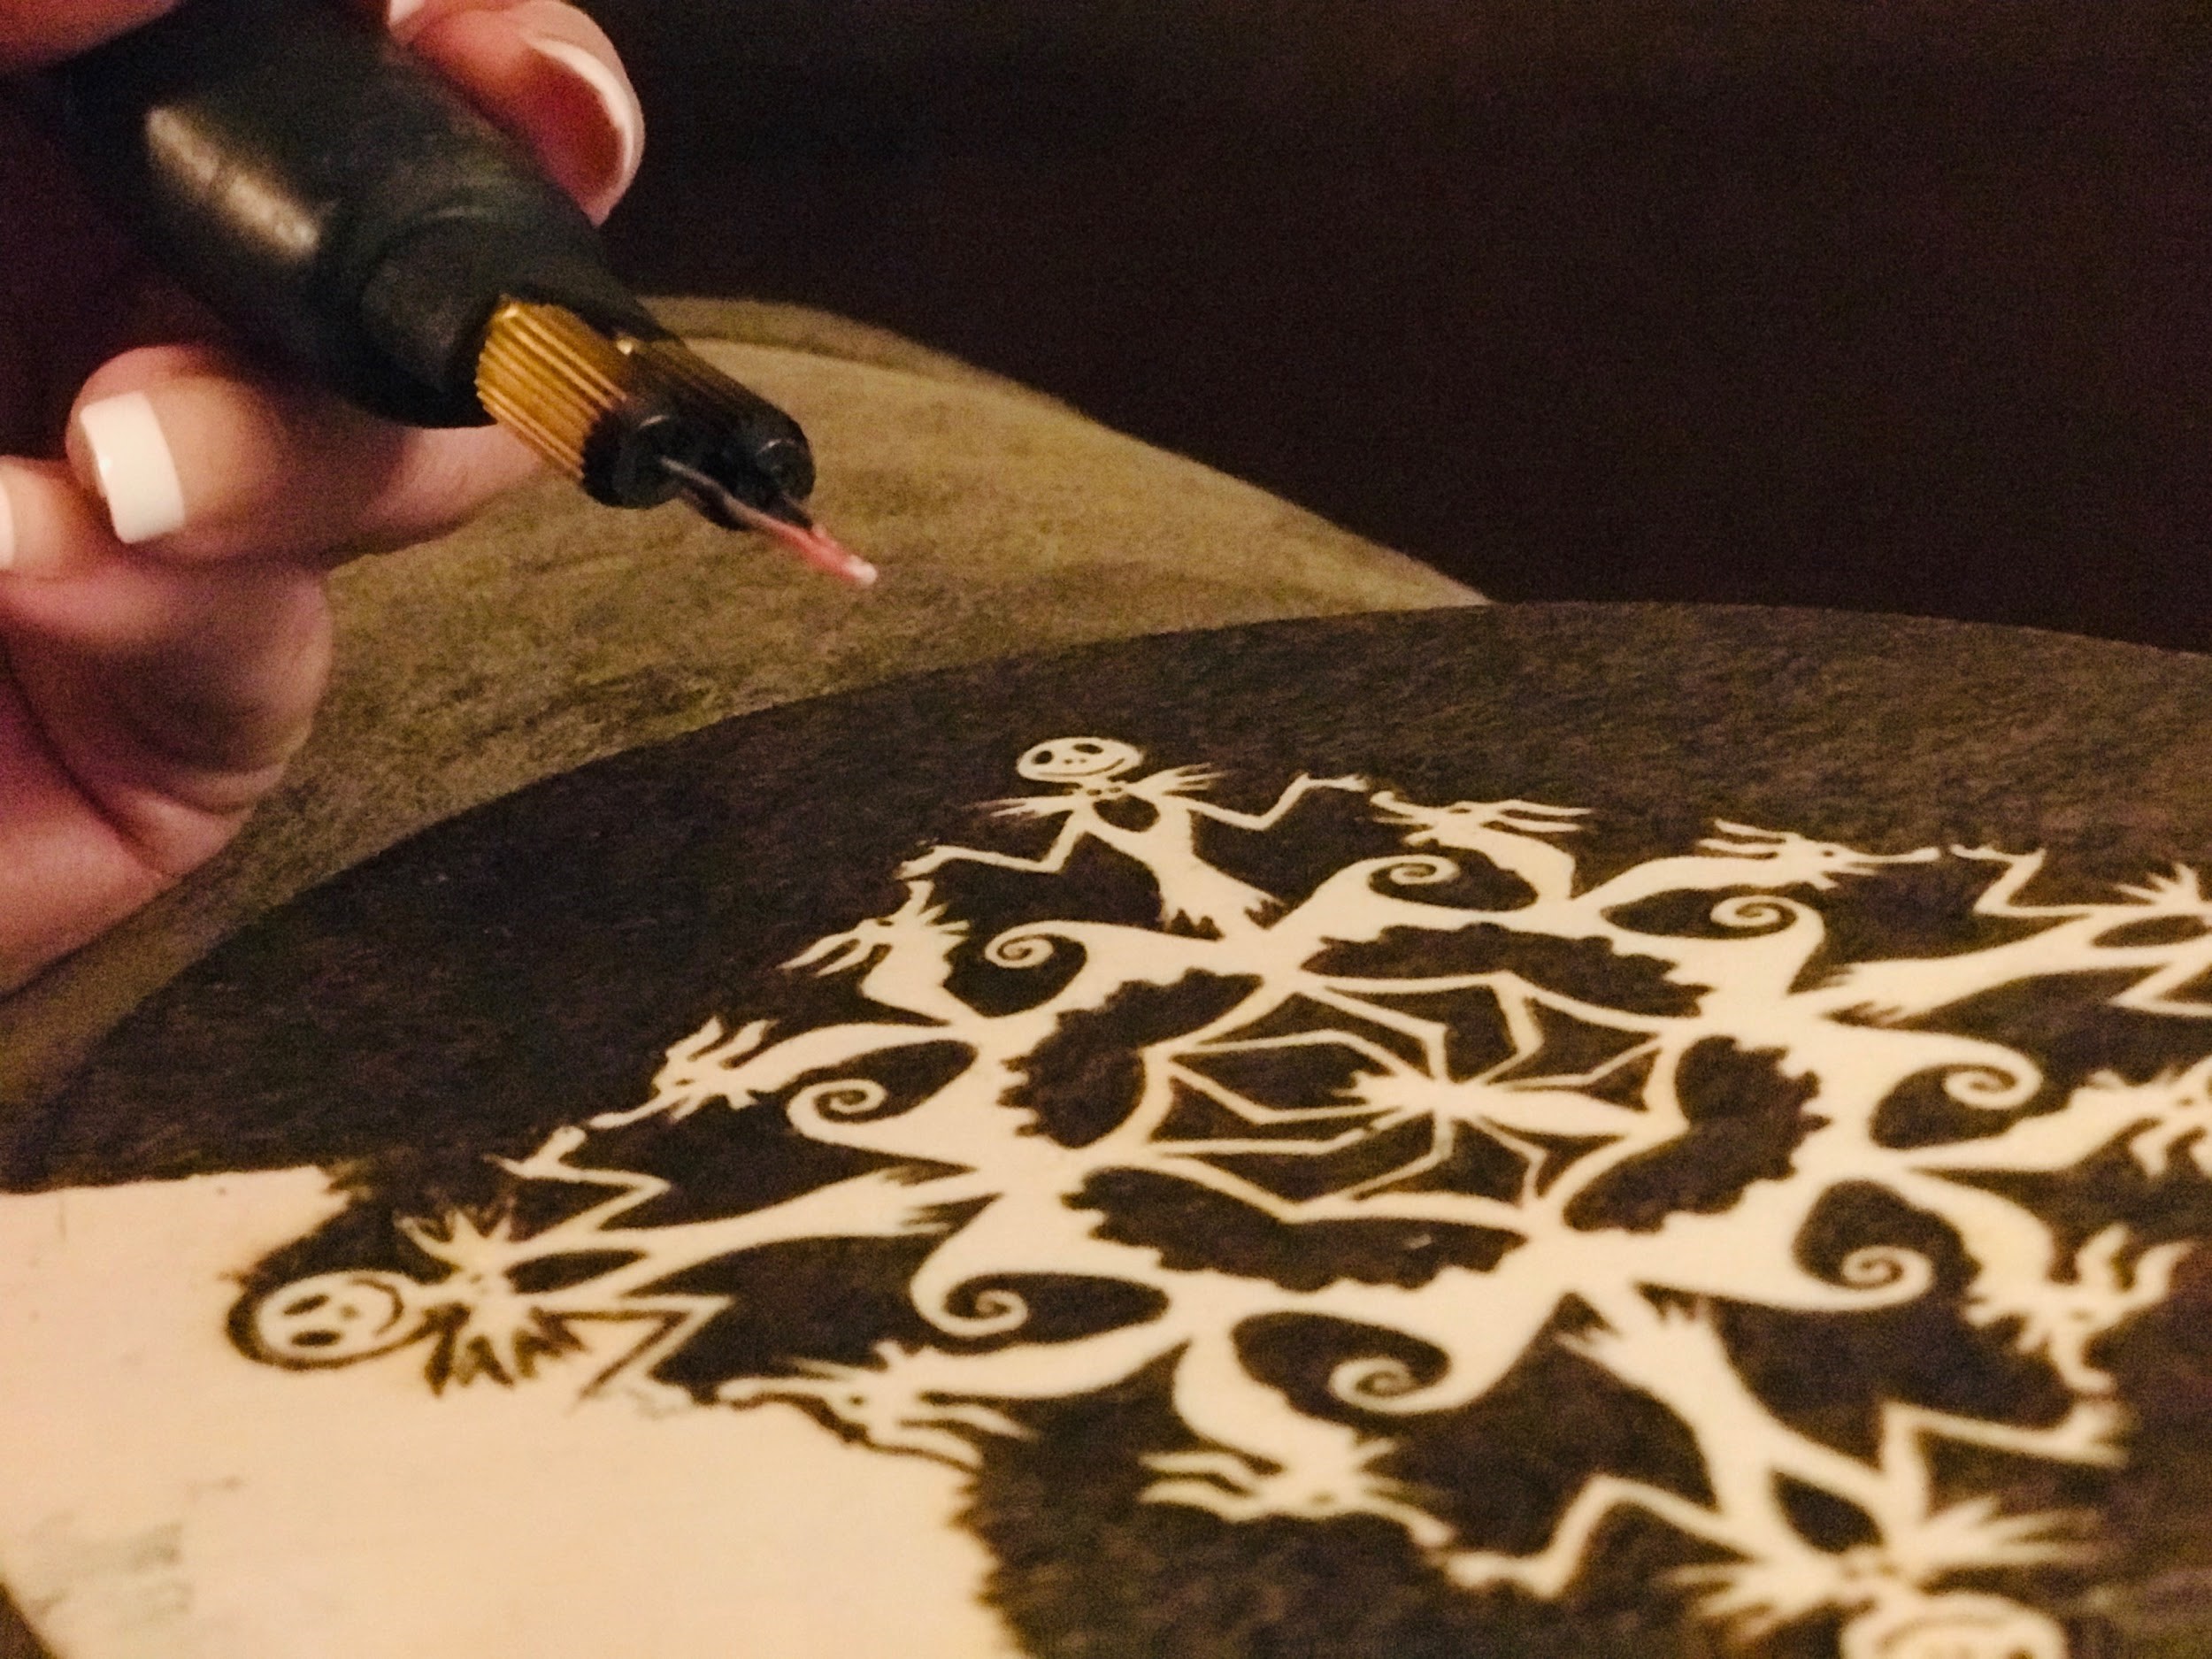

Once you are done with your burning, erase any tracing lines, stain (if needed) and varnish.
With pyrography, your handmade gifts can have the appearance of a store-bought, detailed piece but will be treasured by your loved ones for years to come.
I hope these tips have helped and that some of my ideas have inspired you to create the perfect gift.
Lastly, I hope you all enjoy the holidays! See you next time.
Andrea Pate
Pate’s Pyrography
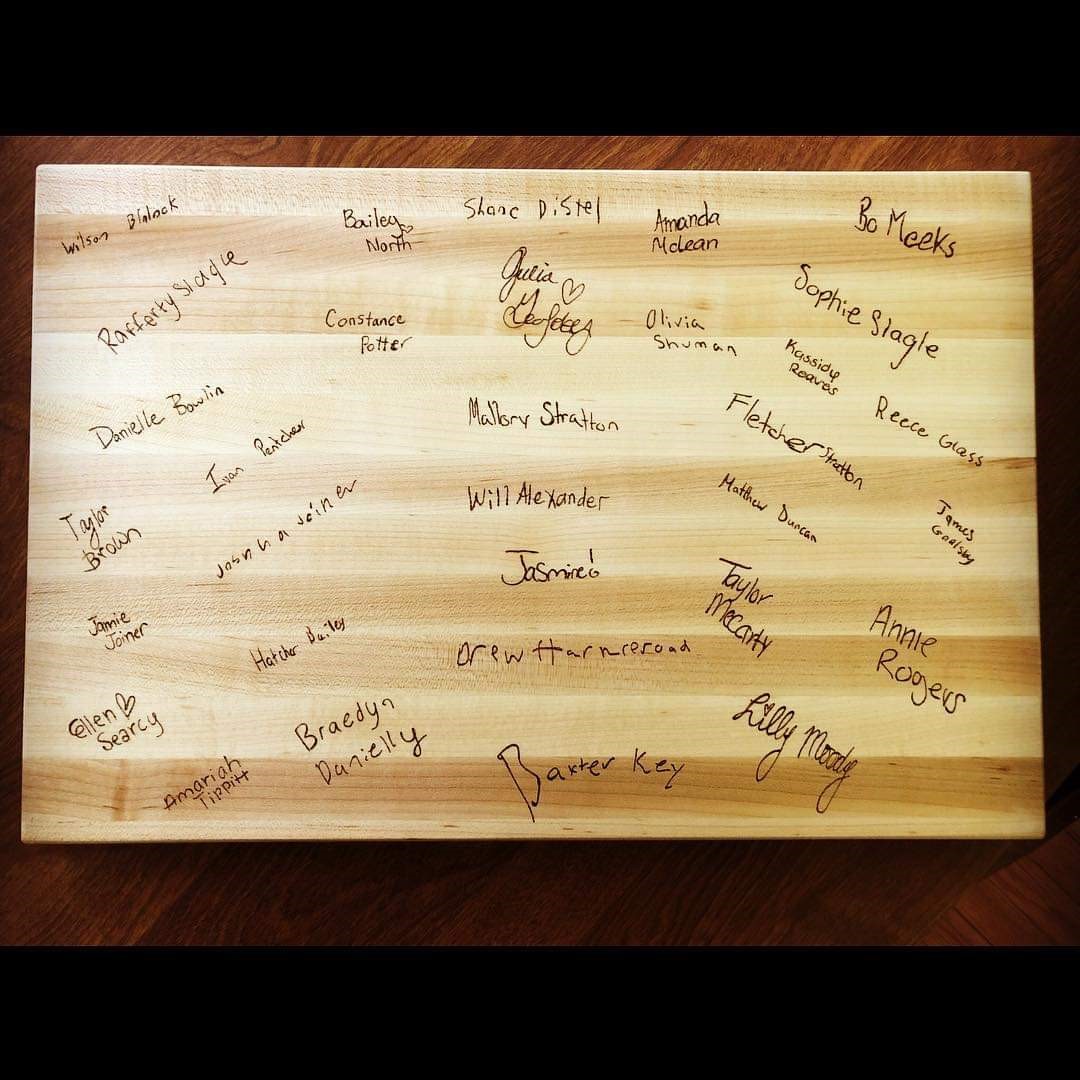
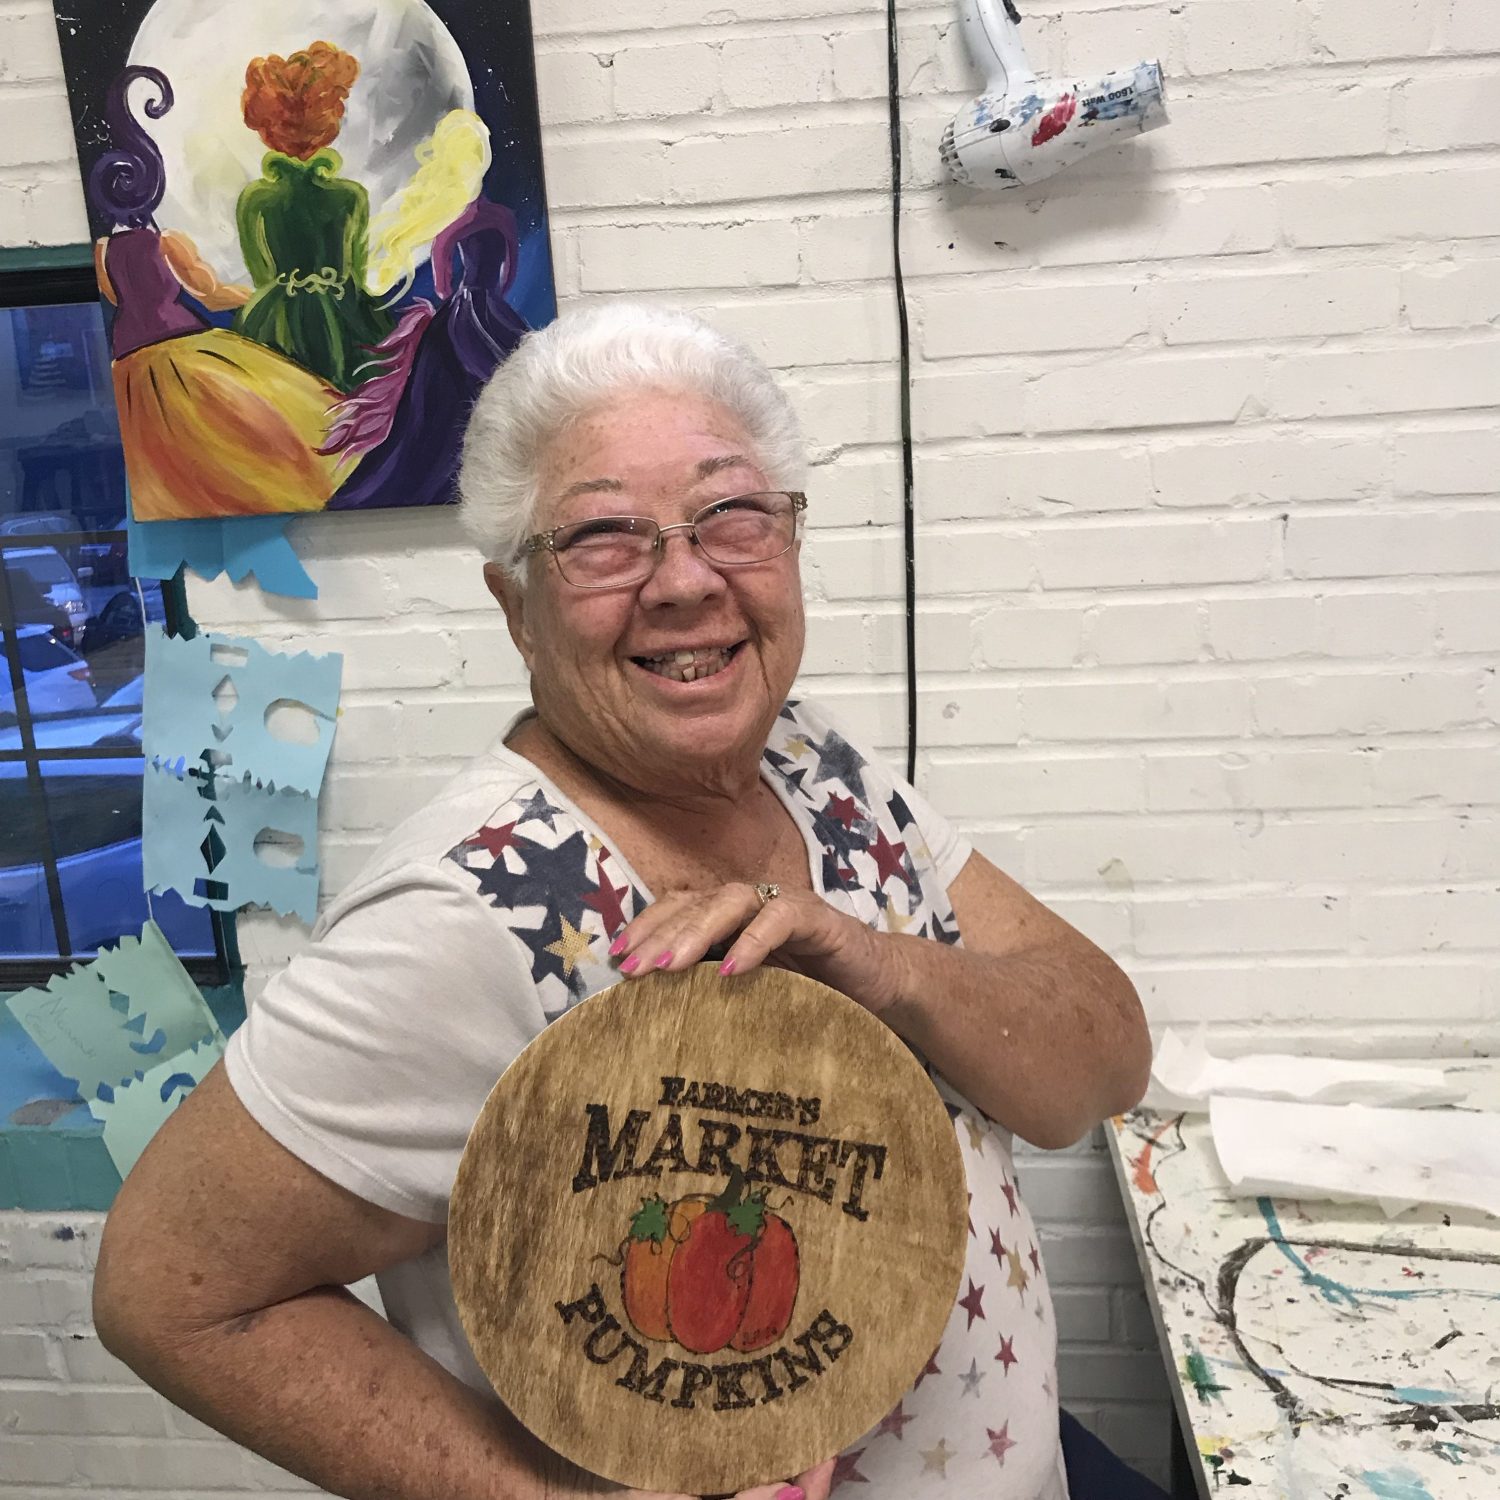
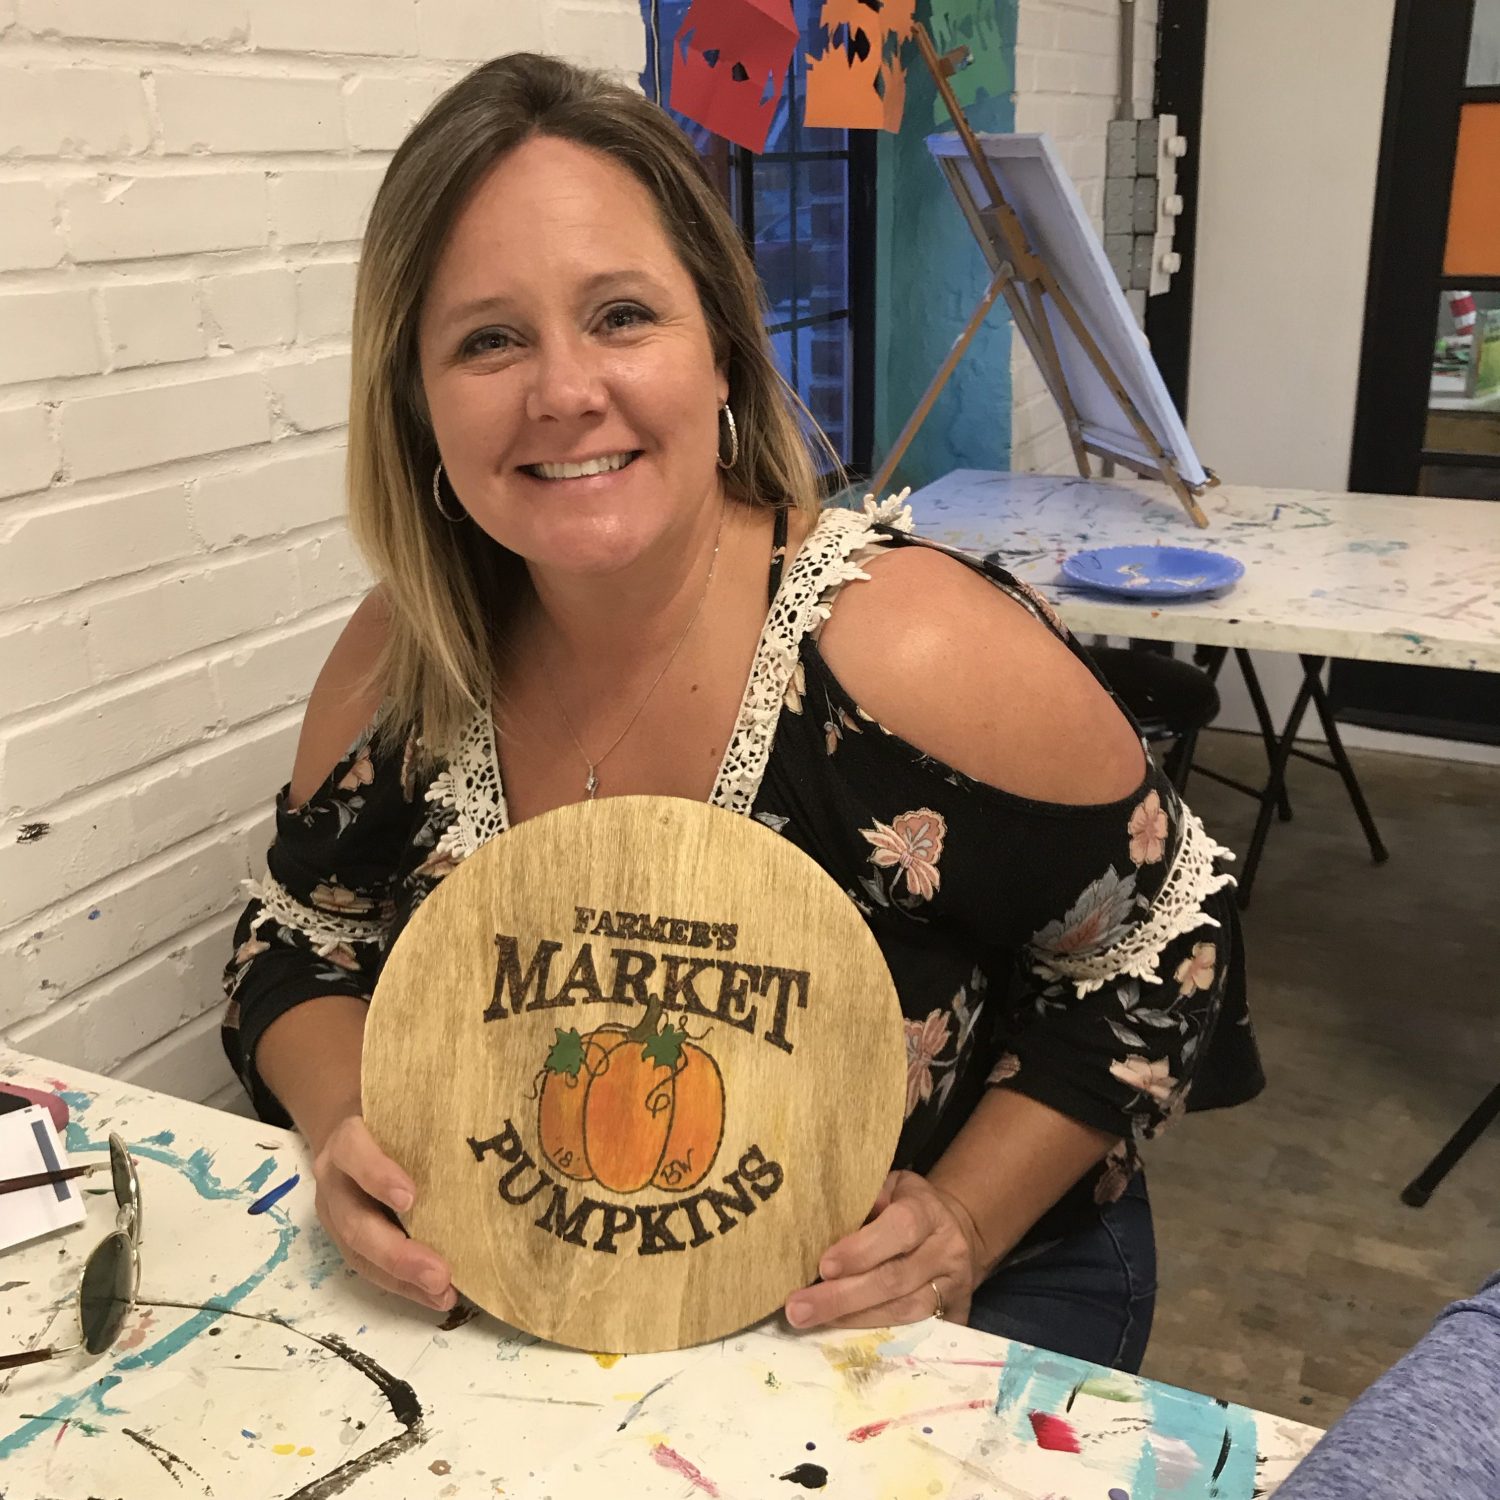
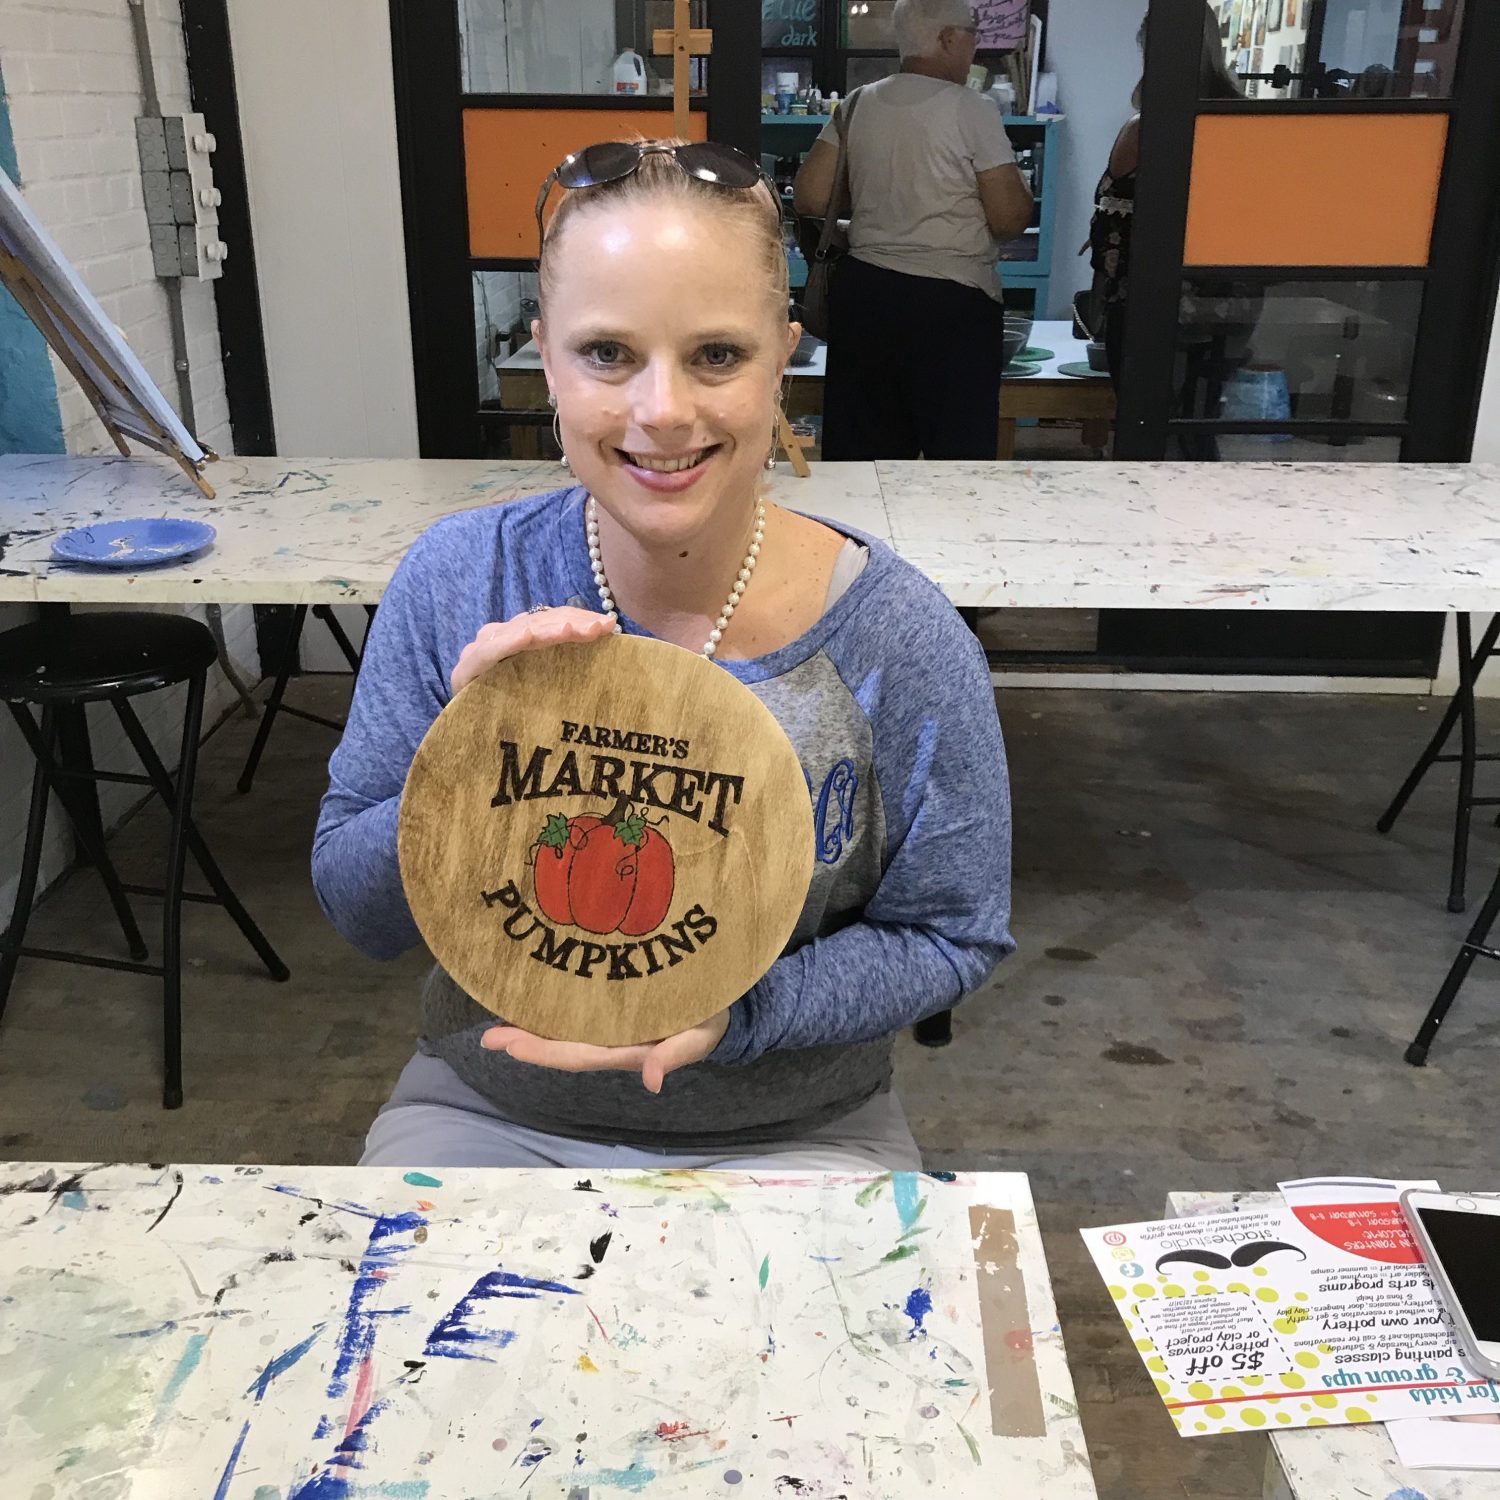
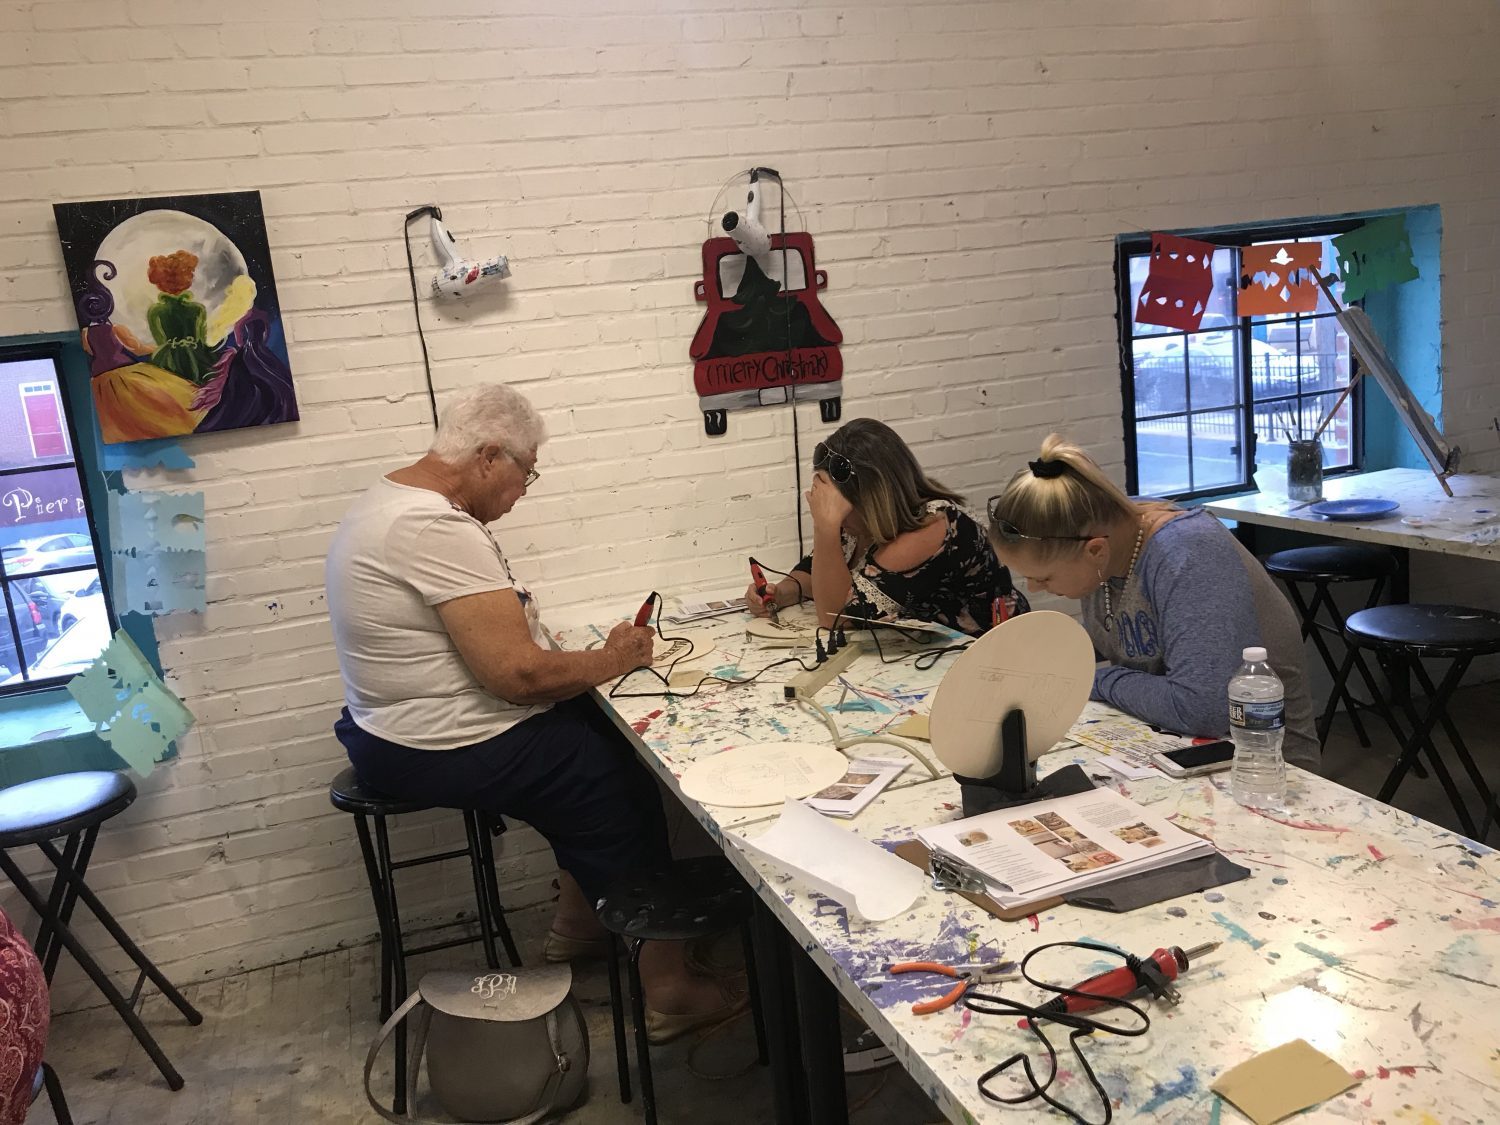
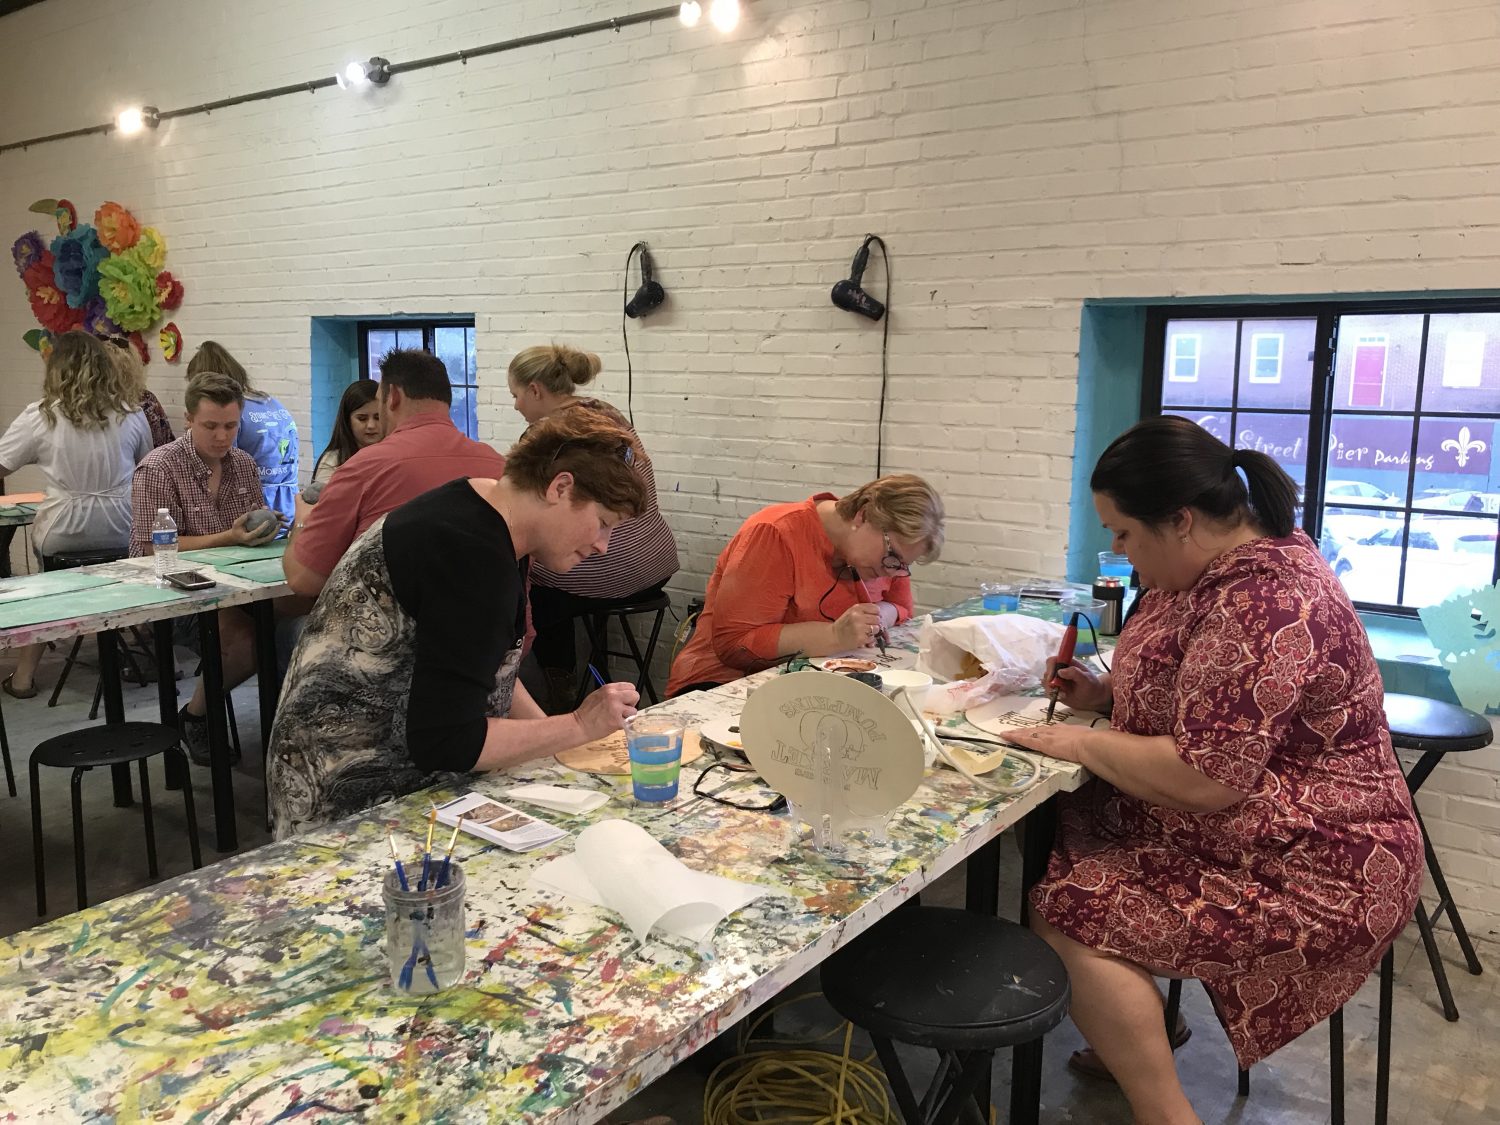
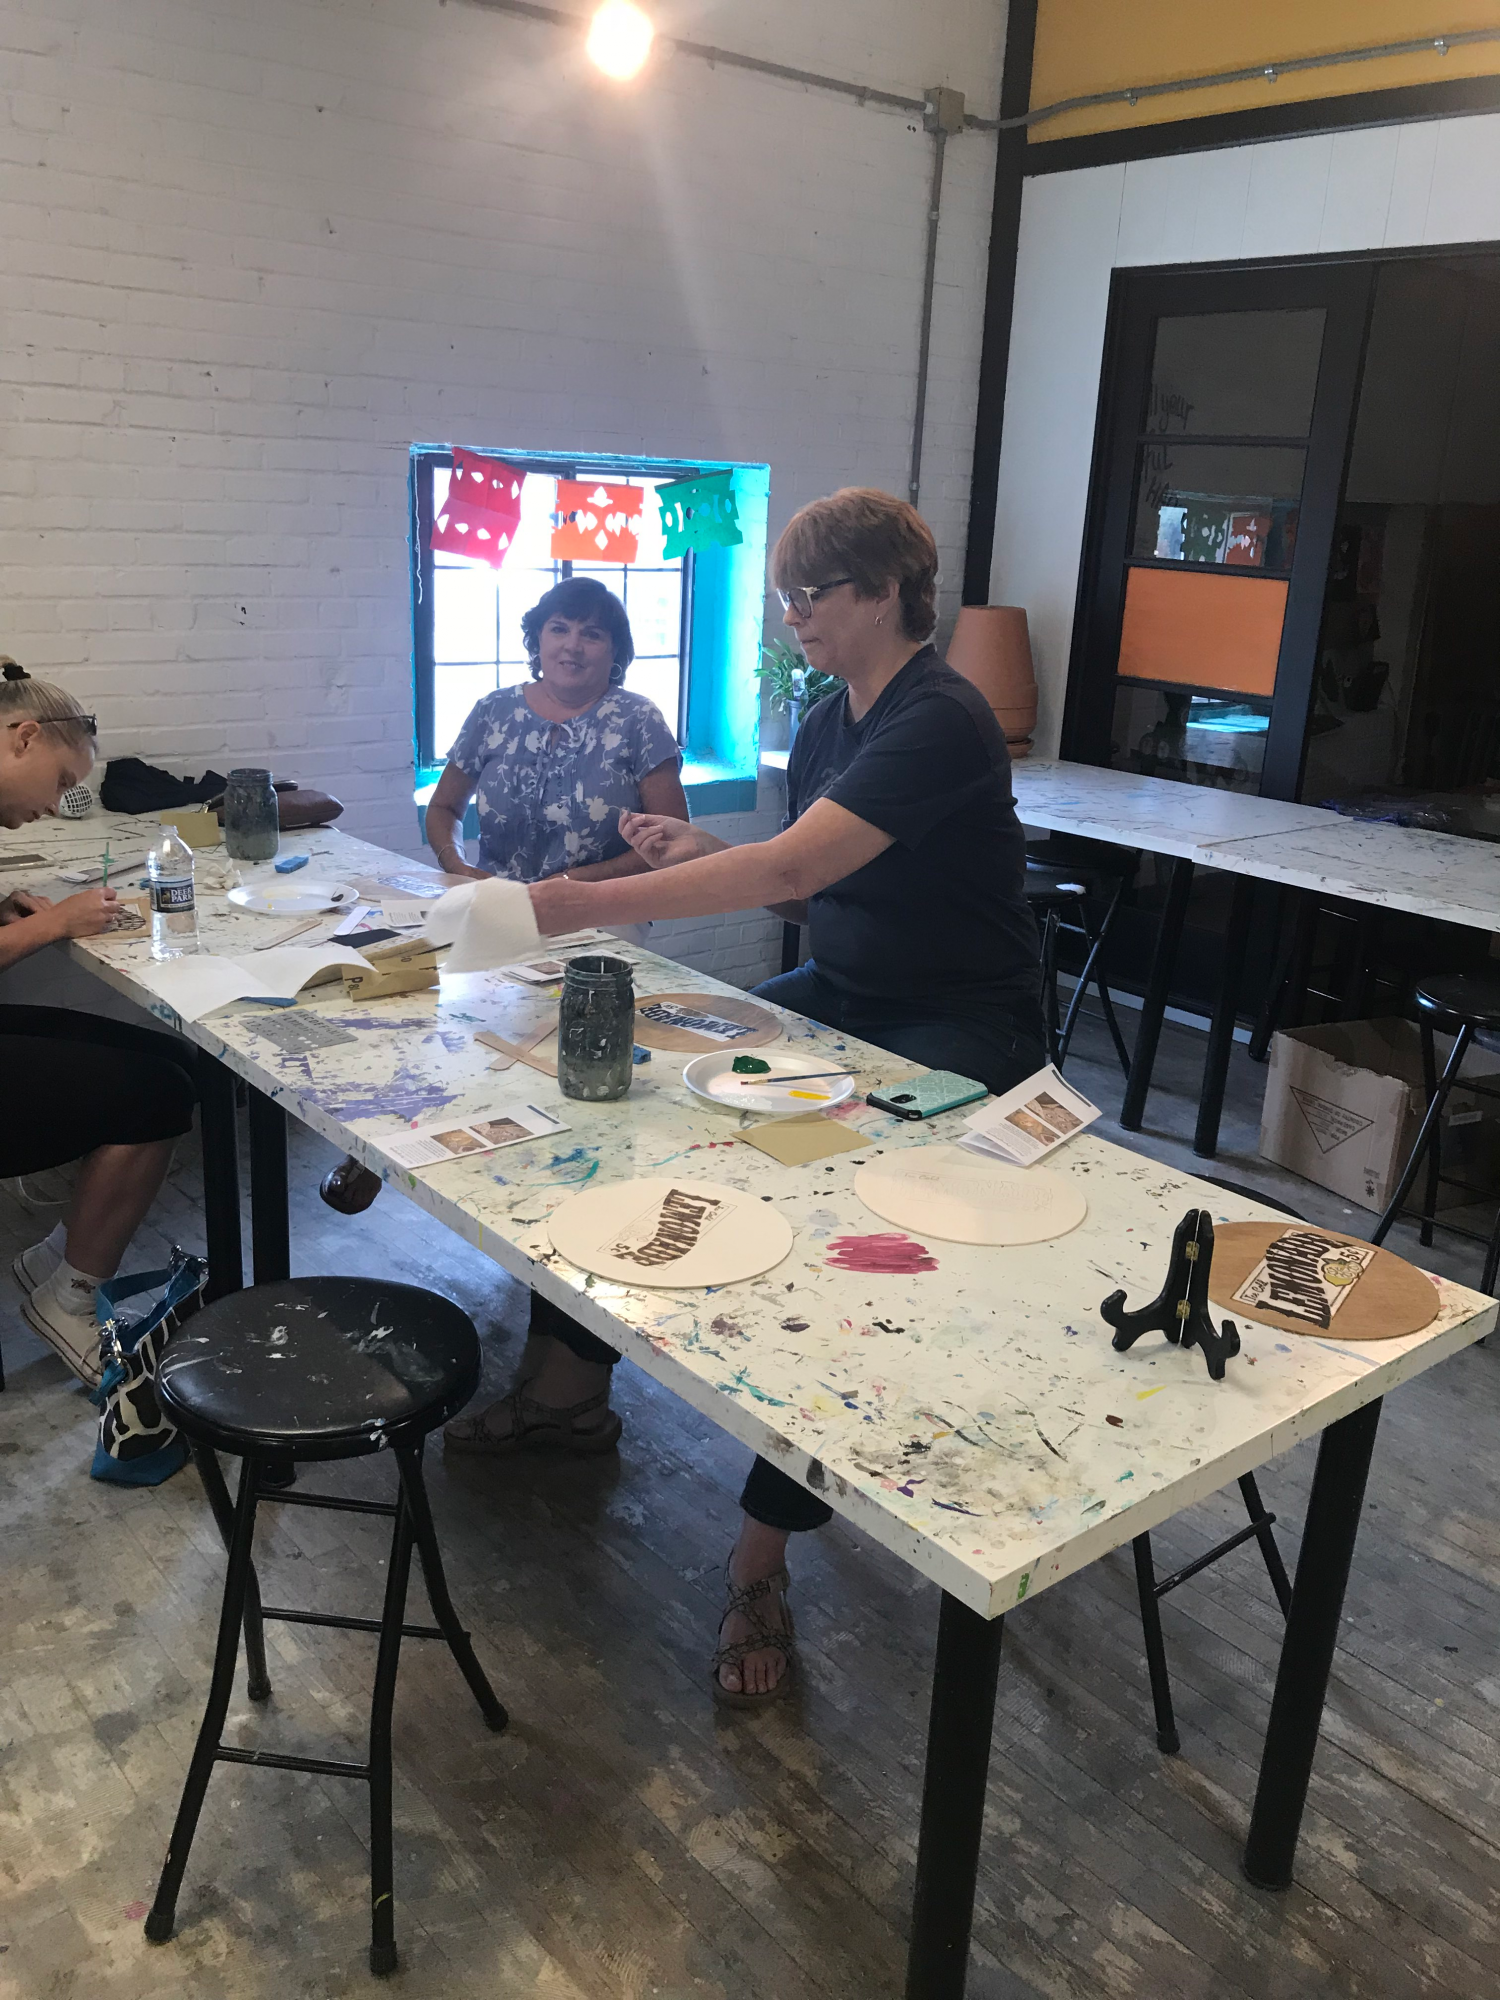
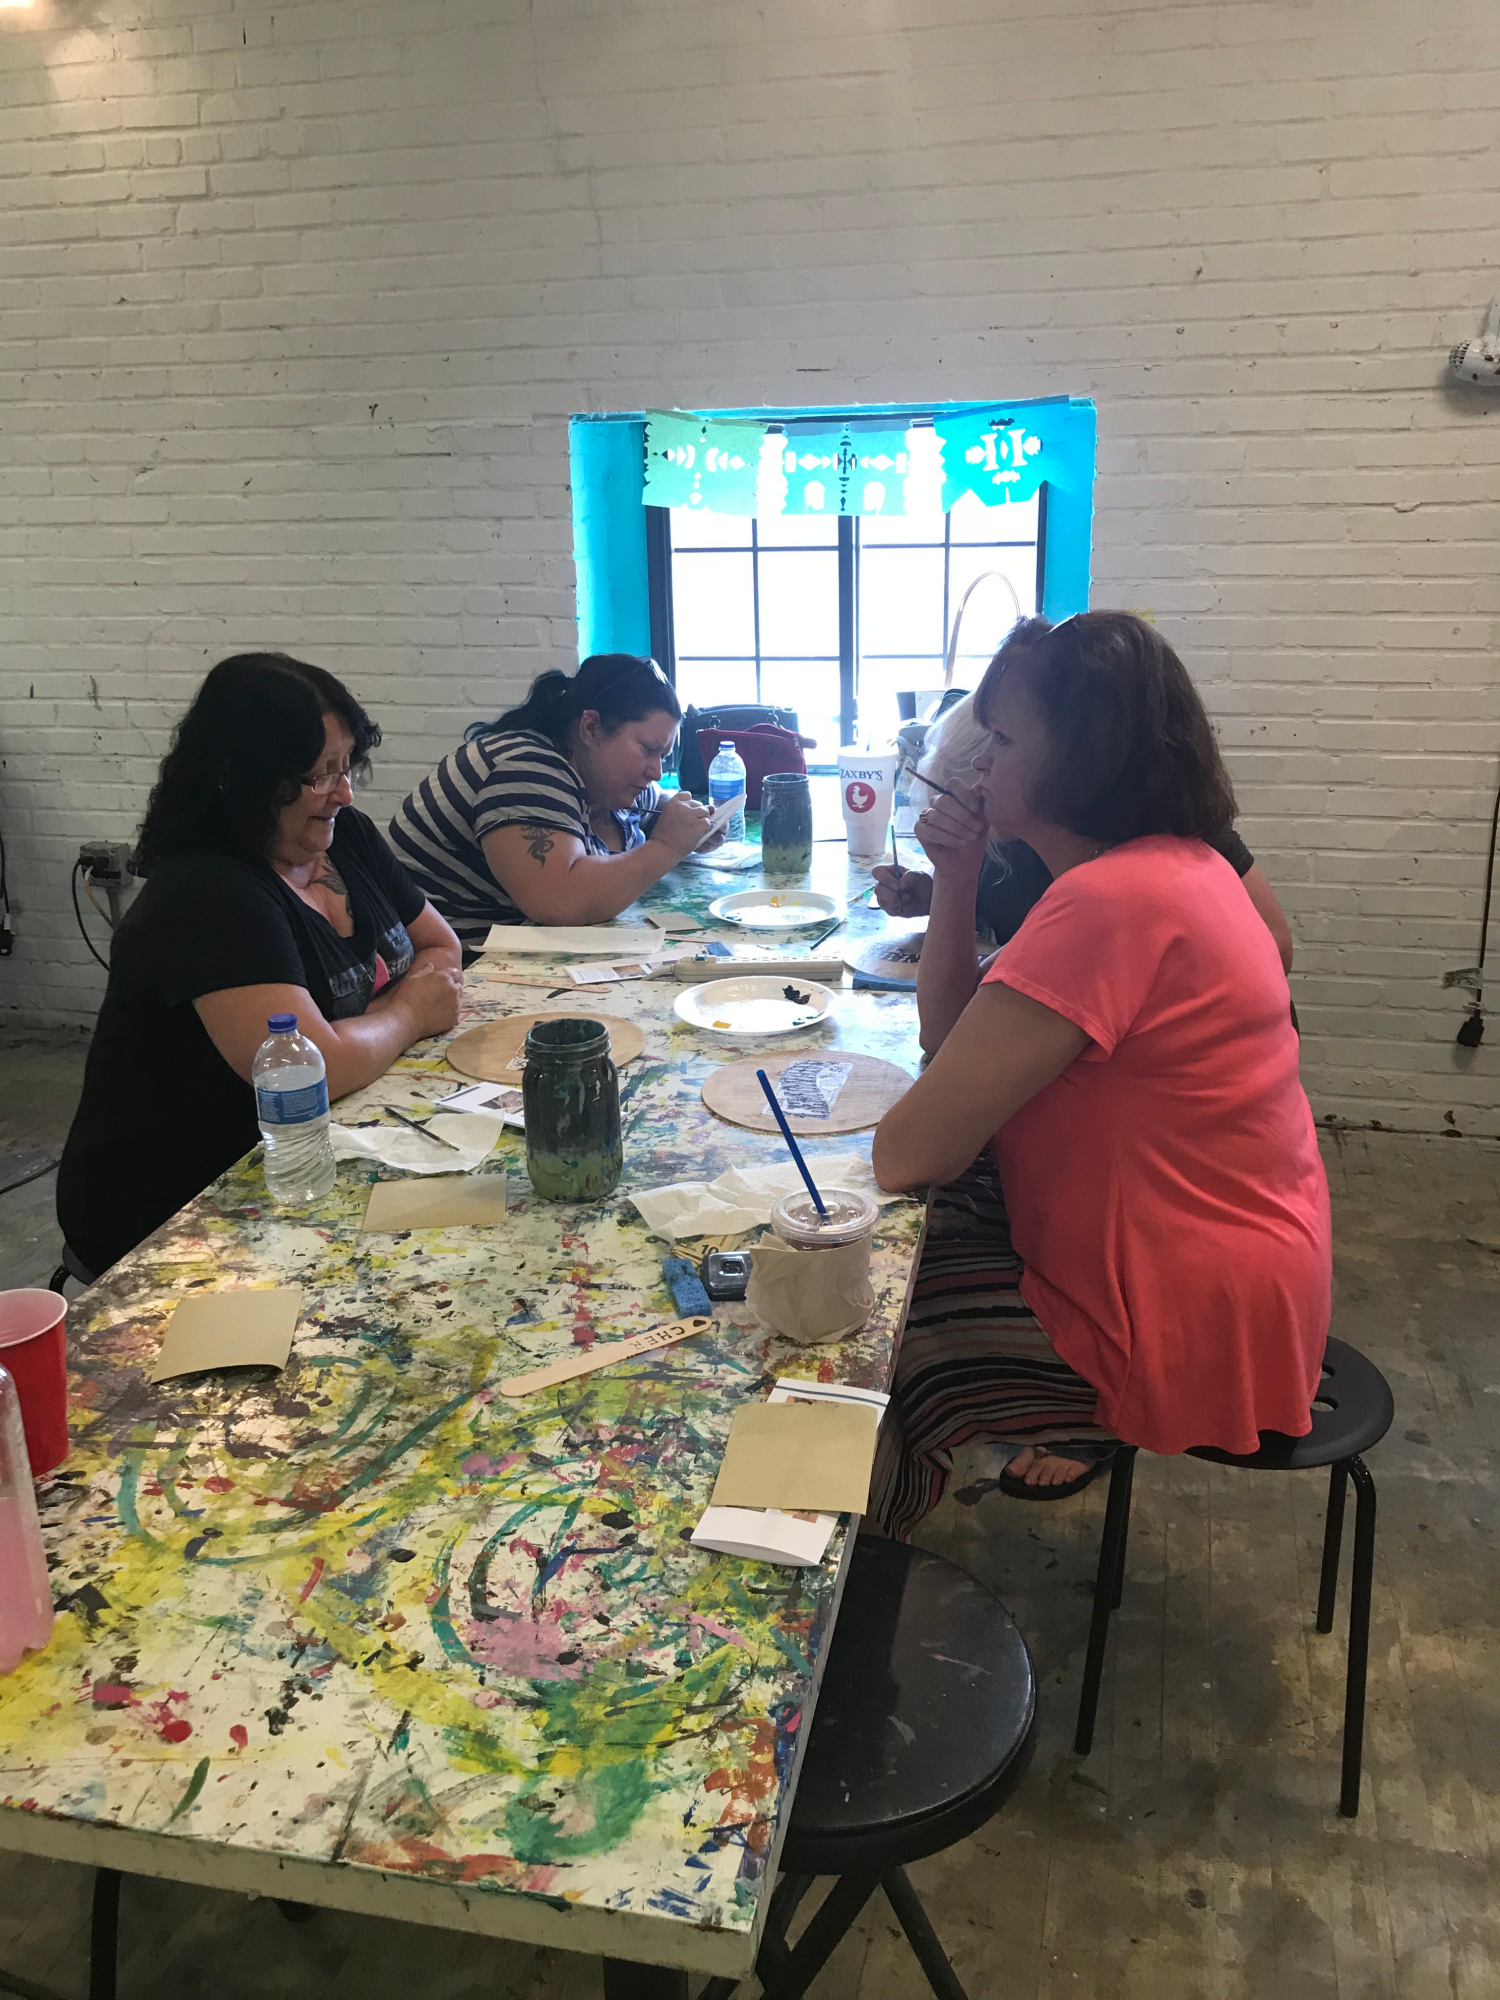
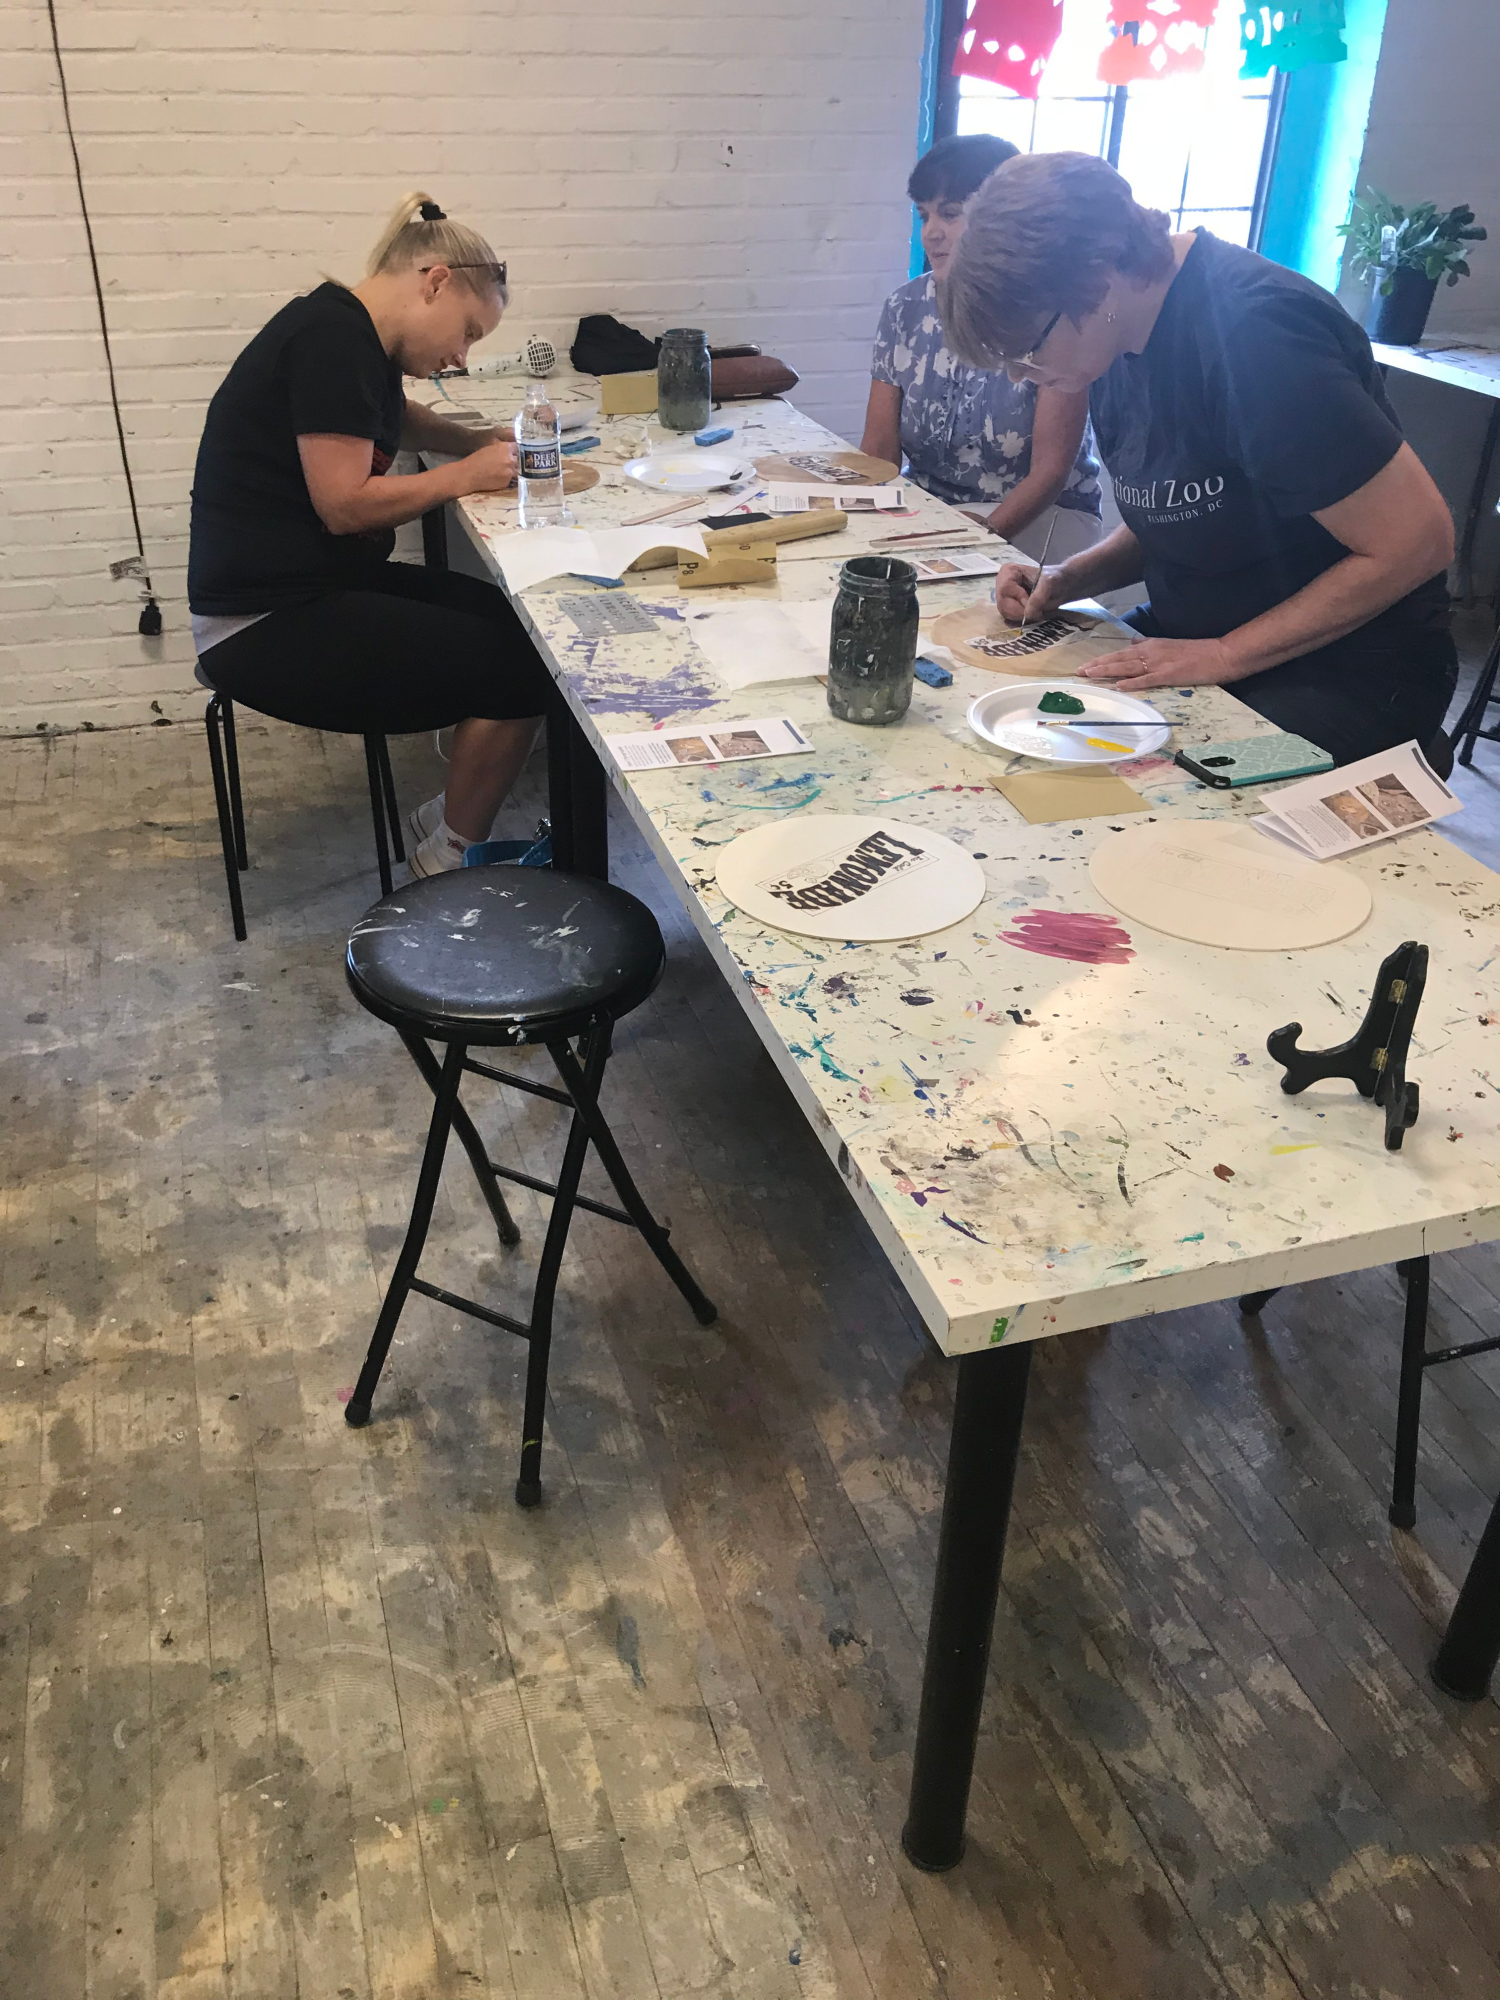
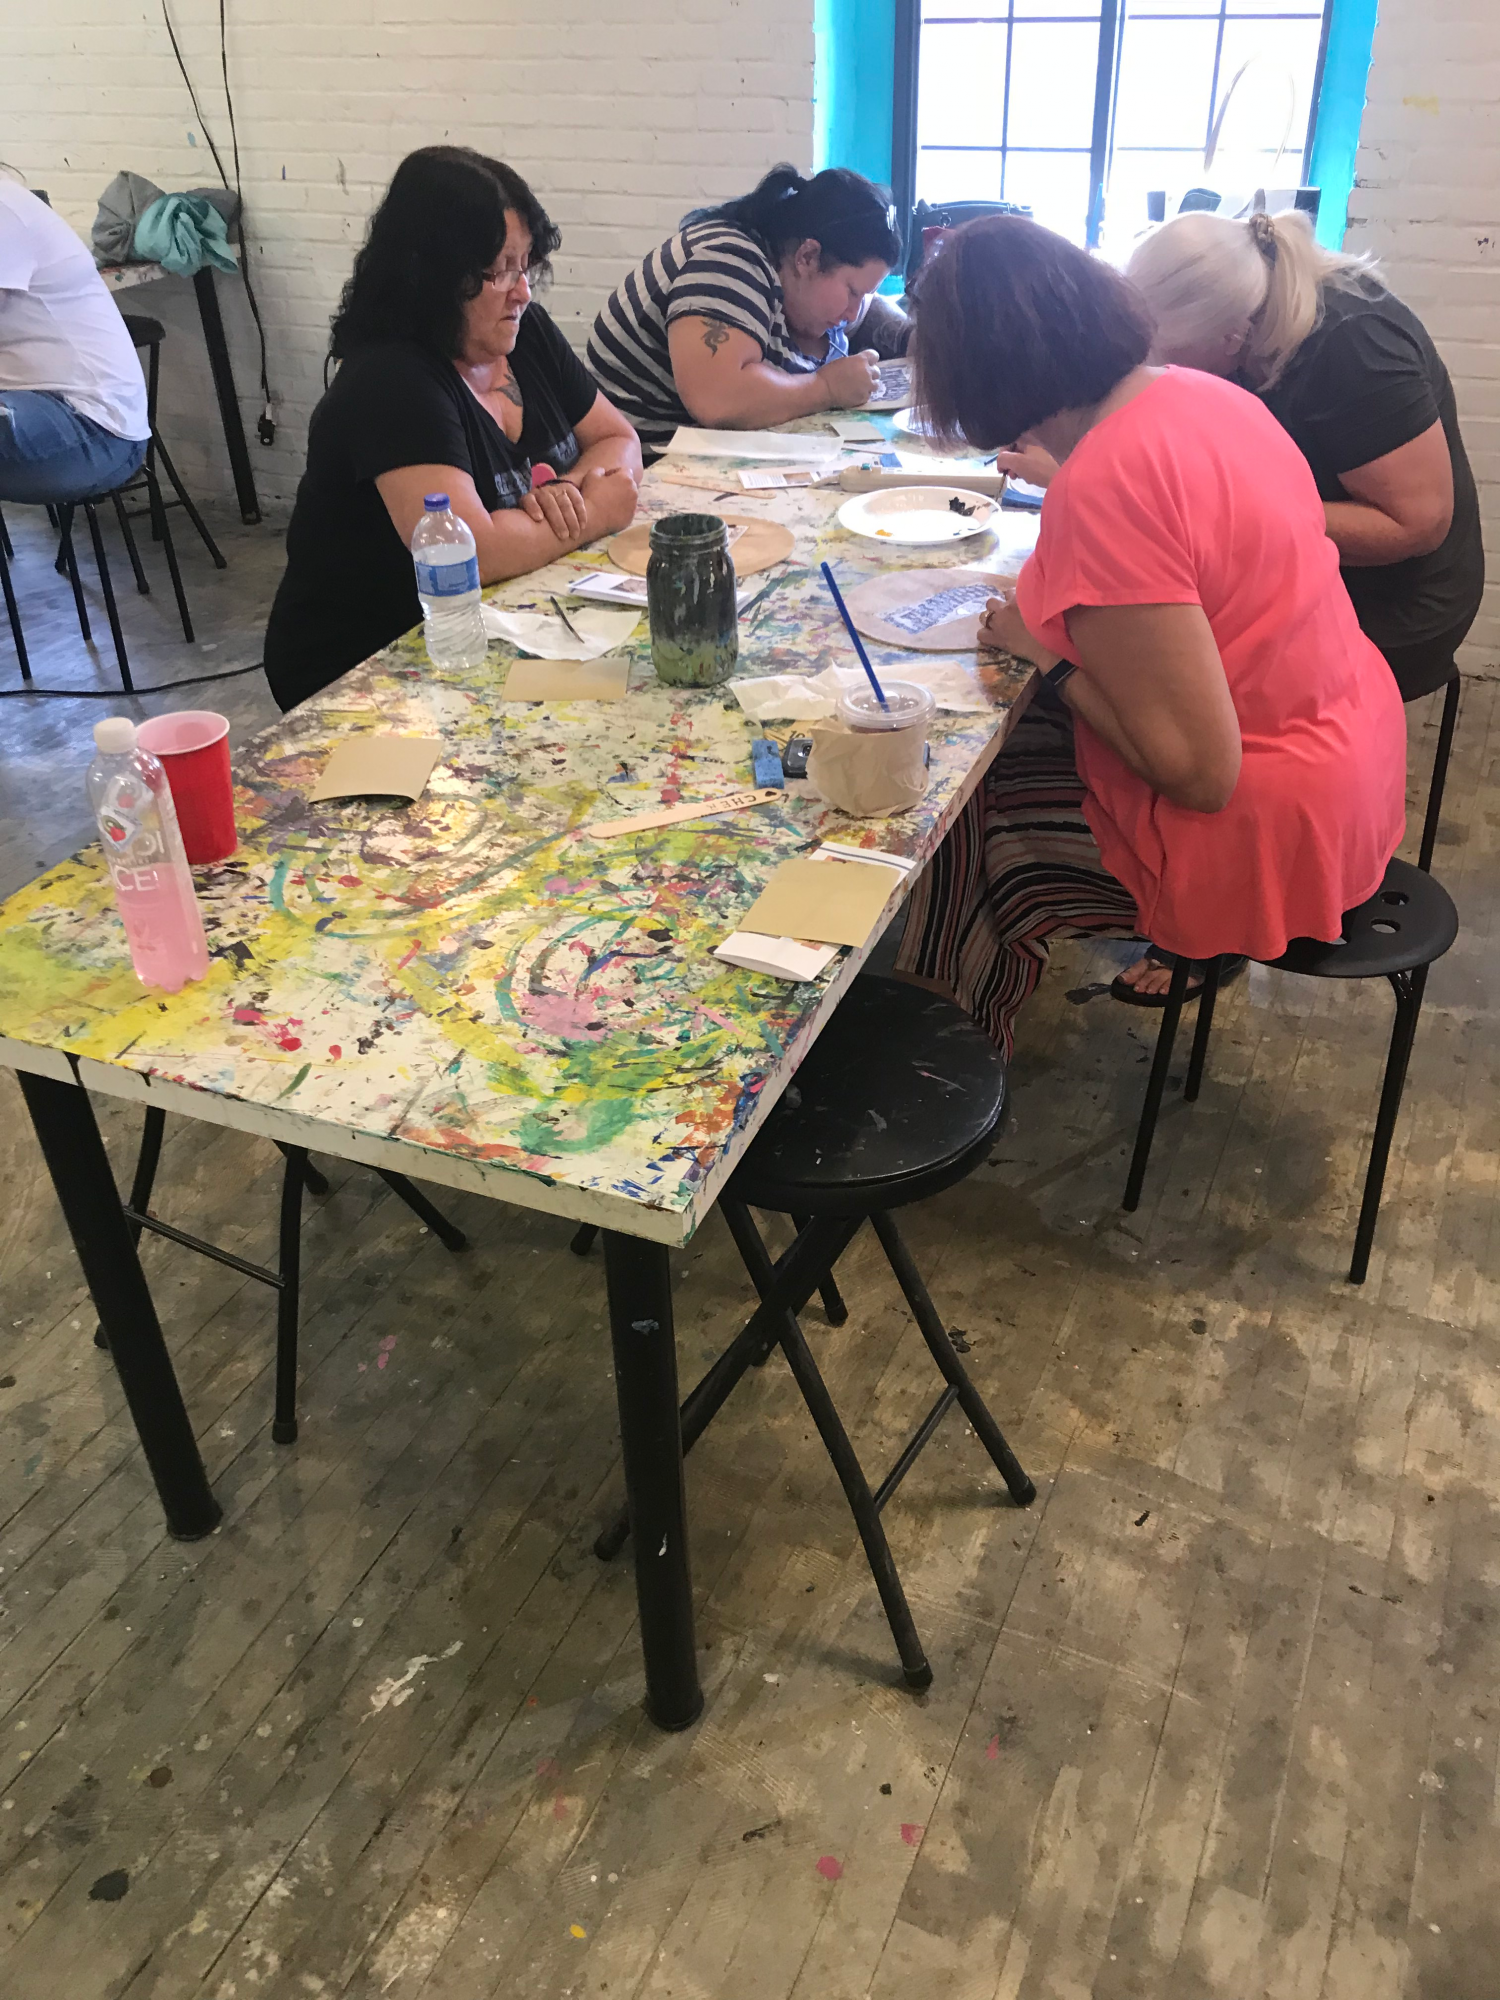
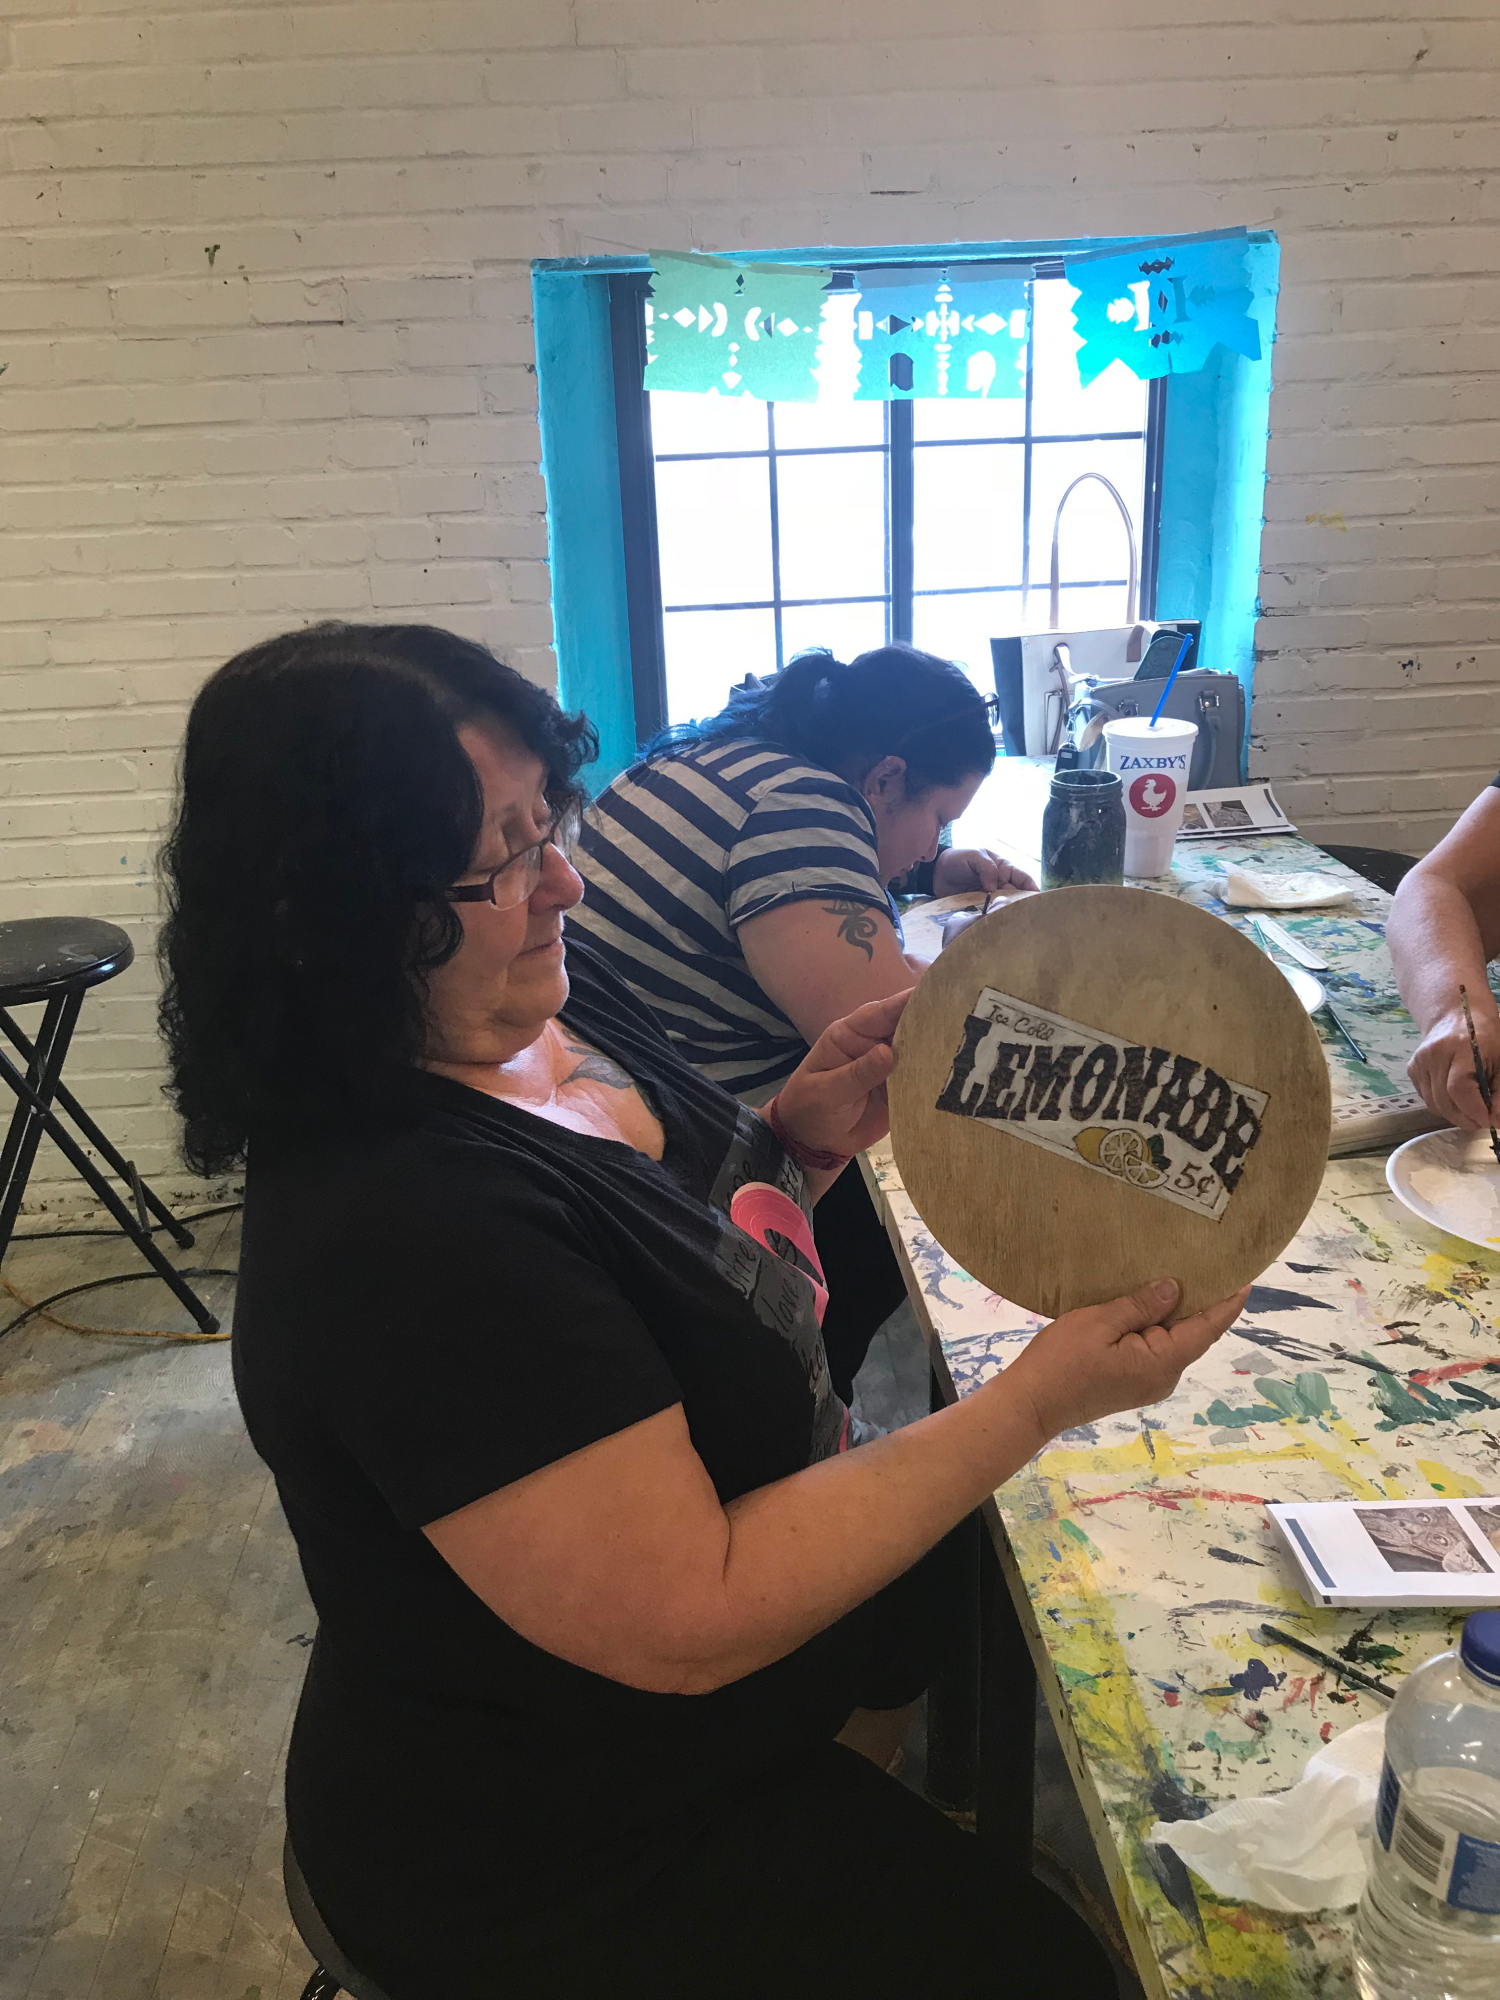
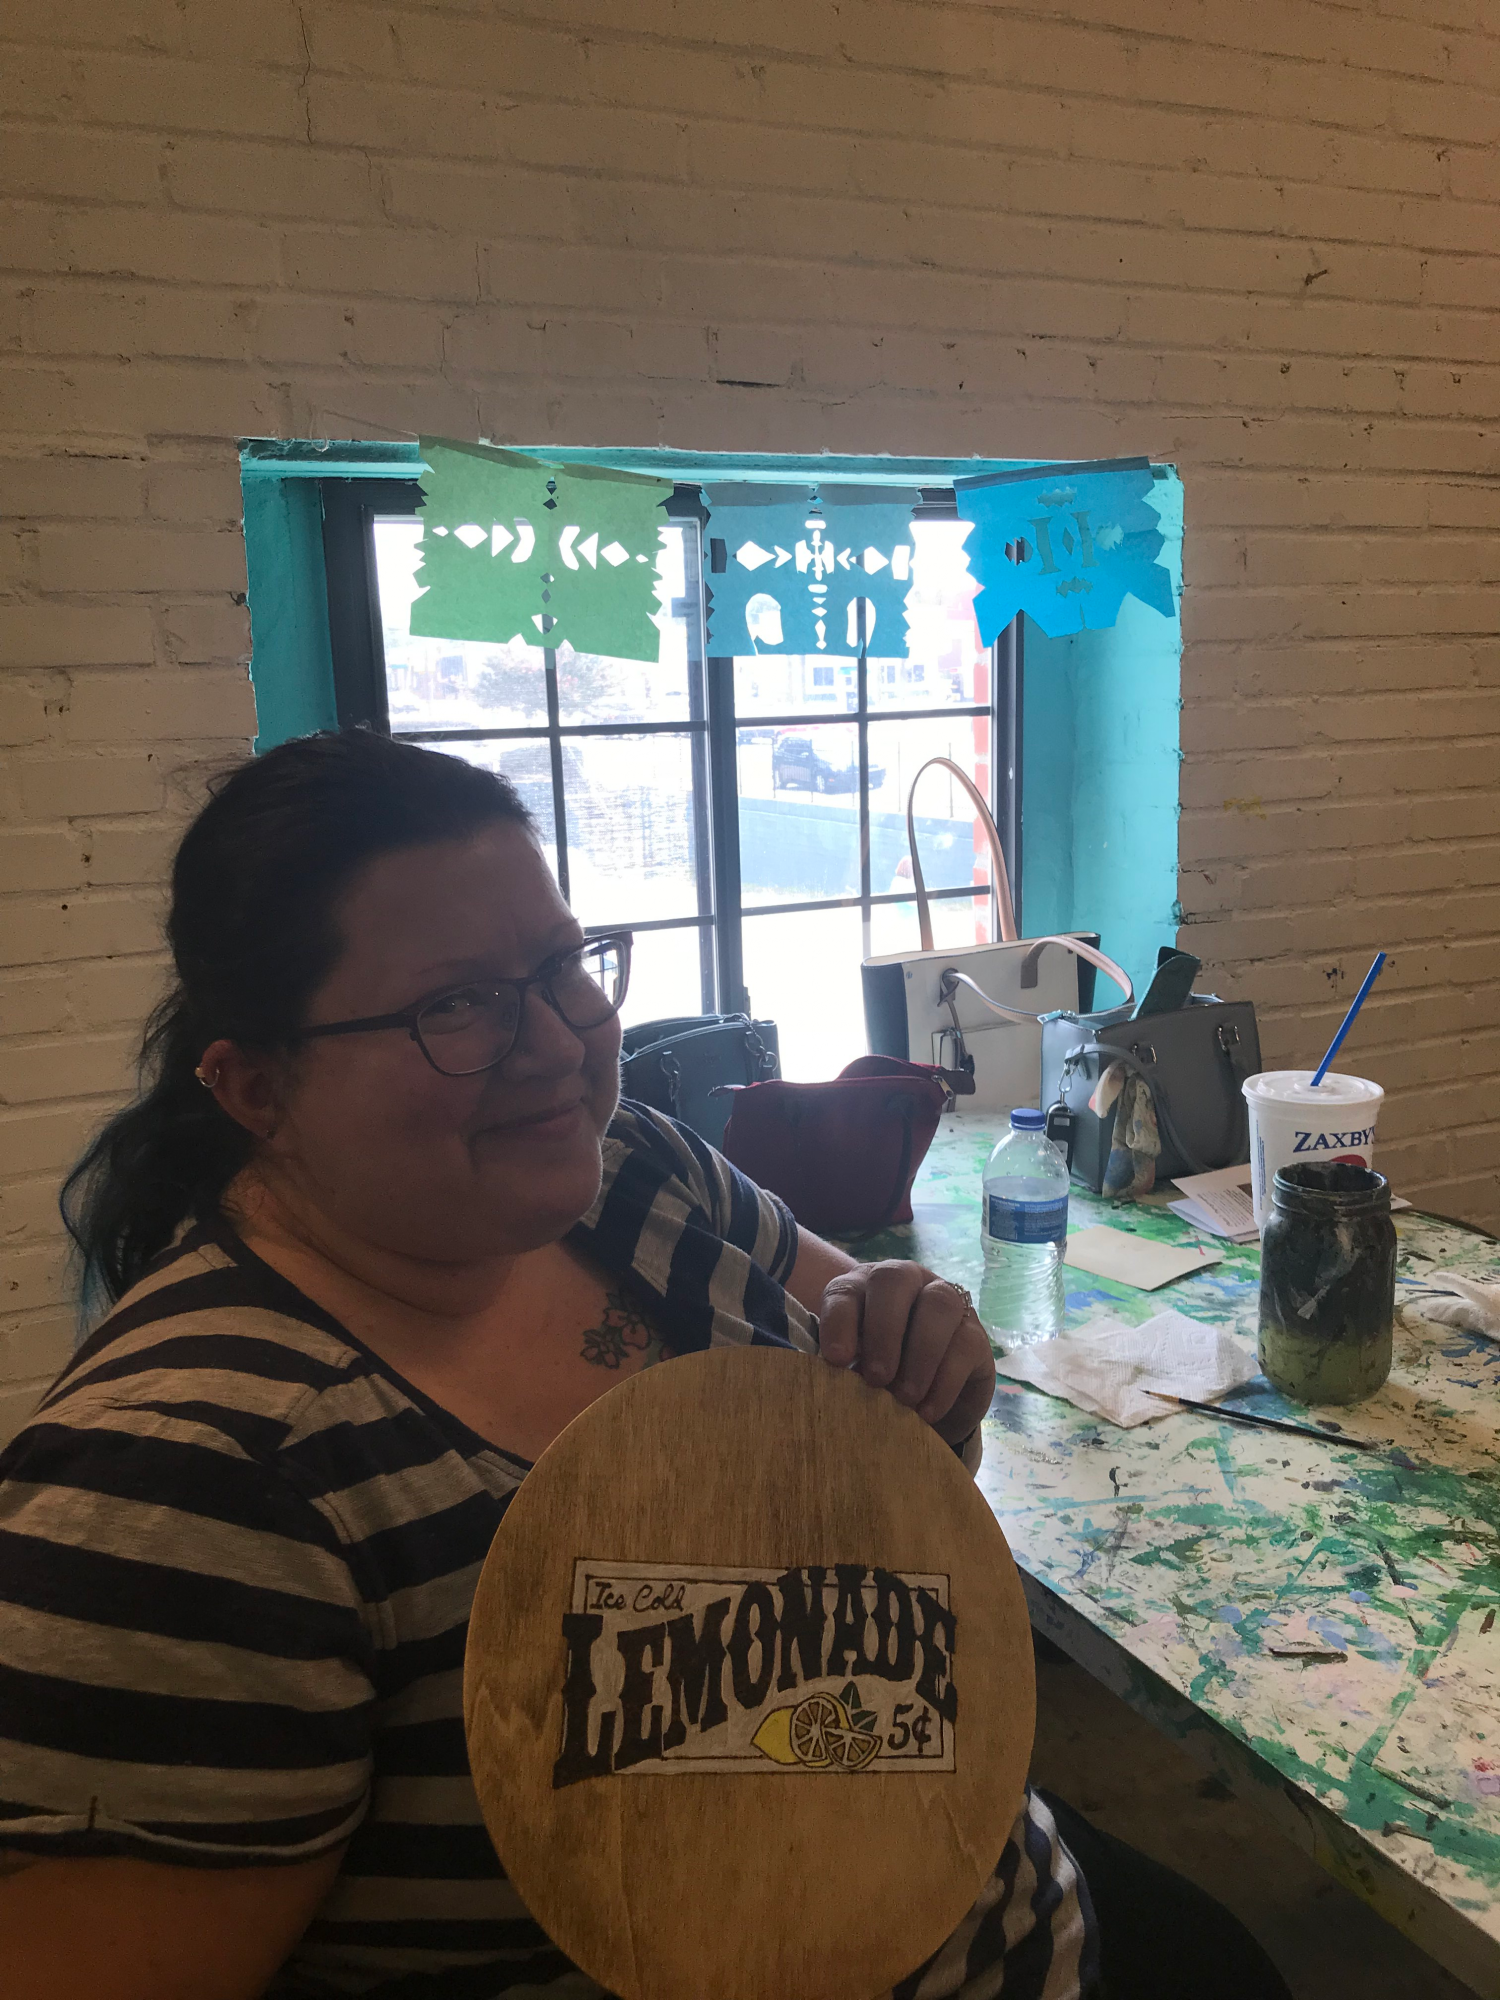
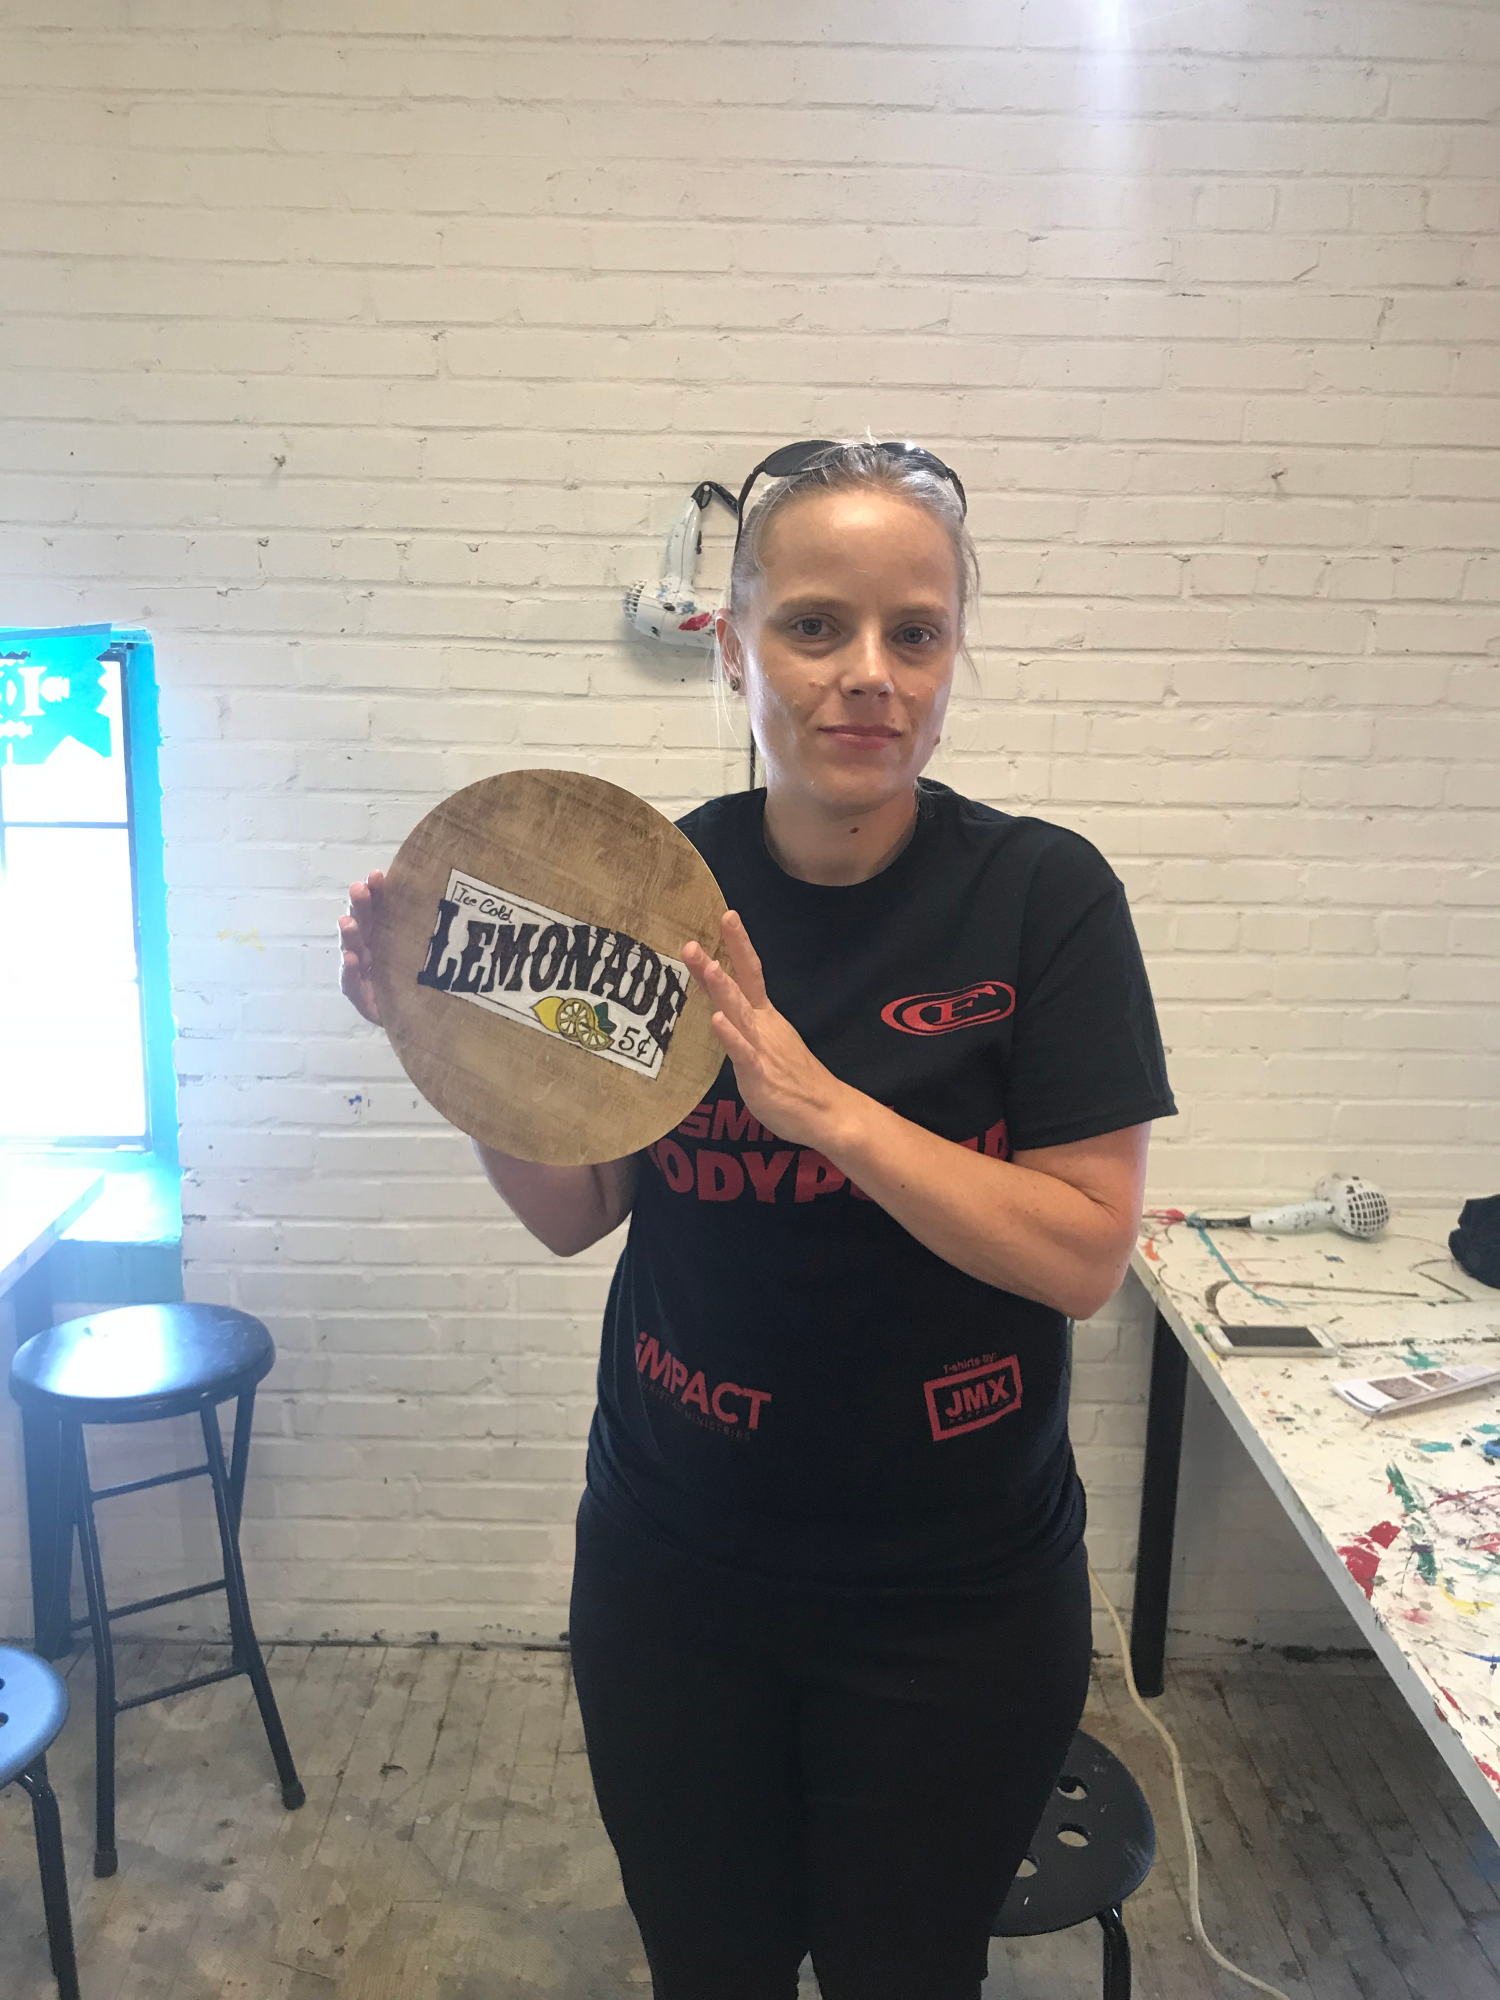
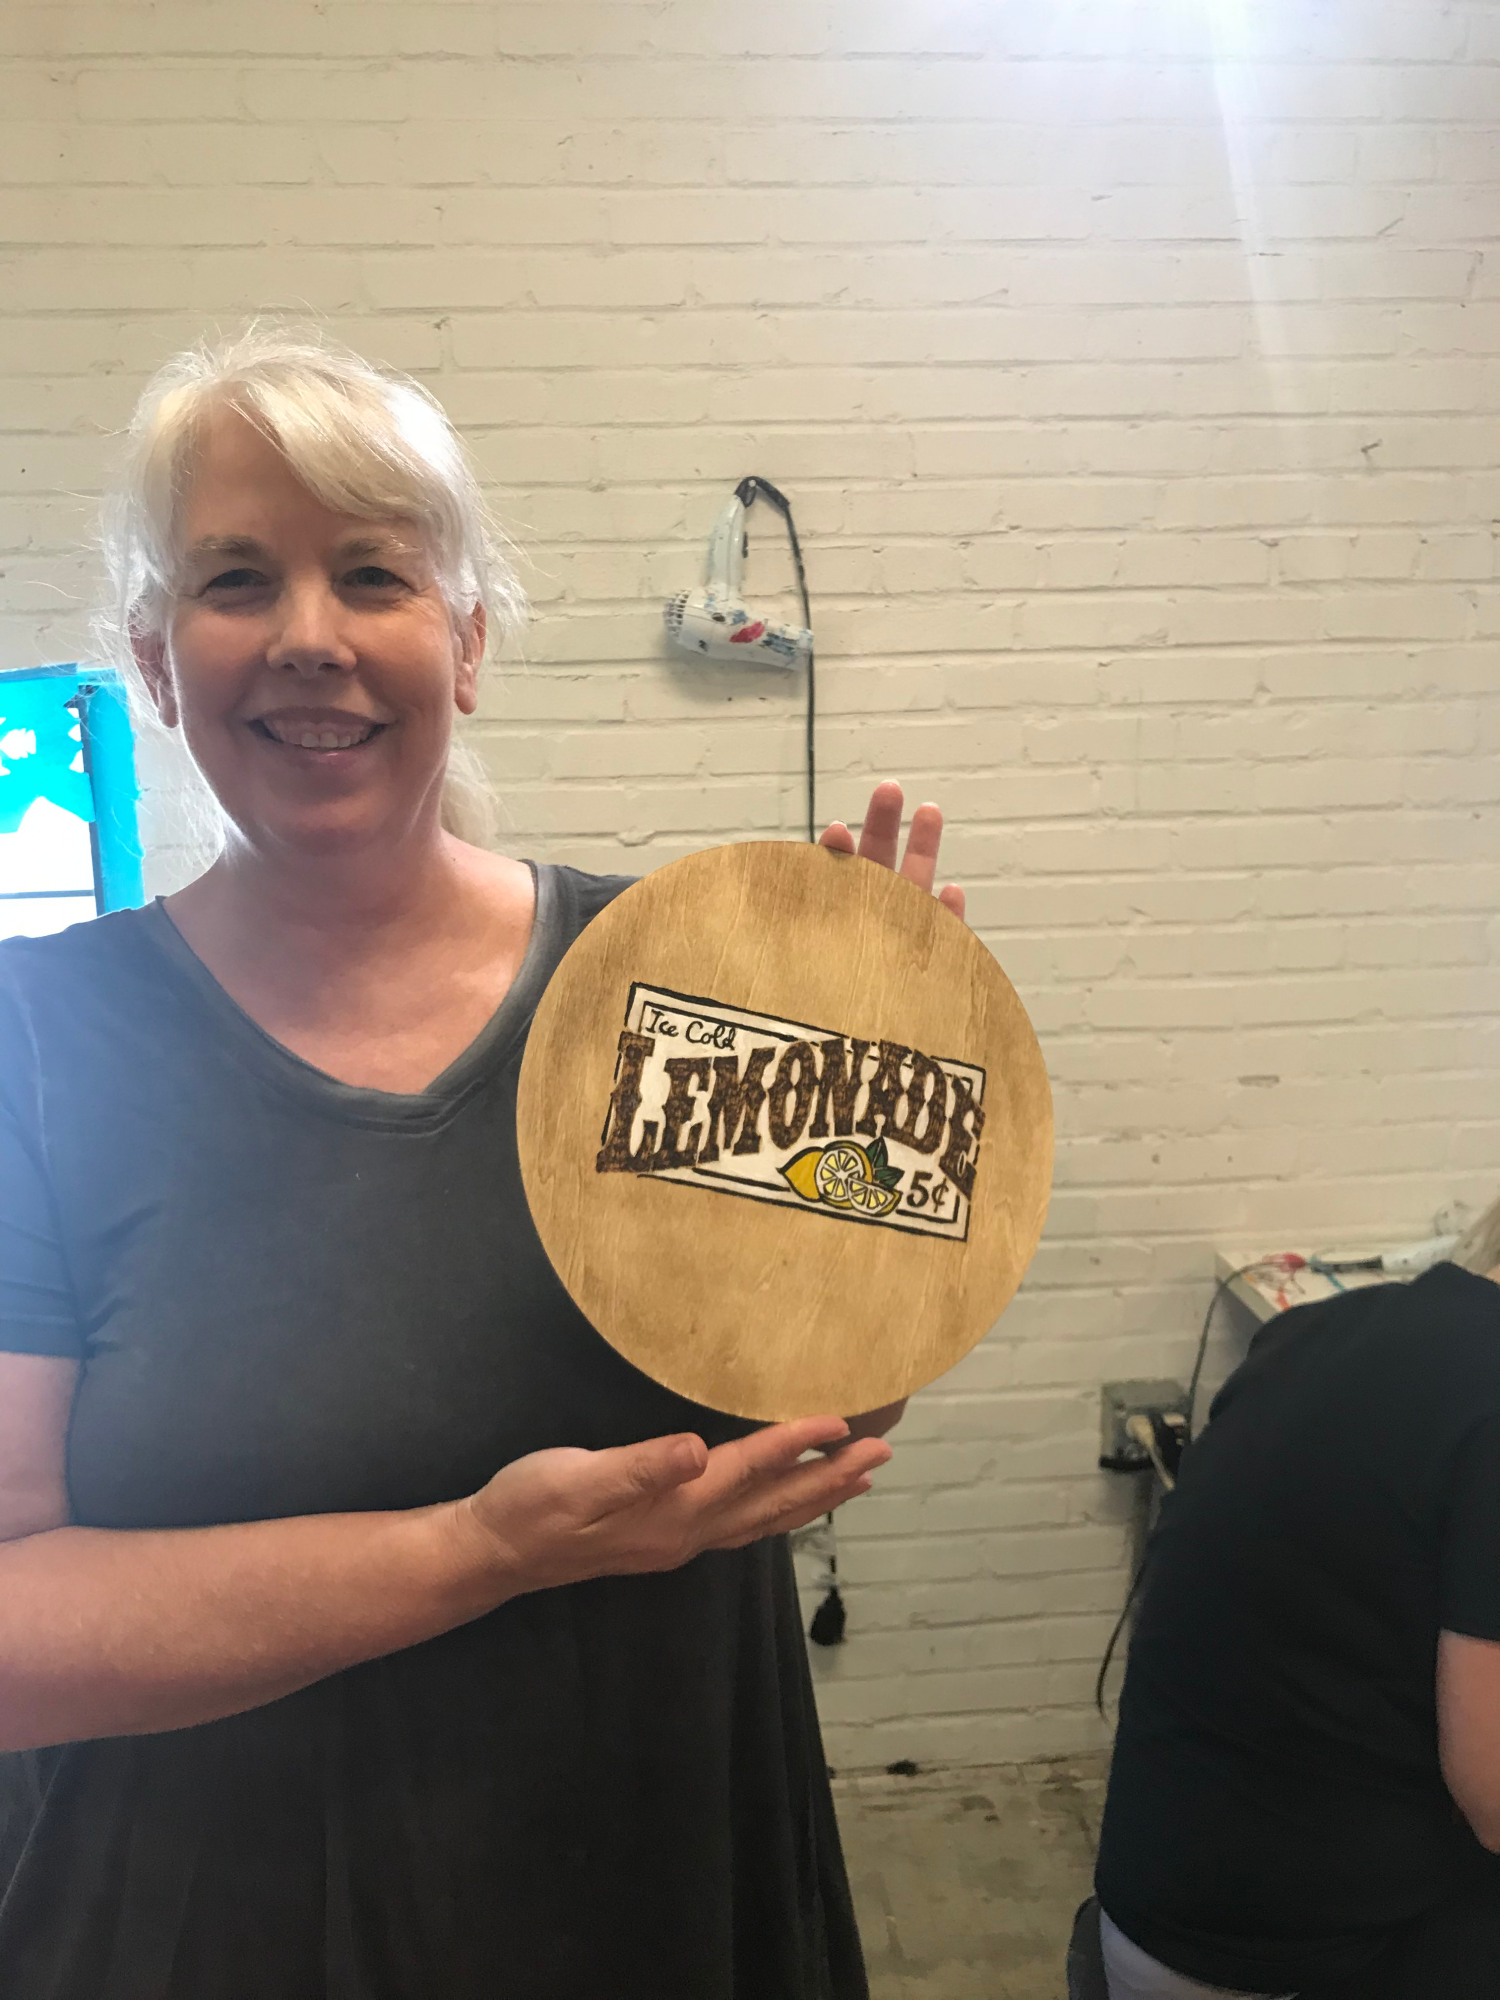
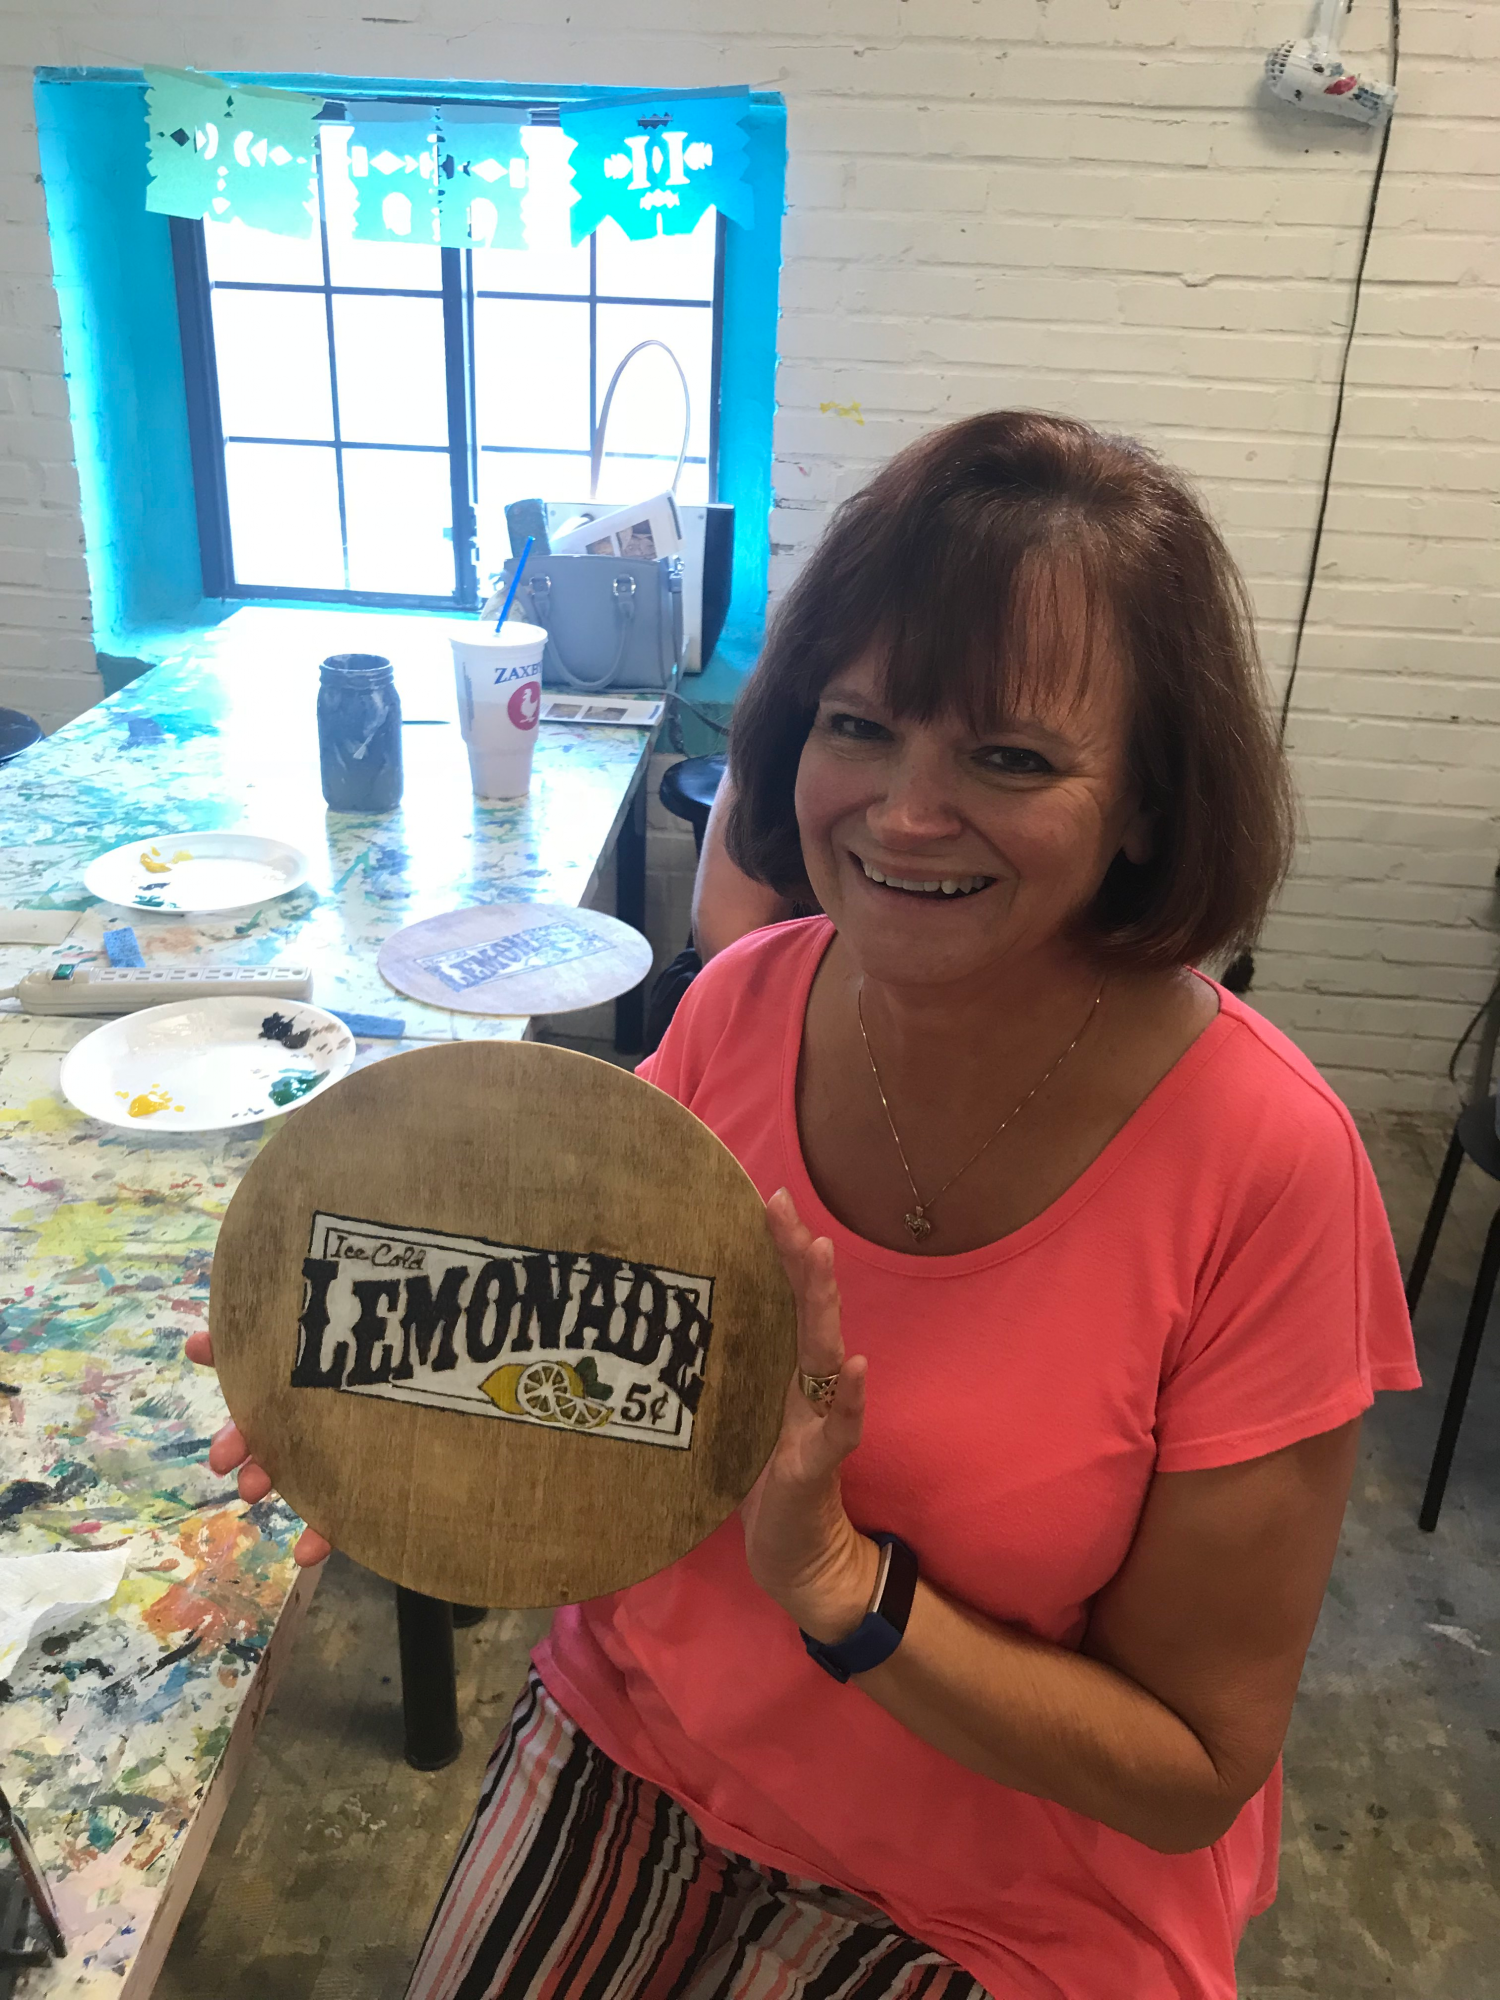
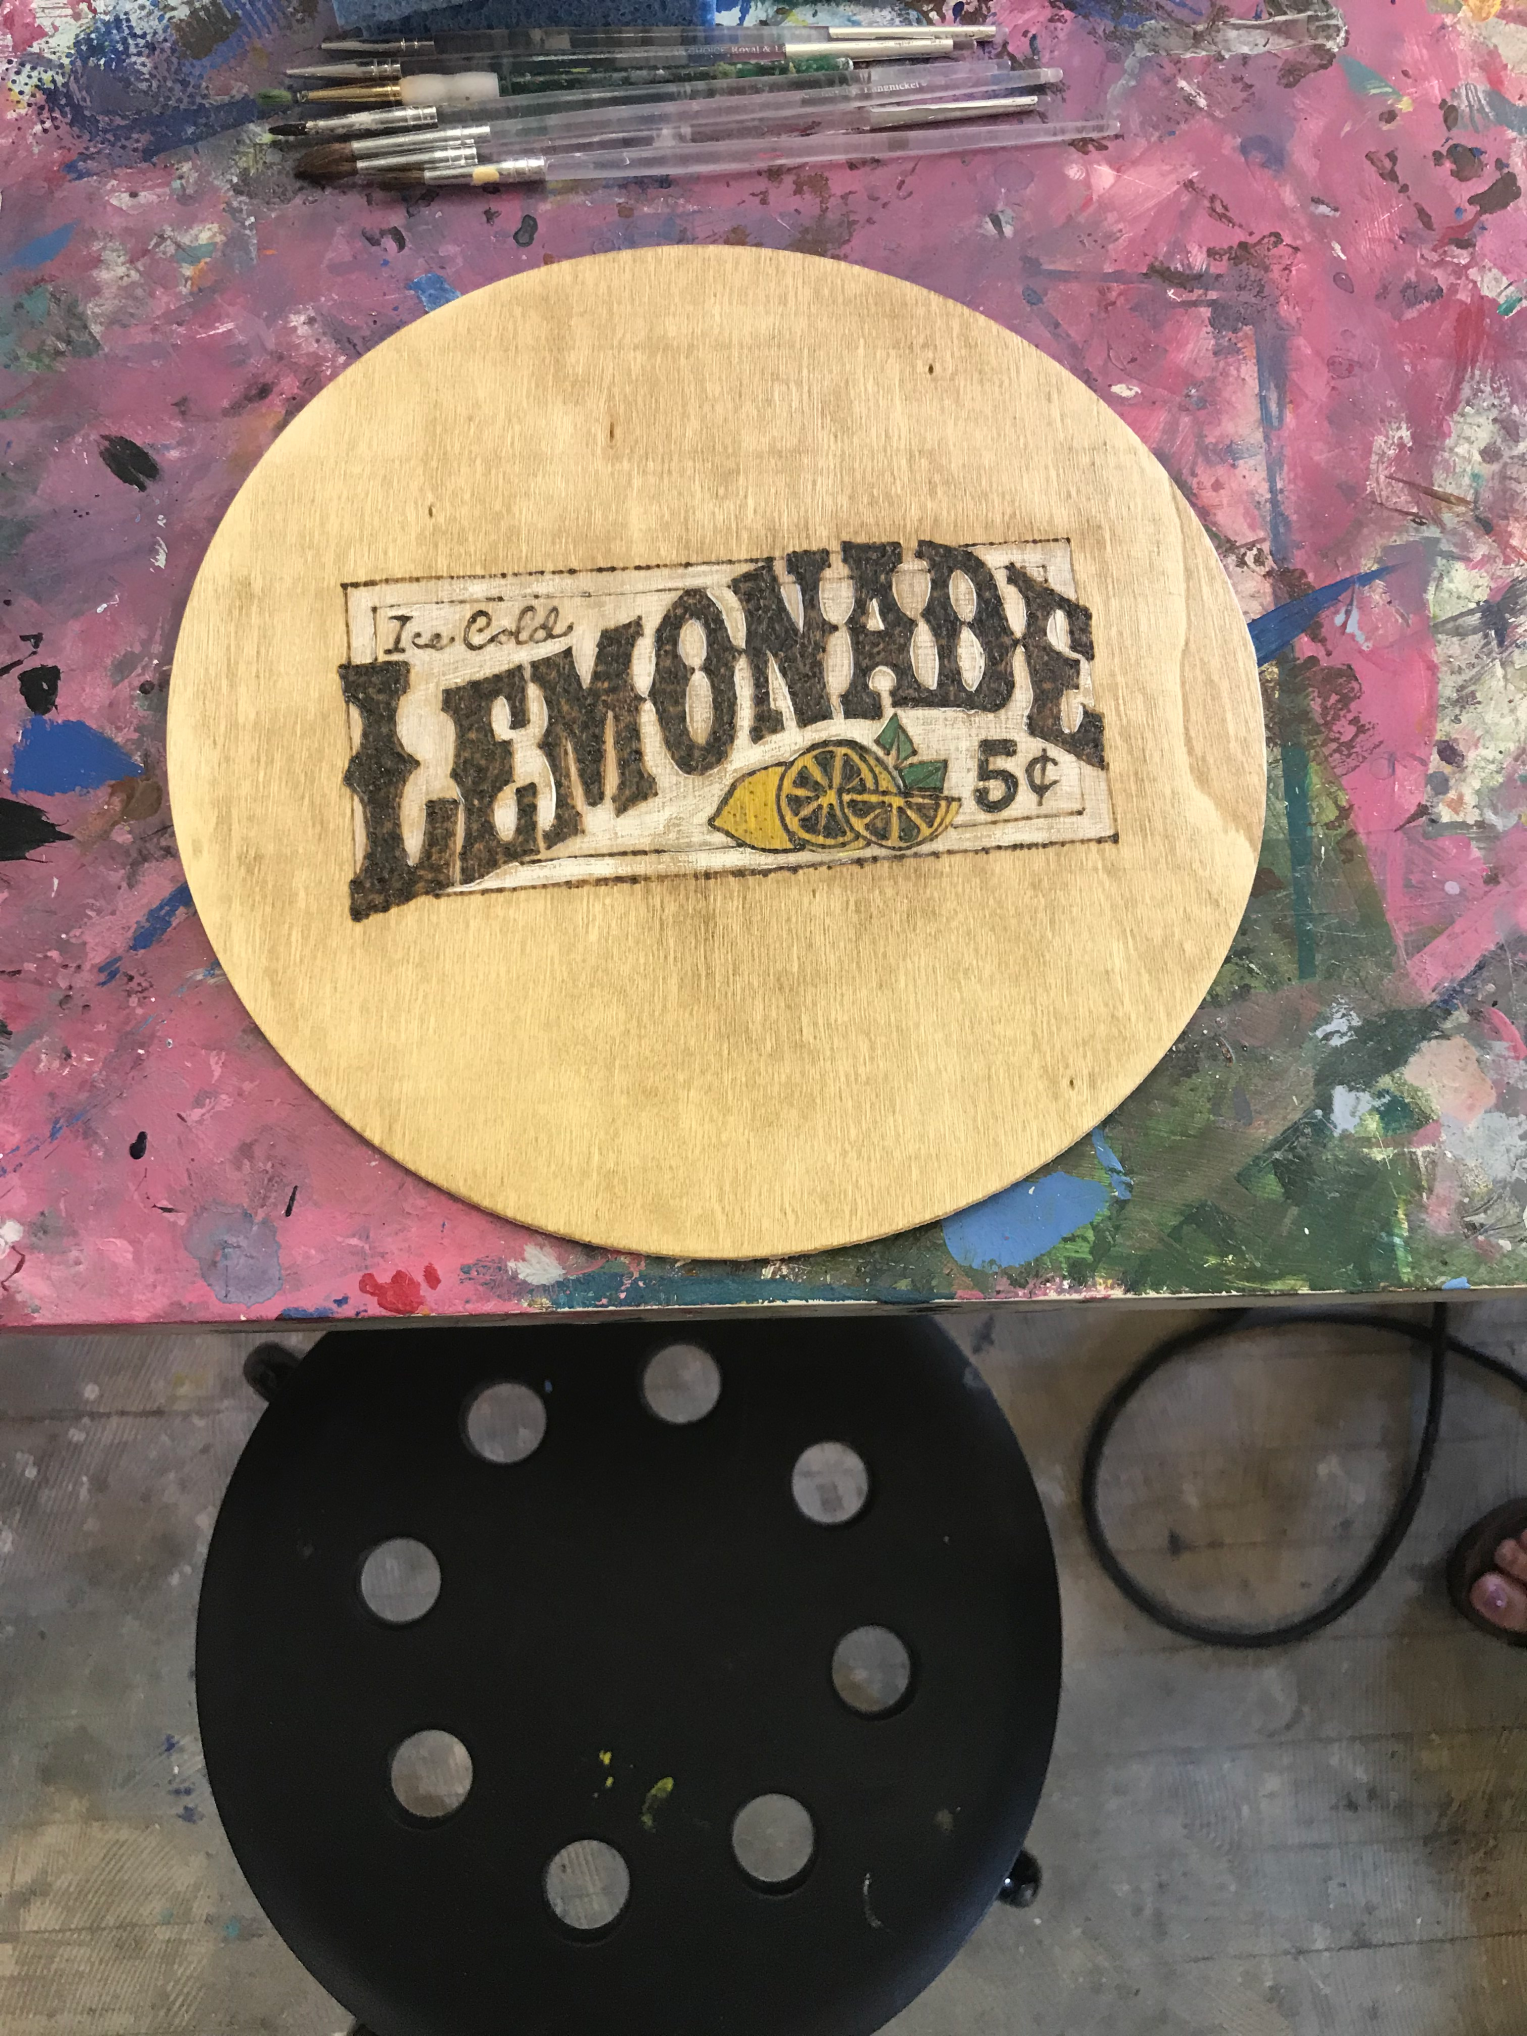
Another big “CONGRATULATIONS” to Andrea Pate on her second successful Pyrography Workshop at Stache Studios on September 29, 2018!
Once again, Andrea Pate, a very accomplished artist in art mediums such as portrait artistry and polymer clay modelling, has managed to spread the word about pyrography in downtown Griffin. As her plan to continue on the workshop on Seasonal Designs, all her attendees with big satisfied grins and new home decors.
 |
 |
 |
 |
 |
 |
“Leave a permanent impression with pyrography”
Andrea Pate
 |
 |
We at TRUArt are proud to be a part of Andrea’s endeavors to teach others of the easy and fun-loaded art of pyrography or wood burning. The pyrography pens used in this workshop and the one before that were predominantly our (Stage 1) Wood and Leather Pyrography Pen. The artist herself has our robust 60 W Professional Woodburning Detailer.
We can’t wait to check out what next season’s theme is going to be permanently burned into wood again!
The TRUArt family extends its biggest “CONGRATULATIONS” to Andrea Pate for successfully hosting her first Pyrography Workshop at Stache Studios last August 18, 2018 and has effectively opened the doors to many budding artists looking for a unique and fun way to express their creativity!
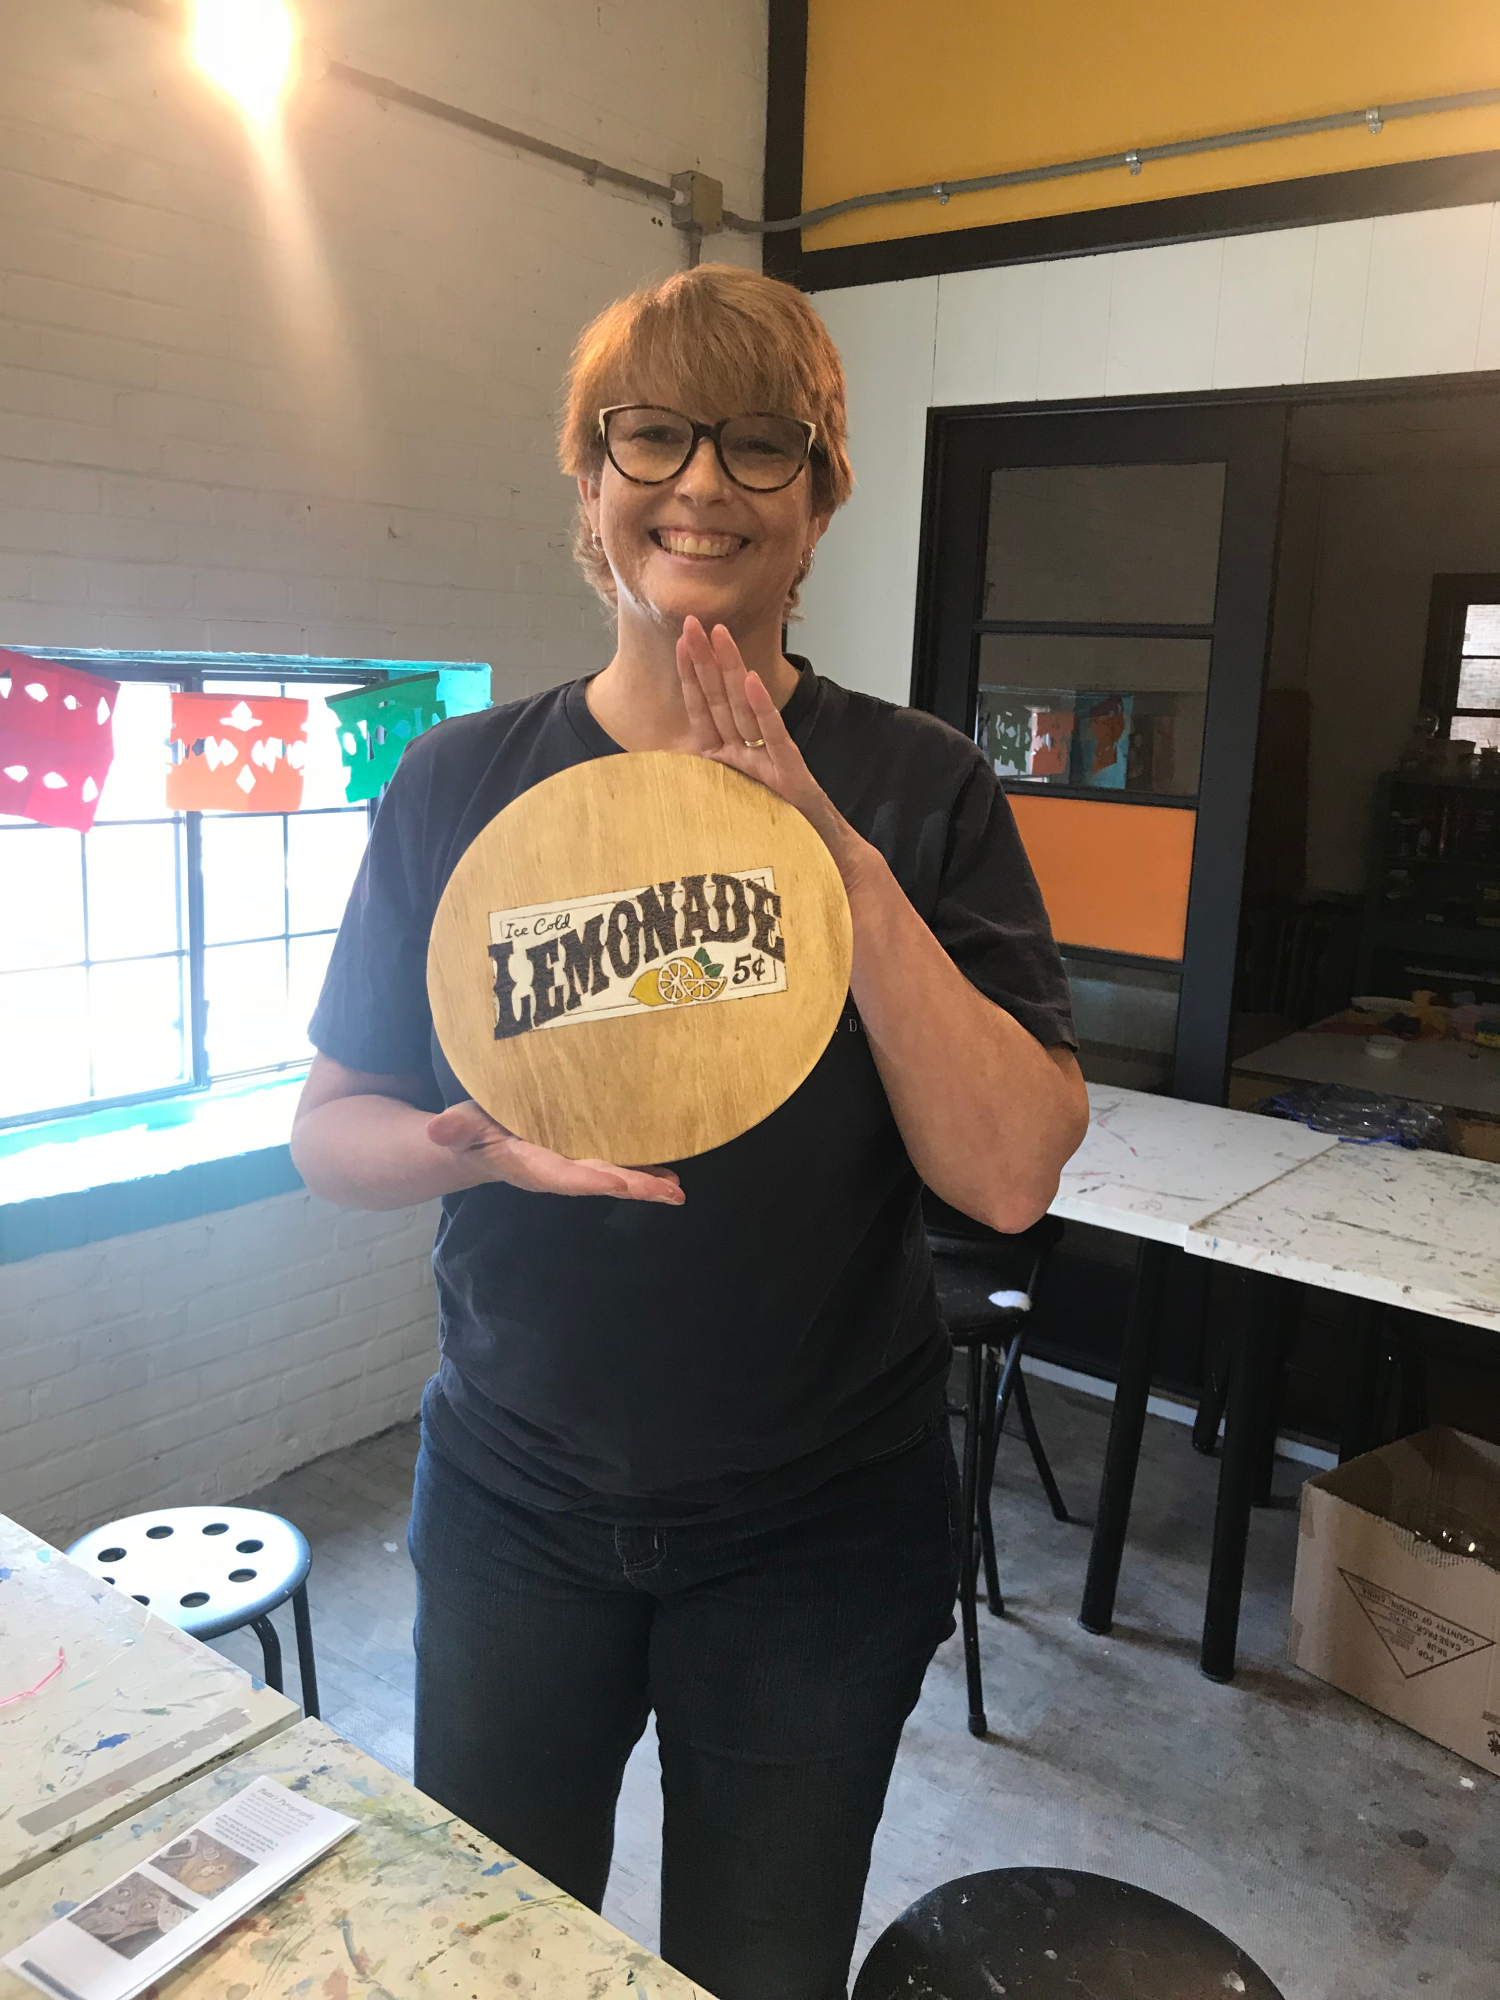
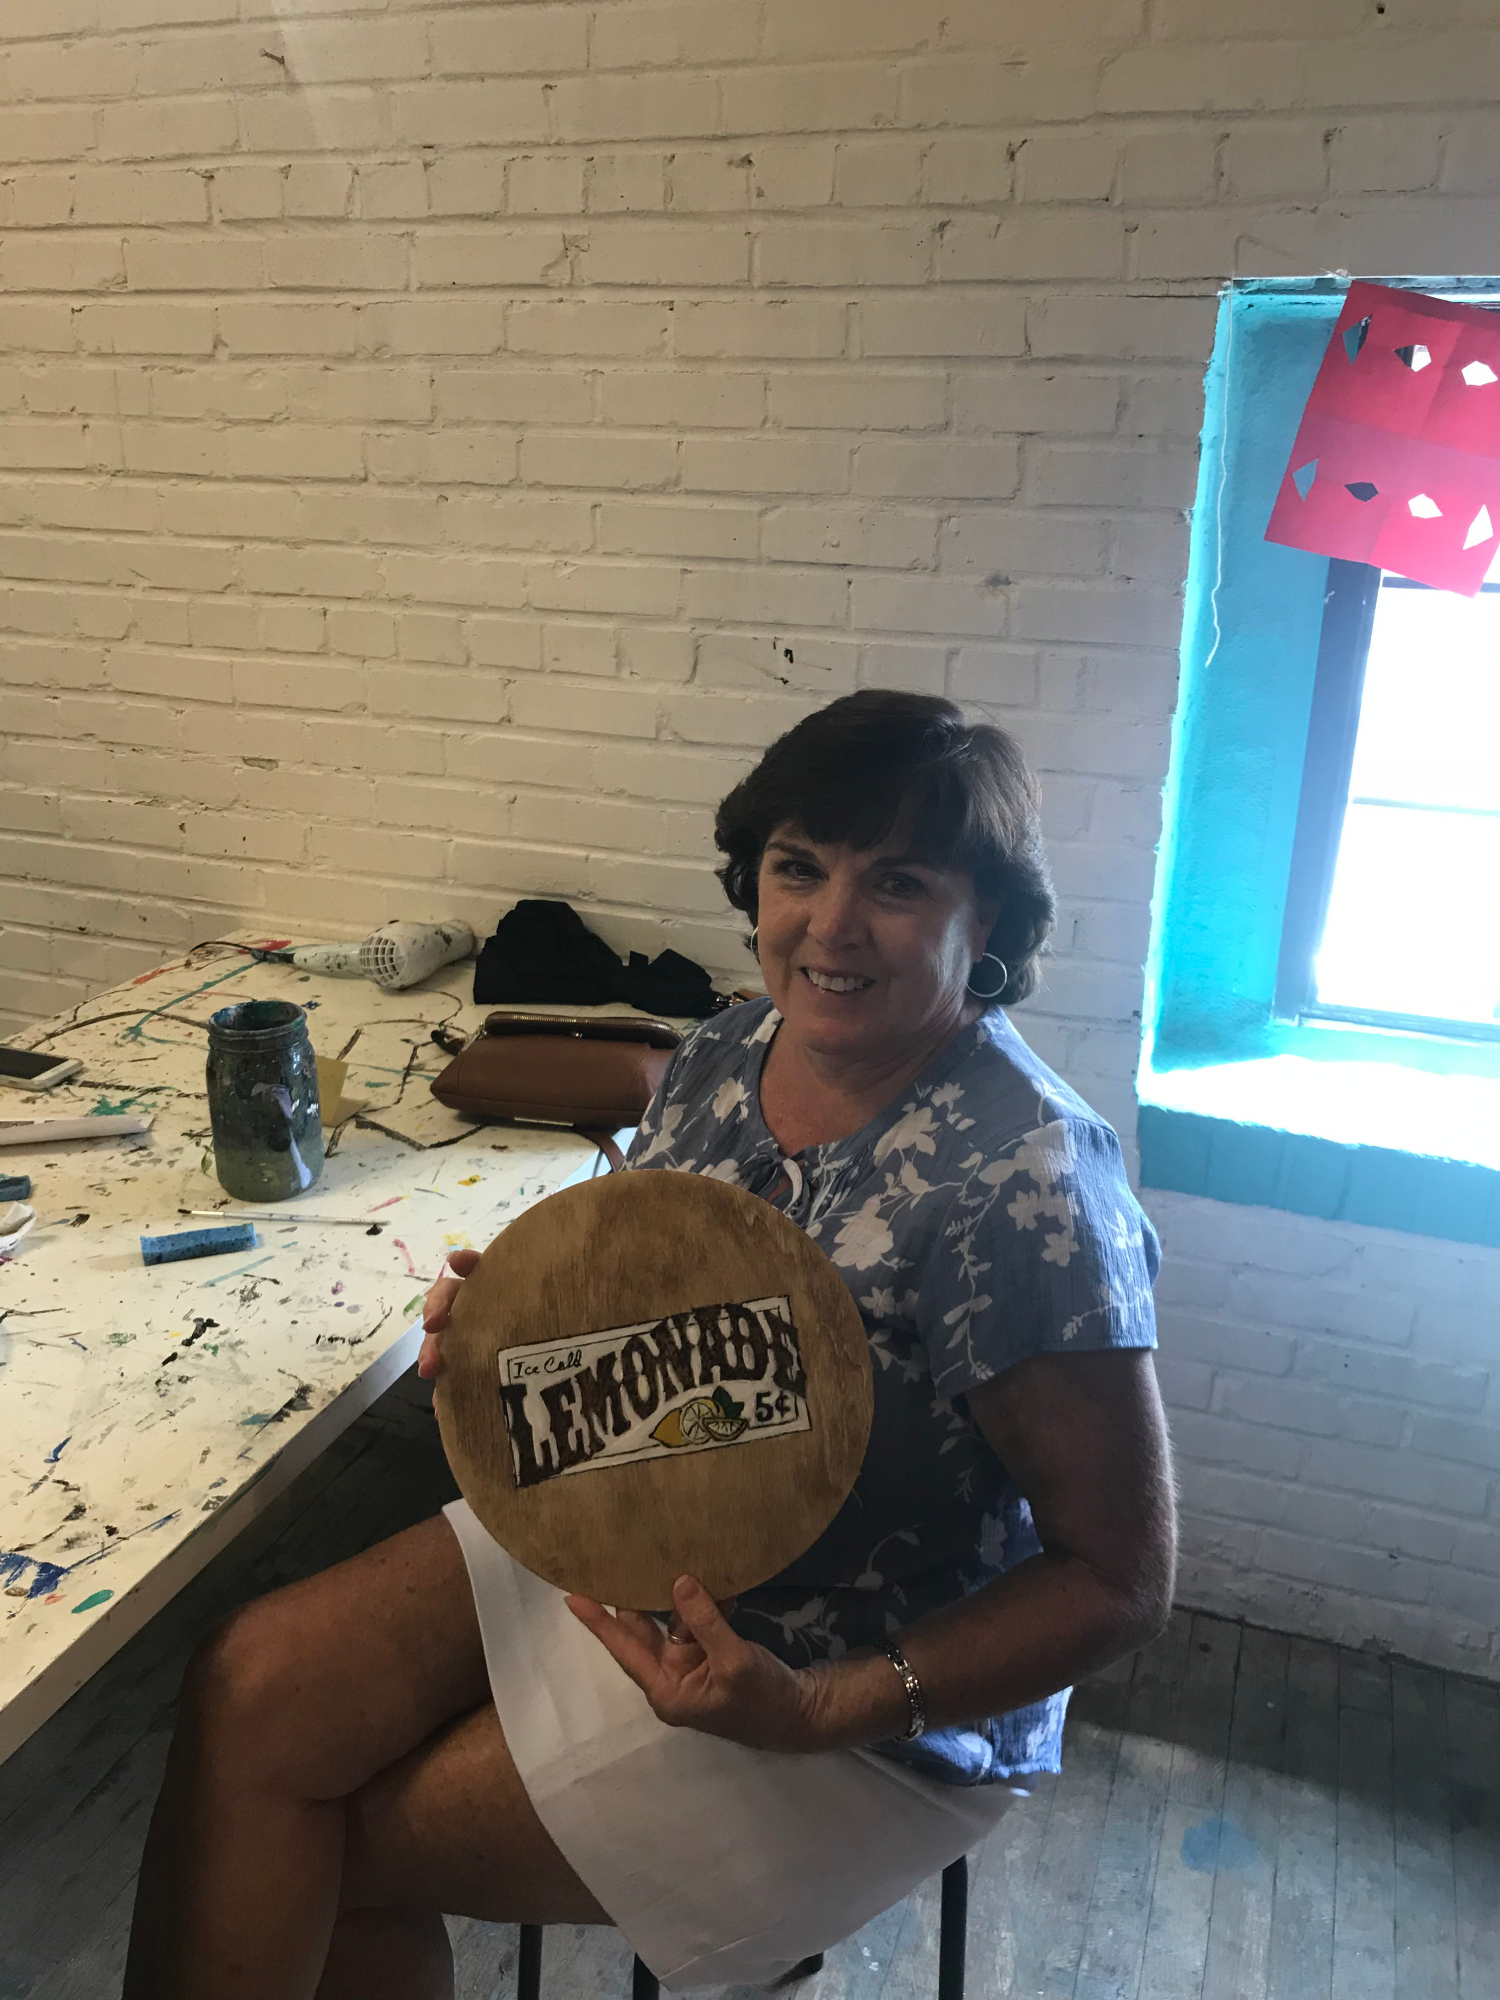
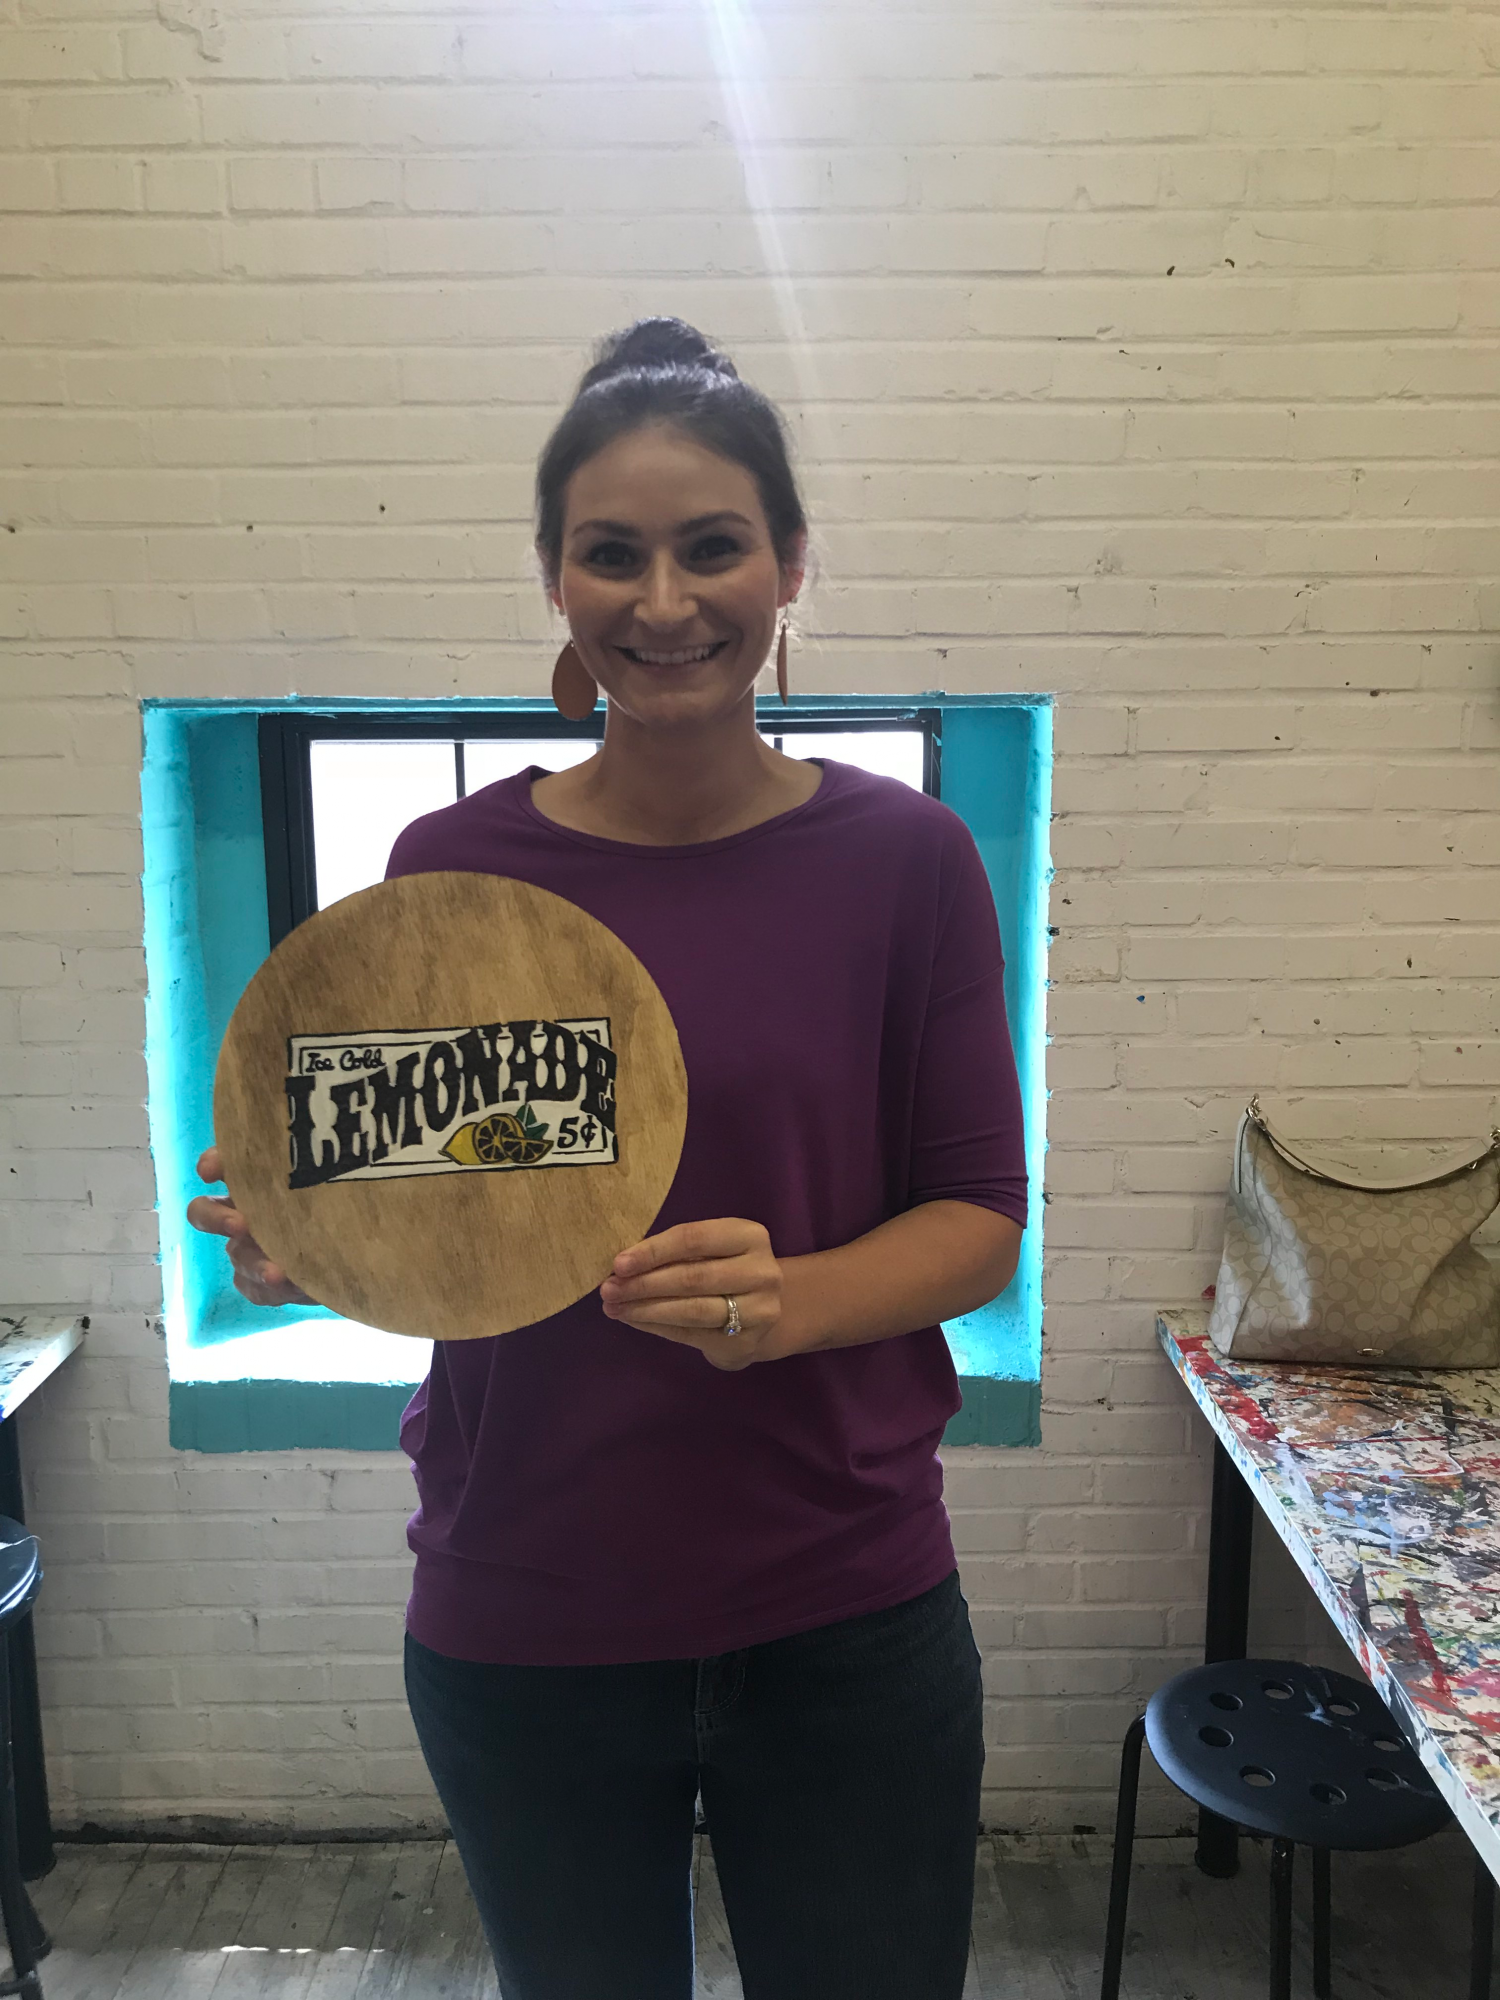
Stache Studios, the go-to place in Downtown Griffin for learning various forms of art medium such as painting, ceramics, mosaics and clay works, graciously welcomed Andrea’s suggestion to include a new form of artwork – pyrography. With Andrea’s long history and connection to art since childhood, coupled with more than two years of pyrography experience, she deftly introduced and guided everyone into the practically new art world of wood burning. Needless to say, all workshop attendees left with proud smiles and their finished projects. Just check out the pictures below!
 |
 |
 |
 |
 |
 |
Andrea understands that pyrography isn’t a medium that is well known in the field of arts. In fact, she did not imagine herself hosting any workshop about it at all – being contented with creating beautiful pyrogrphy art work and selling them. That changed when we started commissioning her to create tutorials for us using our wood burning pens. In one of the tutorials, she was teaching some children how to create wood burnings for their loved ones. Watching their excitement in the process got her curious about creating classes for adults. She wanted to expose as many people to this art form as she could. Thinking of ways to get pyrography out there, she came across her local art studio. Although Stache Studio provides customers with amazing pottery and painting classes, she realized they didn’t have any on woodburning. In fact, there just aren’t many places around where one could learn Pyrography.
 |
 |
 |
“Leave a permanent impression with pyrography”
Andrea Pate
 |
 |
 |
Jessica, owner of Stache Studios, loved Andrea’s idea and immediately went to work to get things rolling while the artist provided the tools she got from TRUArt. After the resounding success of her first workshop, the artist was thrilled to see the excitement others were going through learning something she was passionate about. She feels very fortunate to have the opportunity to teach people pyrography and plans to continue sharing her expertise with more classes. As of this writing, she’s been busy creating seasonal designs for her workshop that customers can display every month of the year in their homes. It definitely doesn’t look like she plans to slow down one bit seeing that workshops are powerful tools to get the needed exposure to the art as people are starting to become familiar with it and with what she does.

To those who have yet to touch a pyrography pen or to those who think they don’t have the creativity for it, here’s what Andrea has to say about it:
“DO not to give up. If it’s something you’re not good at, that’s all the more reason to keep going. It will get easier and you’ll learn what works for you along the way. If it’s something you are passionate about then never give up.
It’s amazing what you can learn and how you can improve in such a short time frame. I look back at where I started and to where I’m at today and there is such a huge difference. I’m excited to see how much I will continue to grow and improve over the course of this year.”
We at TRUArt couldn’t have said it better, Andrea. We’re so glad and honored to be a part of your achievements in the wonderful world of pyrography. Thank you!
What you will need:
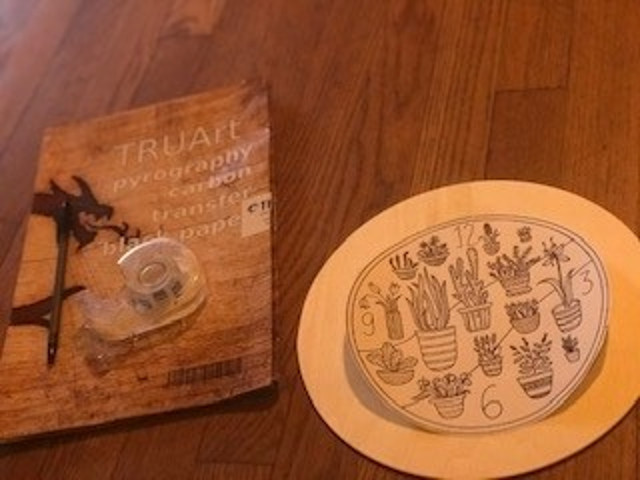
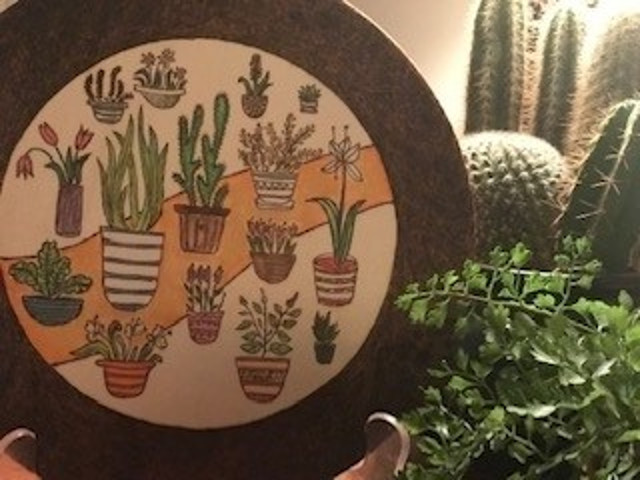
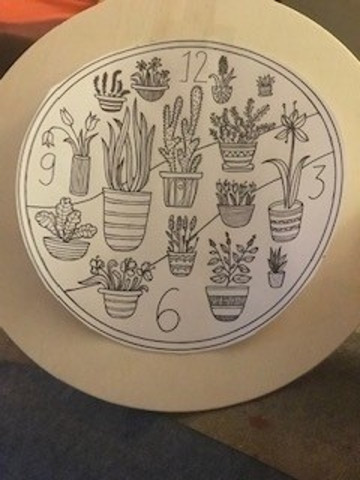
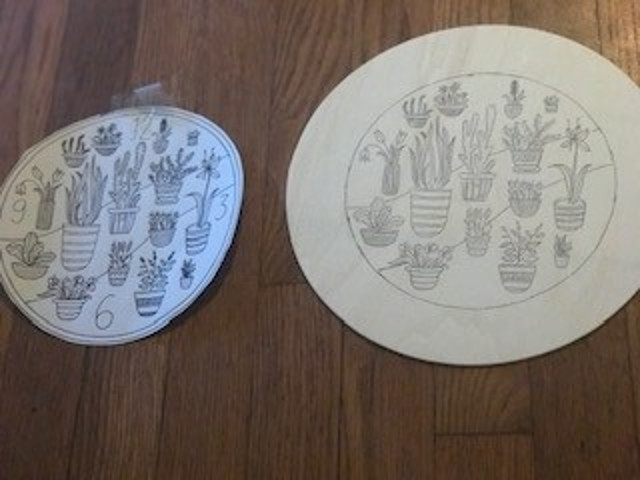
Sometimes, in pyrography, trying to find the right image to burn can be extremely tricky. When you are an artist, copyright laws can make it challenging to find a great image to burn. Fortunately, now TRUArt has FREE printable stencils available. Once I came across these stencils, I couldn’t wait to get started.
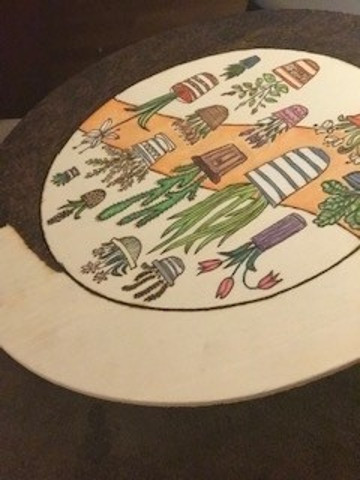
There are several unique designs available to download but, ultimately, I decided on this cactus stencil. This stencil is available under the clock category. I loved the pattern so much that I modified the stencil to make it my own and decided not to trace the numbers.
 |
 |
 |
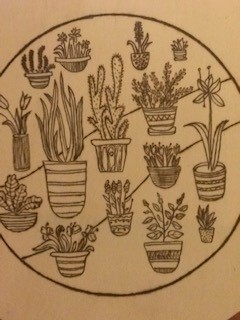 |
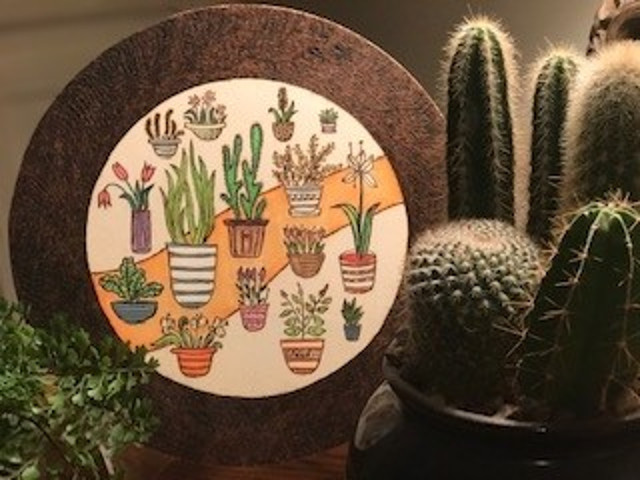
I found this stencil to be a quick and easy burn. This is a great project to do with your family. My children had fun picking out the colors of the various pots and helped me find the right shade of green for each plant. We spent the day going over different stencils and both my children found something that appealed to each of them.
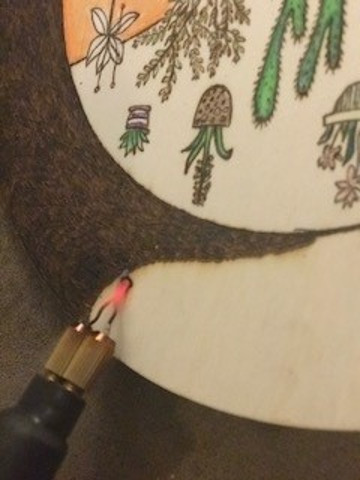
Once the image was burned and colored, I decided to give the background a nice, thick solid burn. This technique gave my burning some depth and made my image pop.
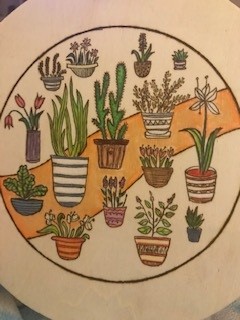
I was extremely happy with the ending result. This was a fantastic family project that is exciting for children to do. These prints are also a useful tool to help you practice your pyrography skills. My children loved working with these stencils and they are both excited about working on our next burning together.
See you next time,
Andrea Pate
Pate’s Pyrography
Materials:
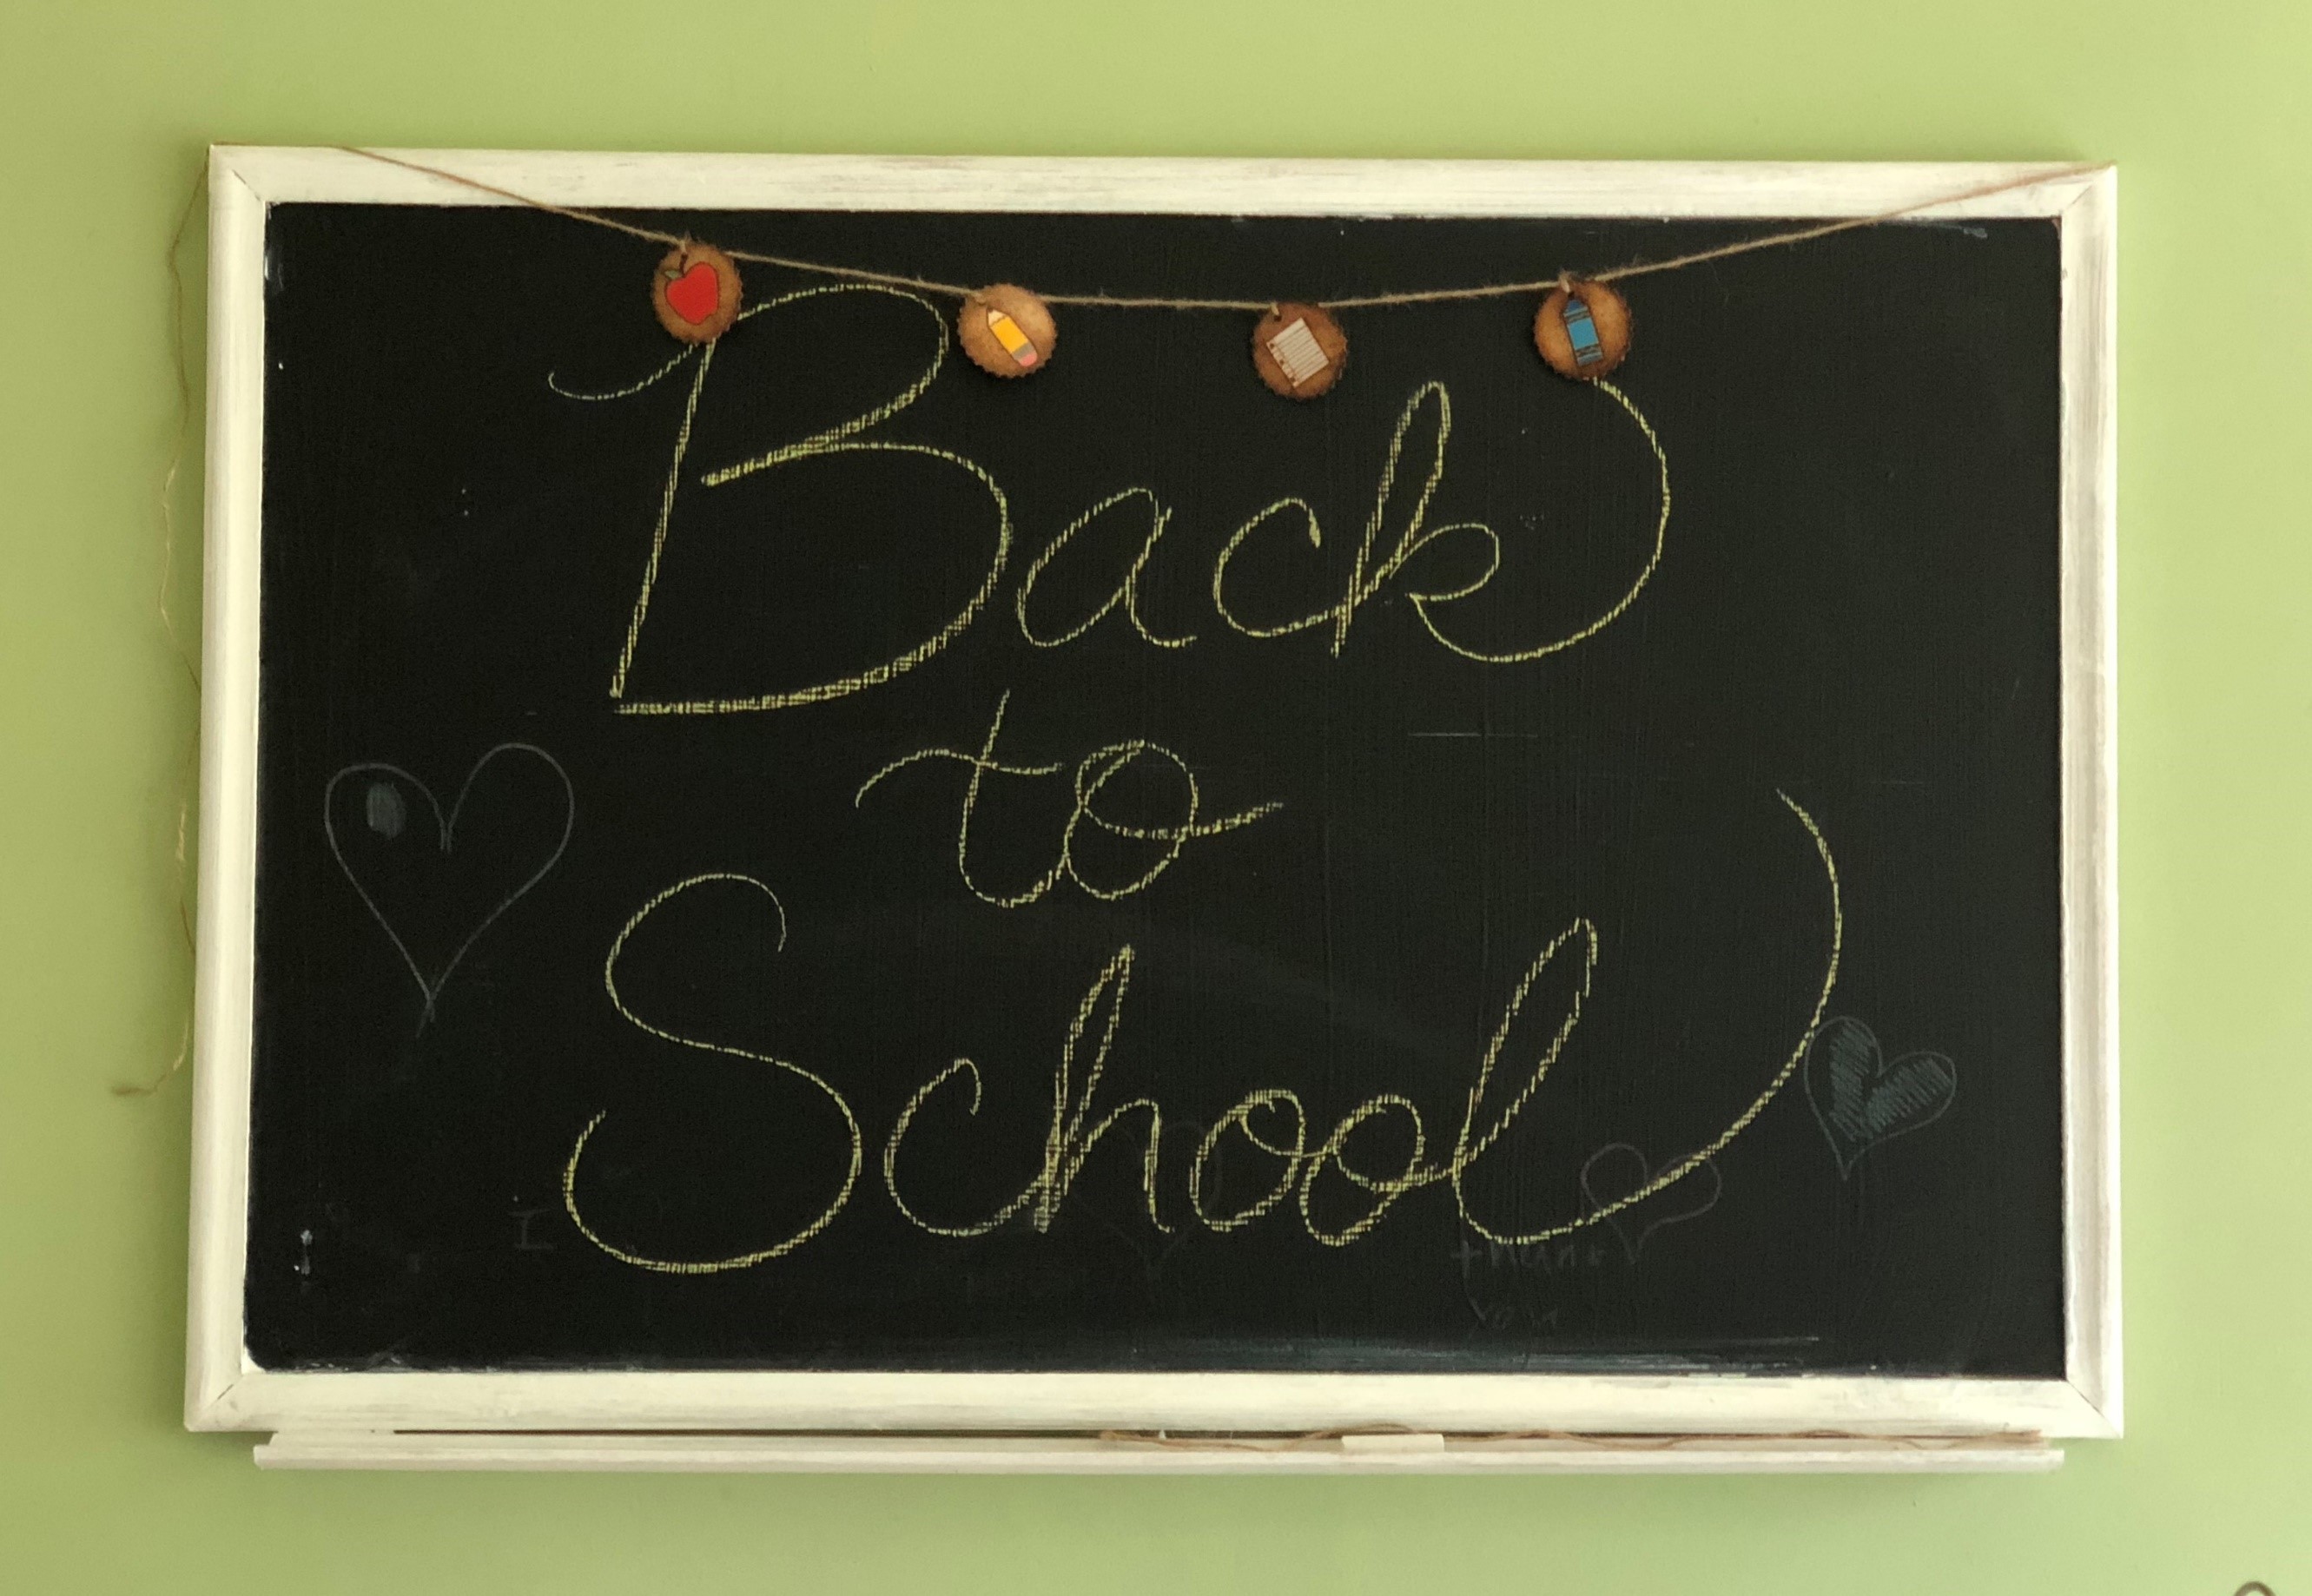
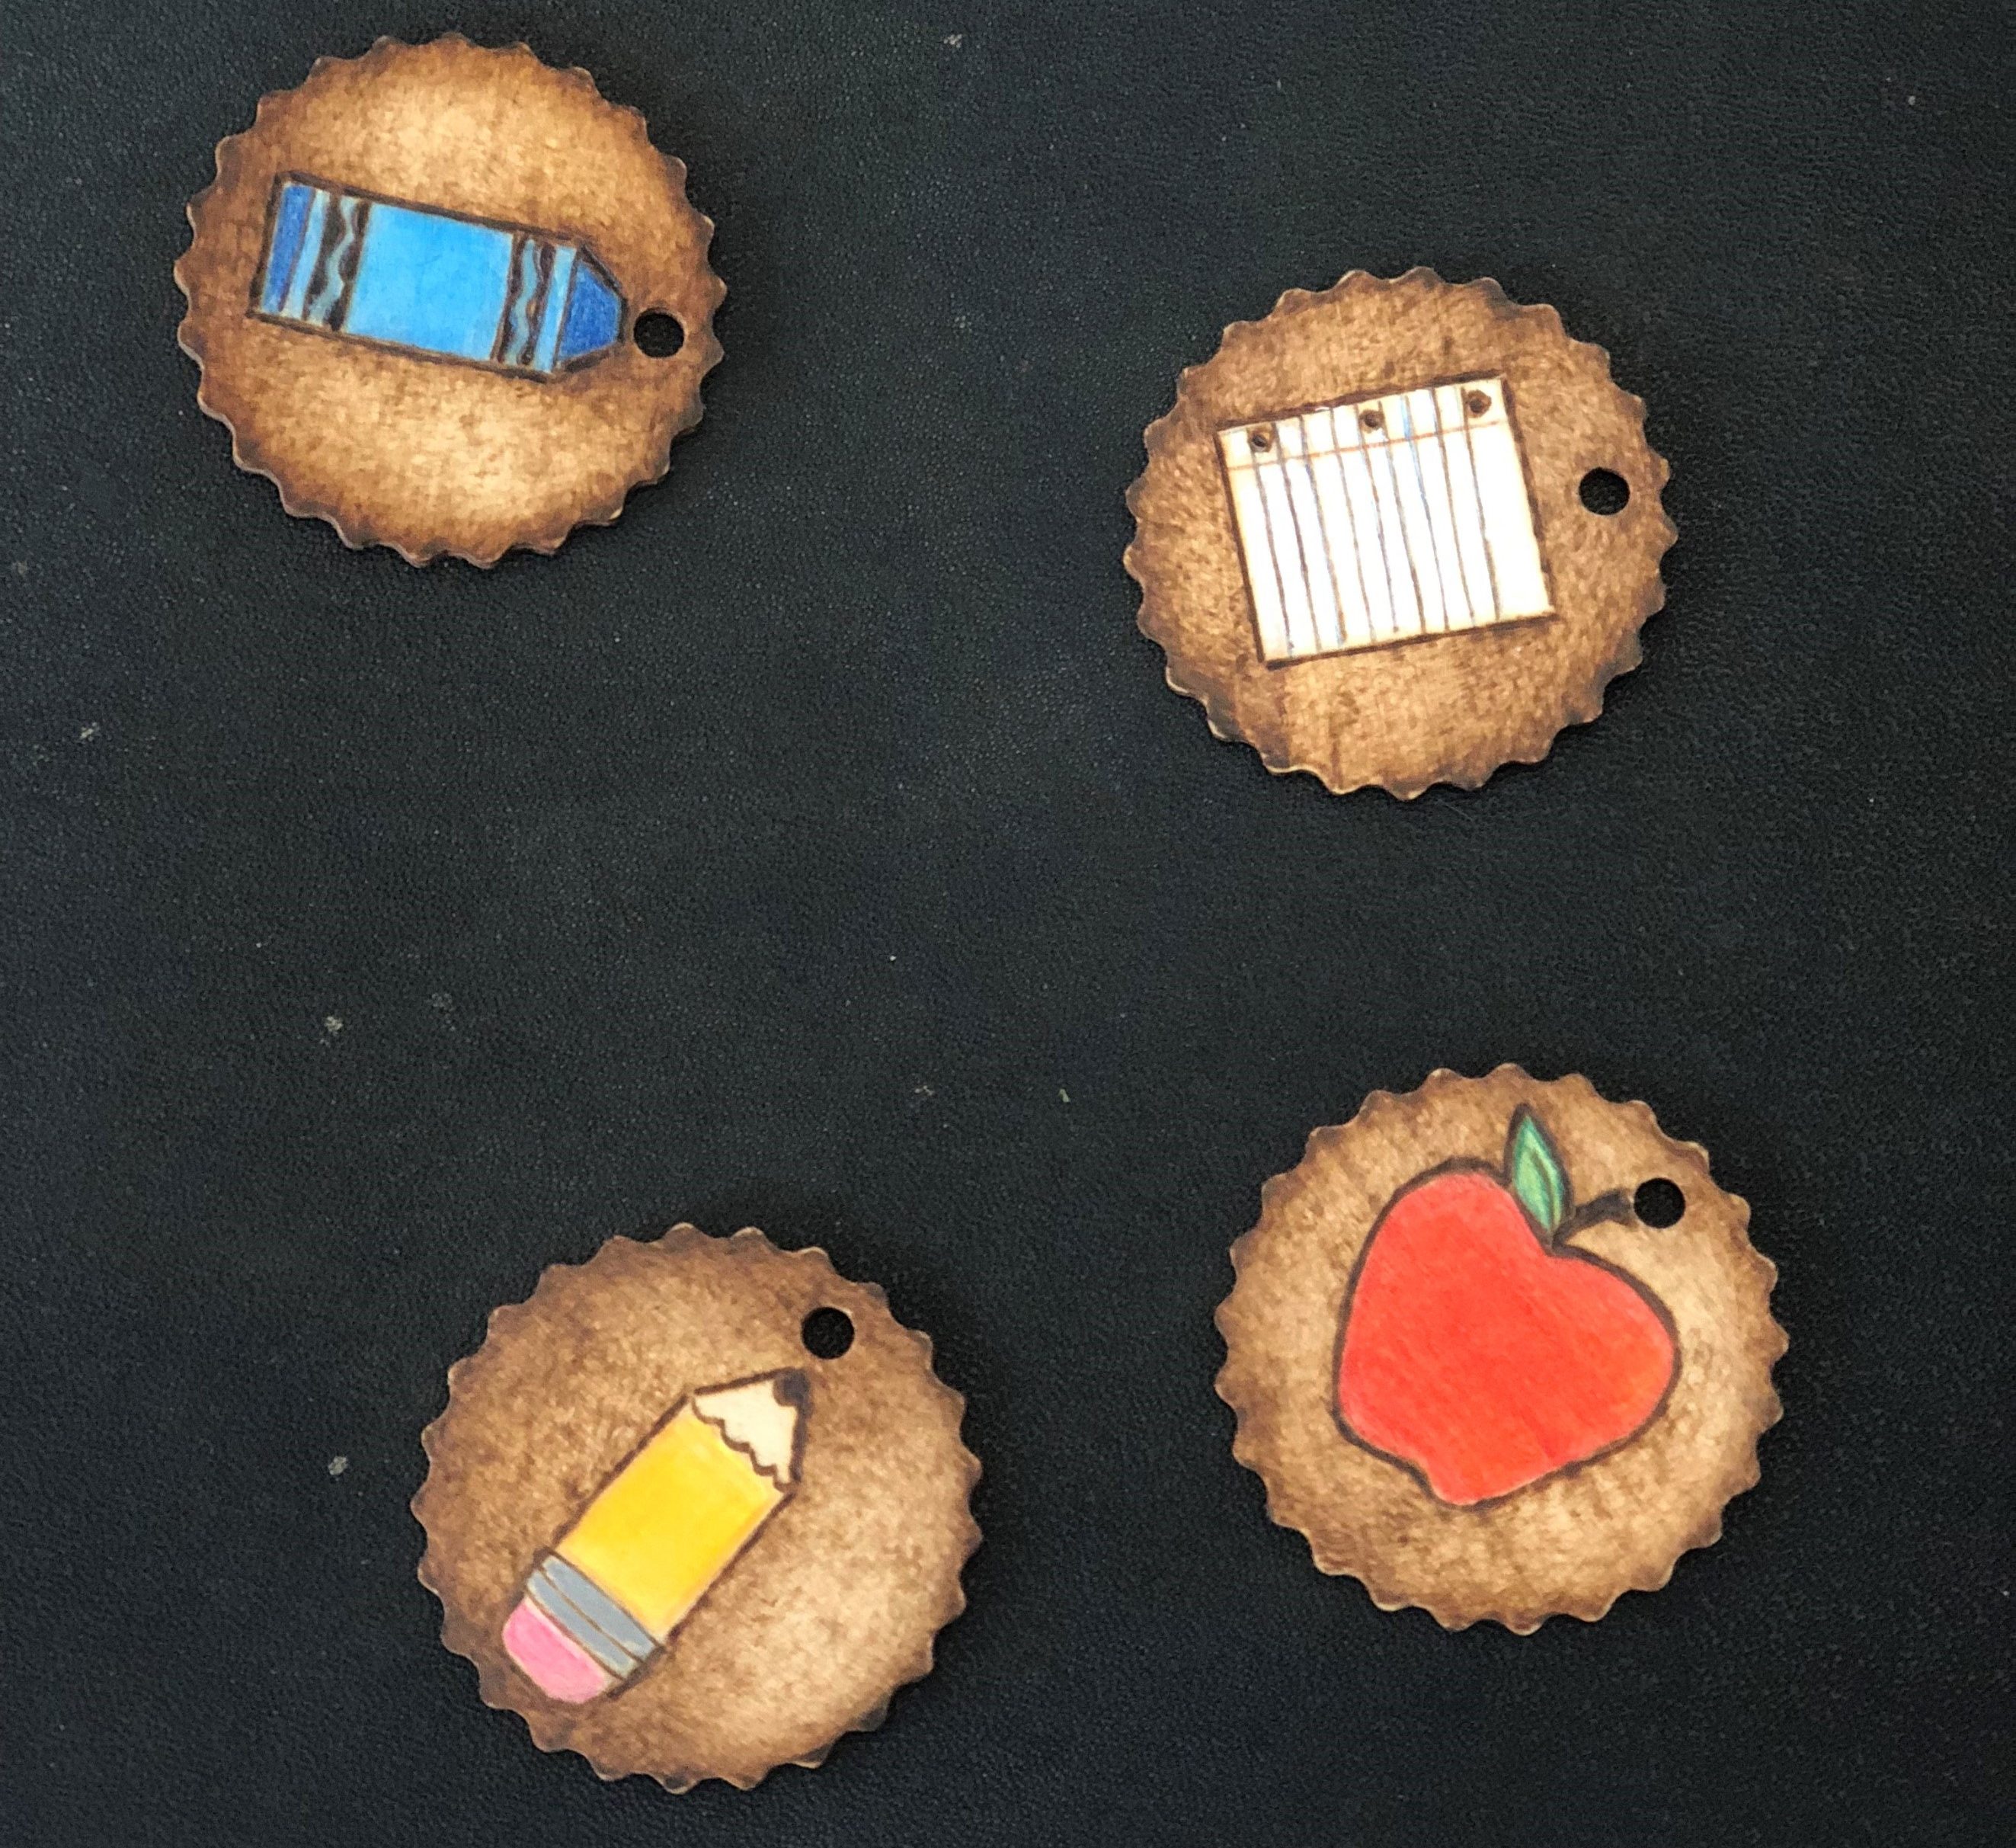
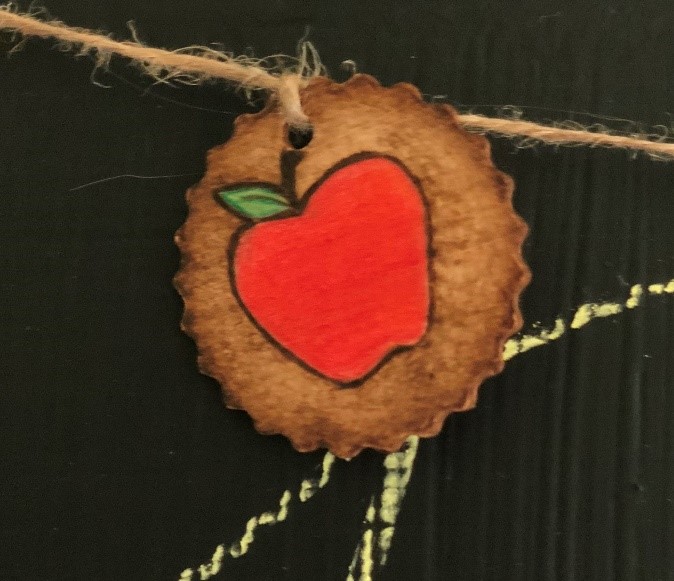
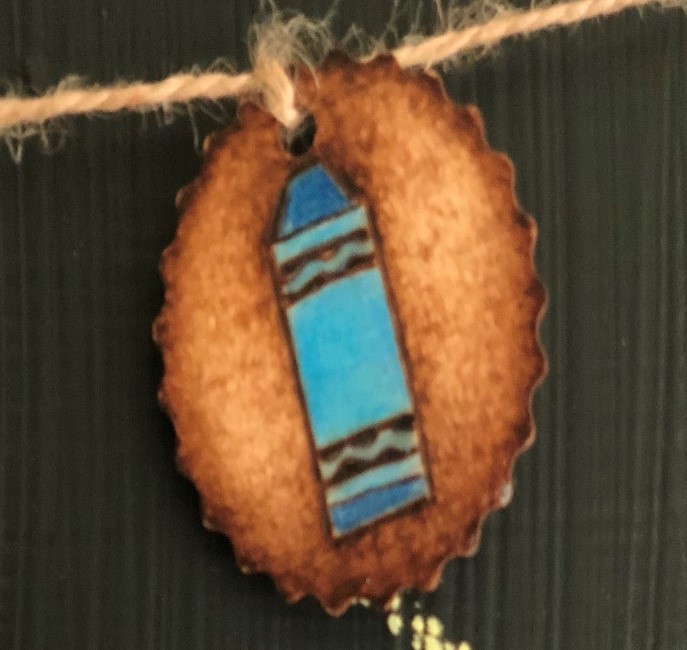
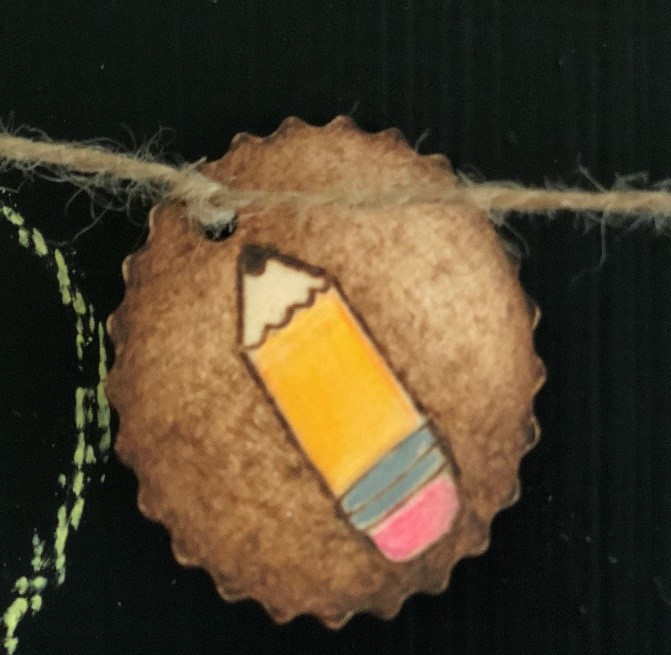
This is a fun and quick project to make for any teacher. Get your kids involved and let them help burn and/or create the designs that are used for this banner.
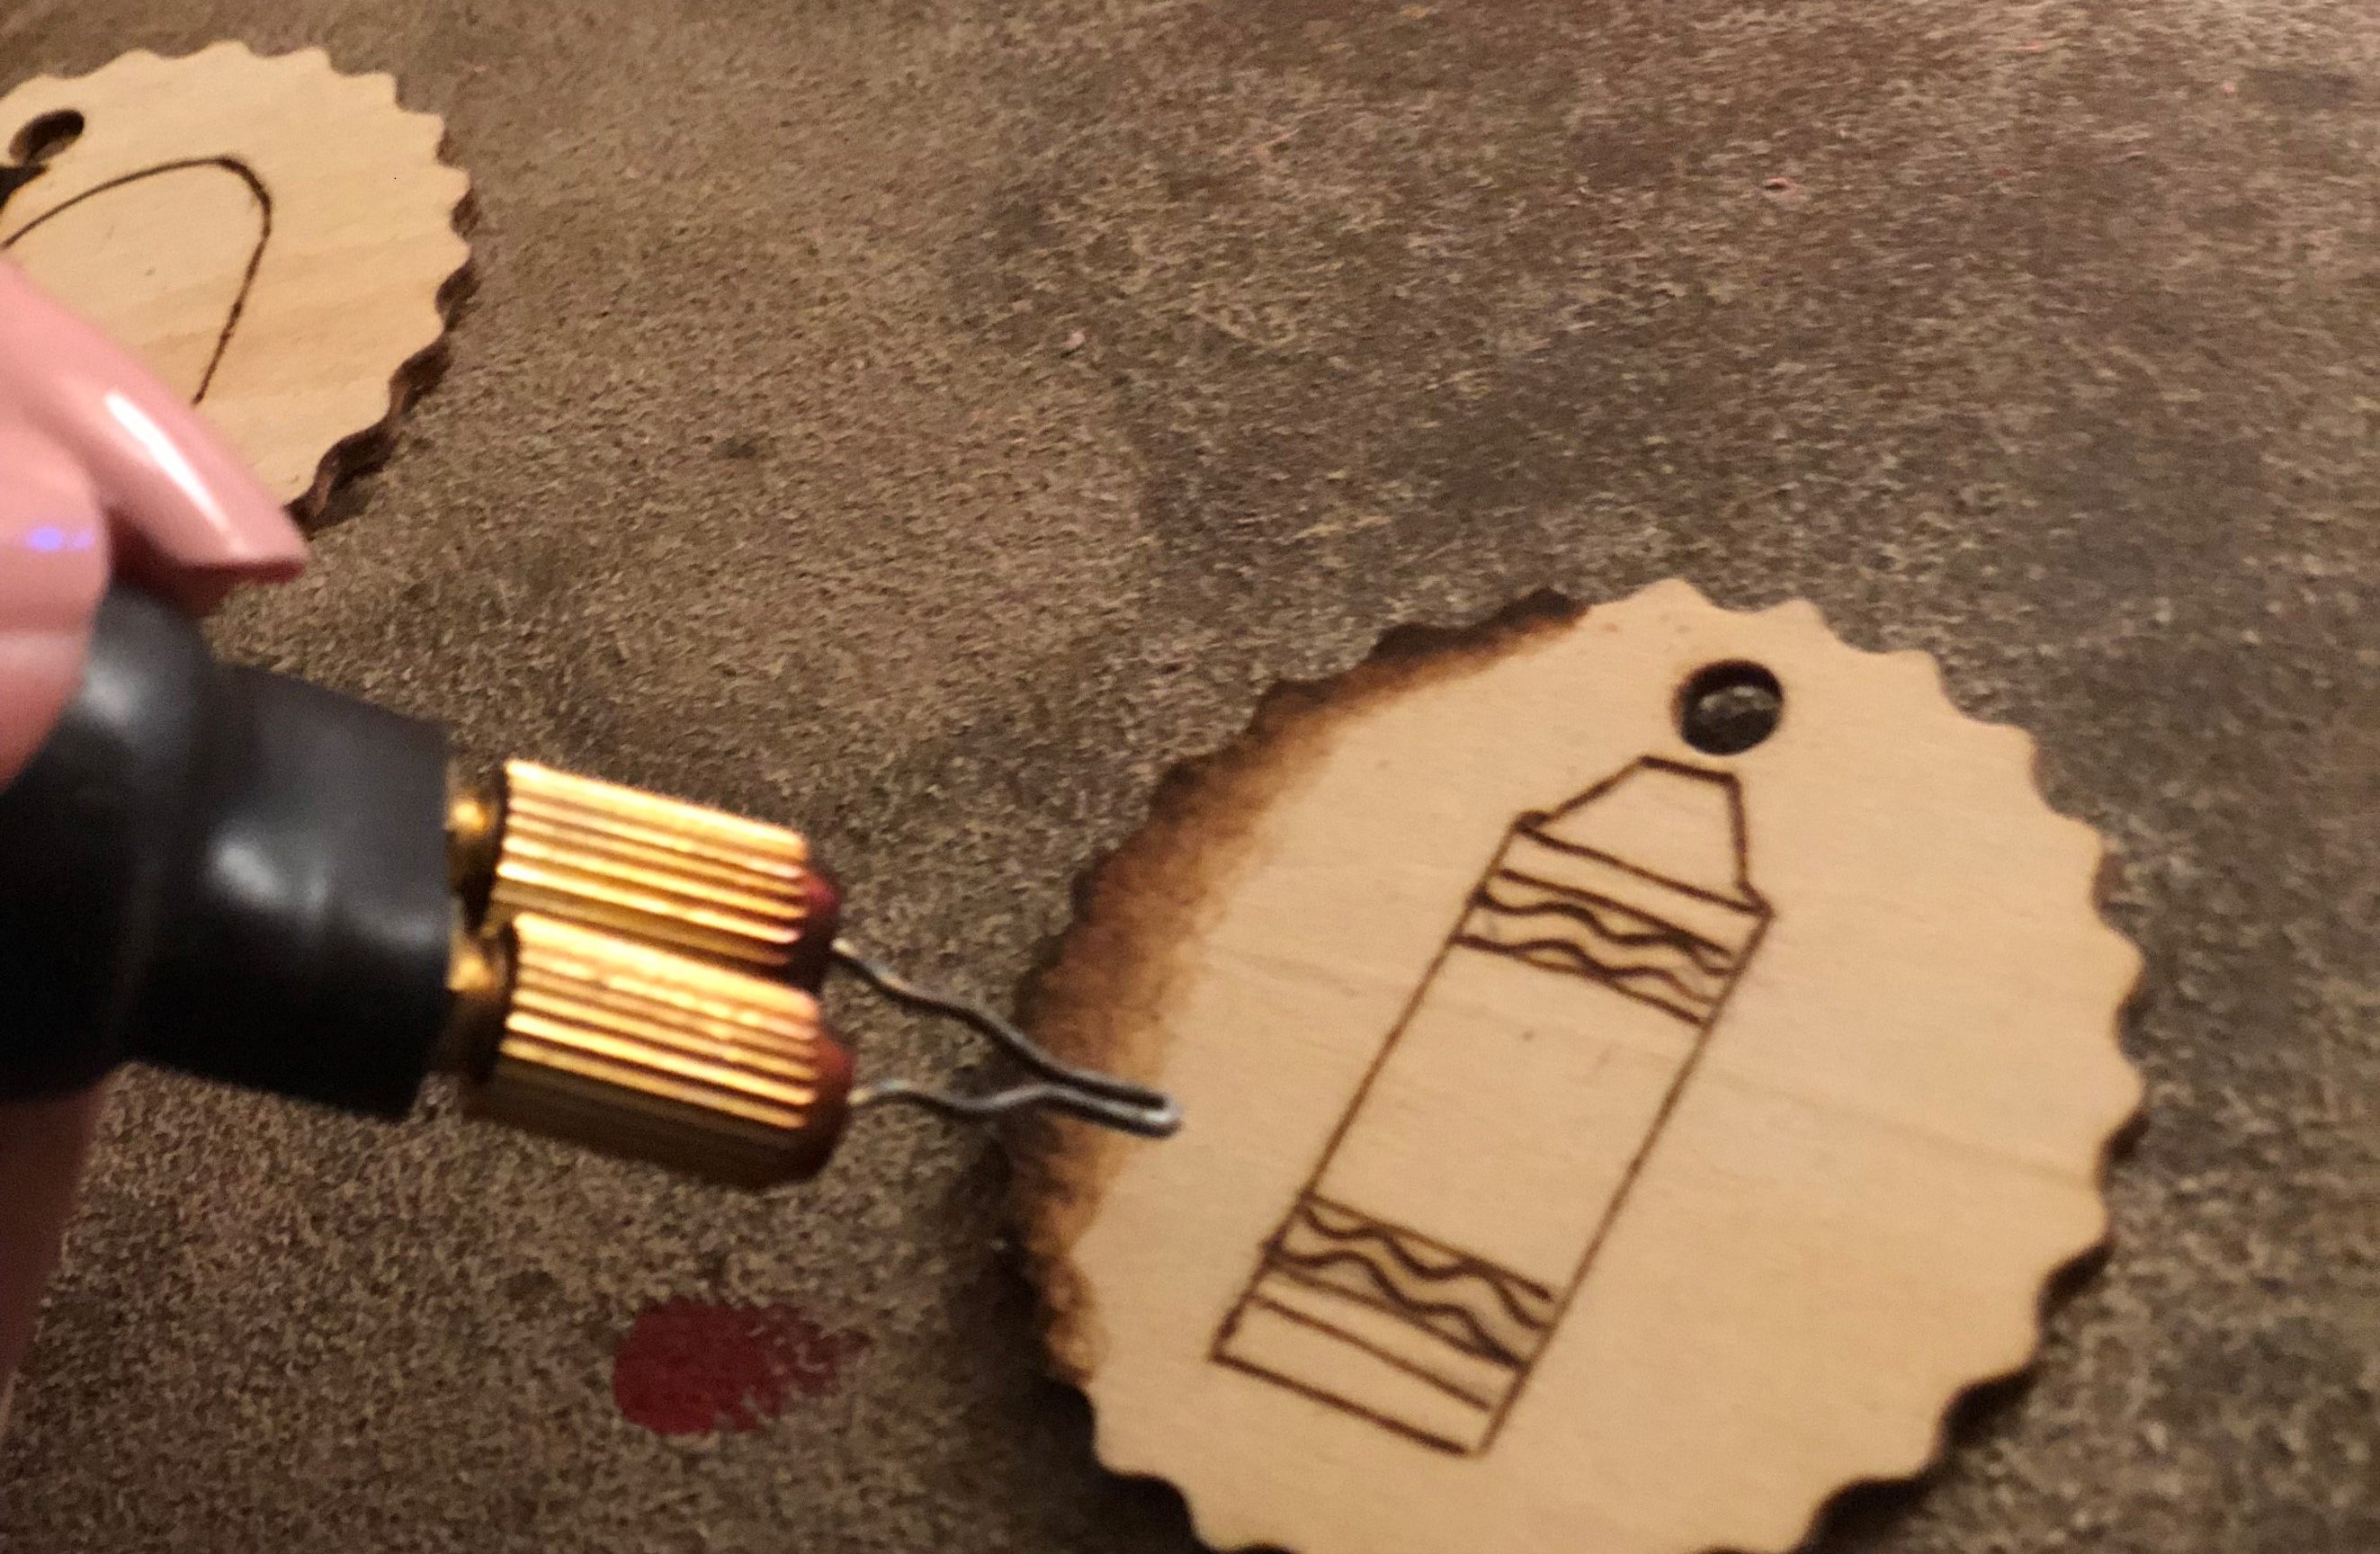
To start, draw or trace some items that are commonly associated with school (for tracing tips, check out my previous post Wood burning Tutorial). Keep the drawings simple. Make sure you only use one drawing per work piece. Outline your image with your pyrography pen.
To make your image pop, I recommend burning the background. You can make the background a solid dark burn or you can do some light shading (for shading tips, check out my tutorial Shading Technique).
Once your burn is complete, add some color to your wood.
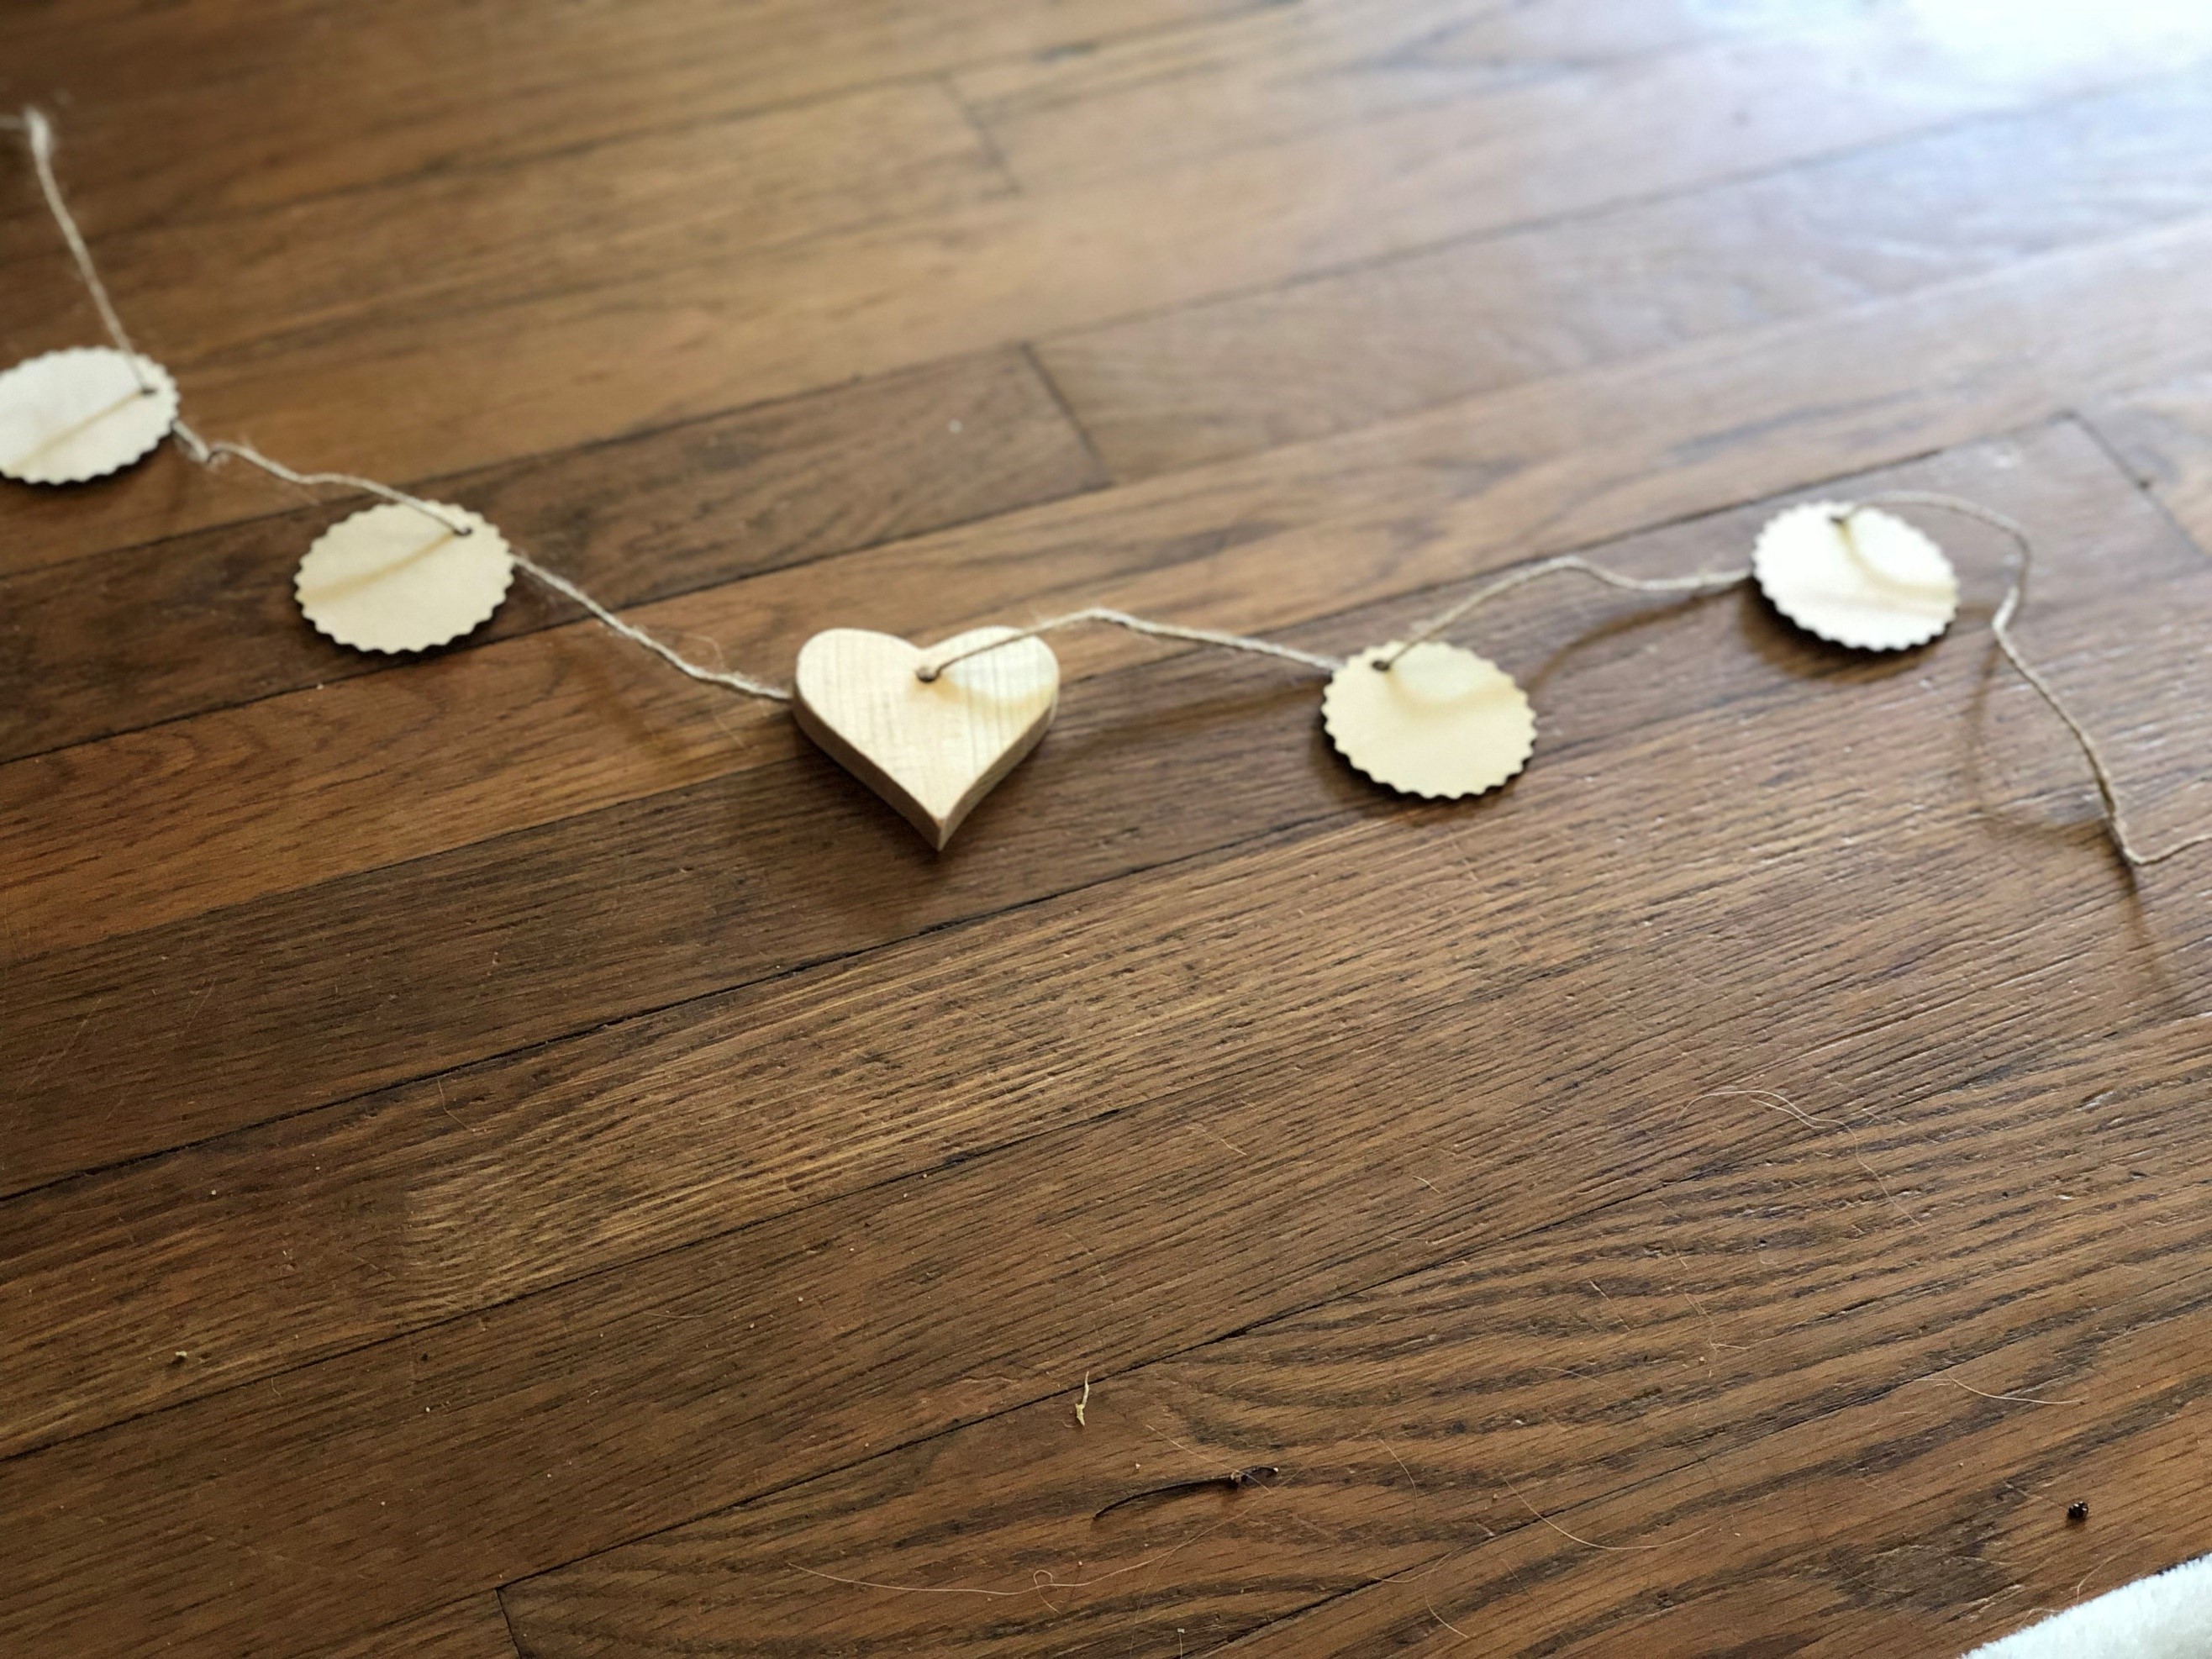
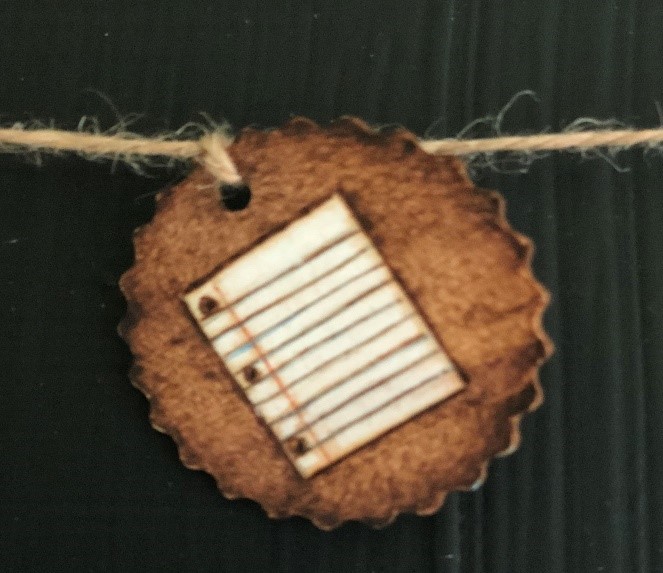
String your wooden circles on some twine. Once you pull one circle through, knot it at the top of the hole to keep the wooden piece from shifting.
 |
 |
 |
 |
Give this to your child’s teacher as a sweet “Back to School” gift. If the banner is not for you, as another option, you could use these wooden circles as an ornament or they could even be used for decoration on a wreath. Practice with different designs and see what works best for you and your kids.
If you have any questions whatsoever, please leave them on the comments below and I’ll get to them as soon as possible.
See you next time!
Andrea Pate
Pate’s Pyrography
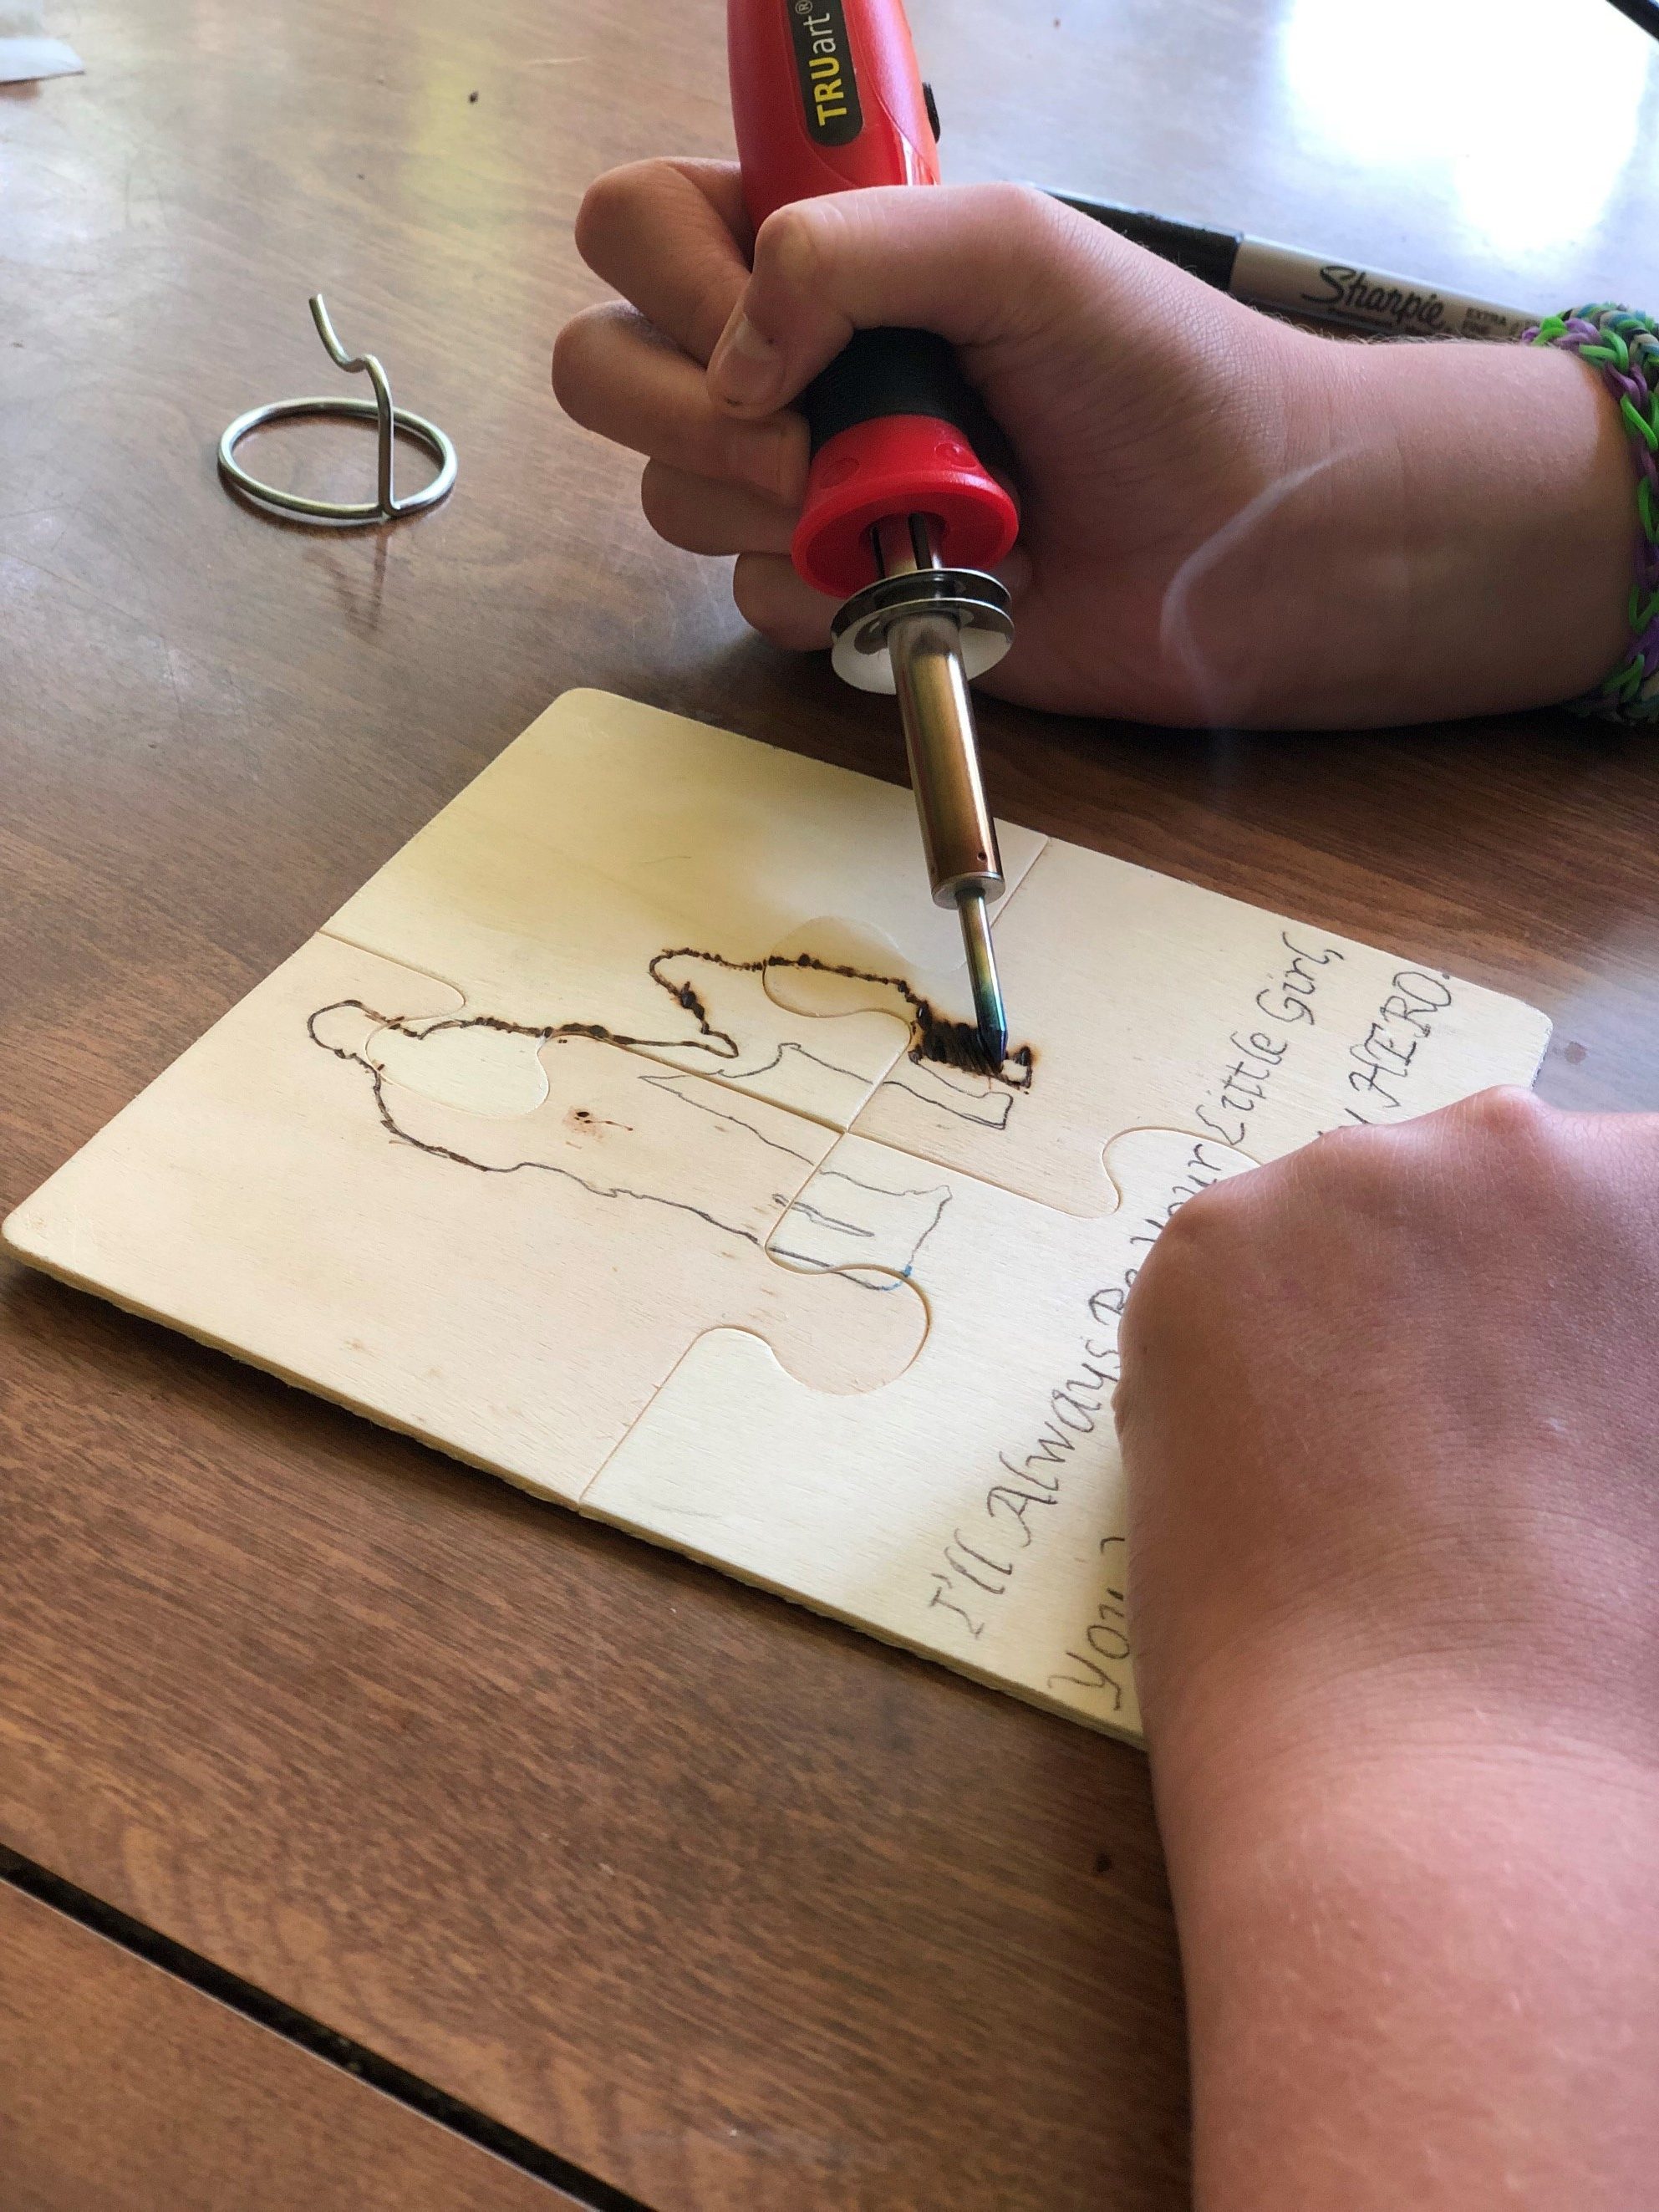
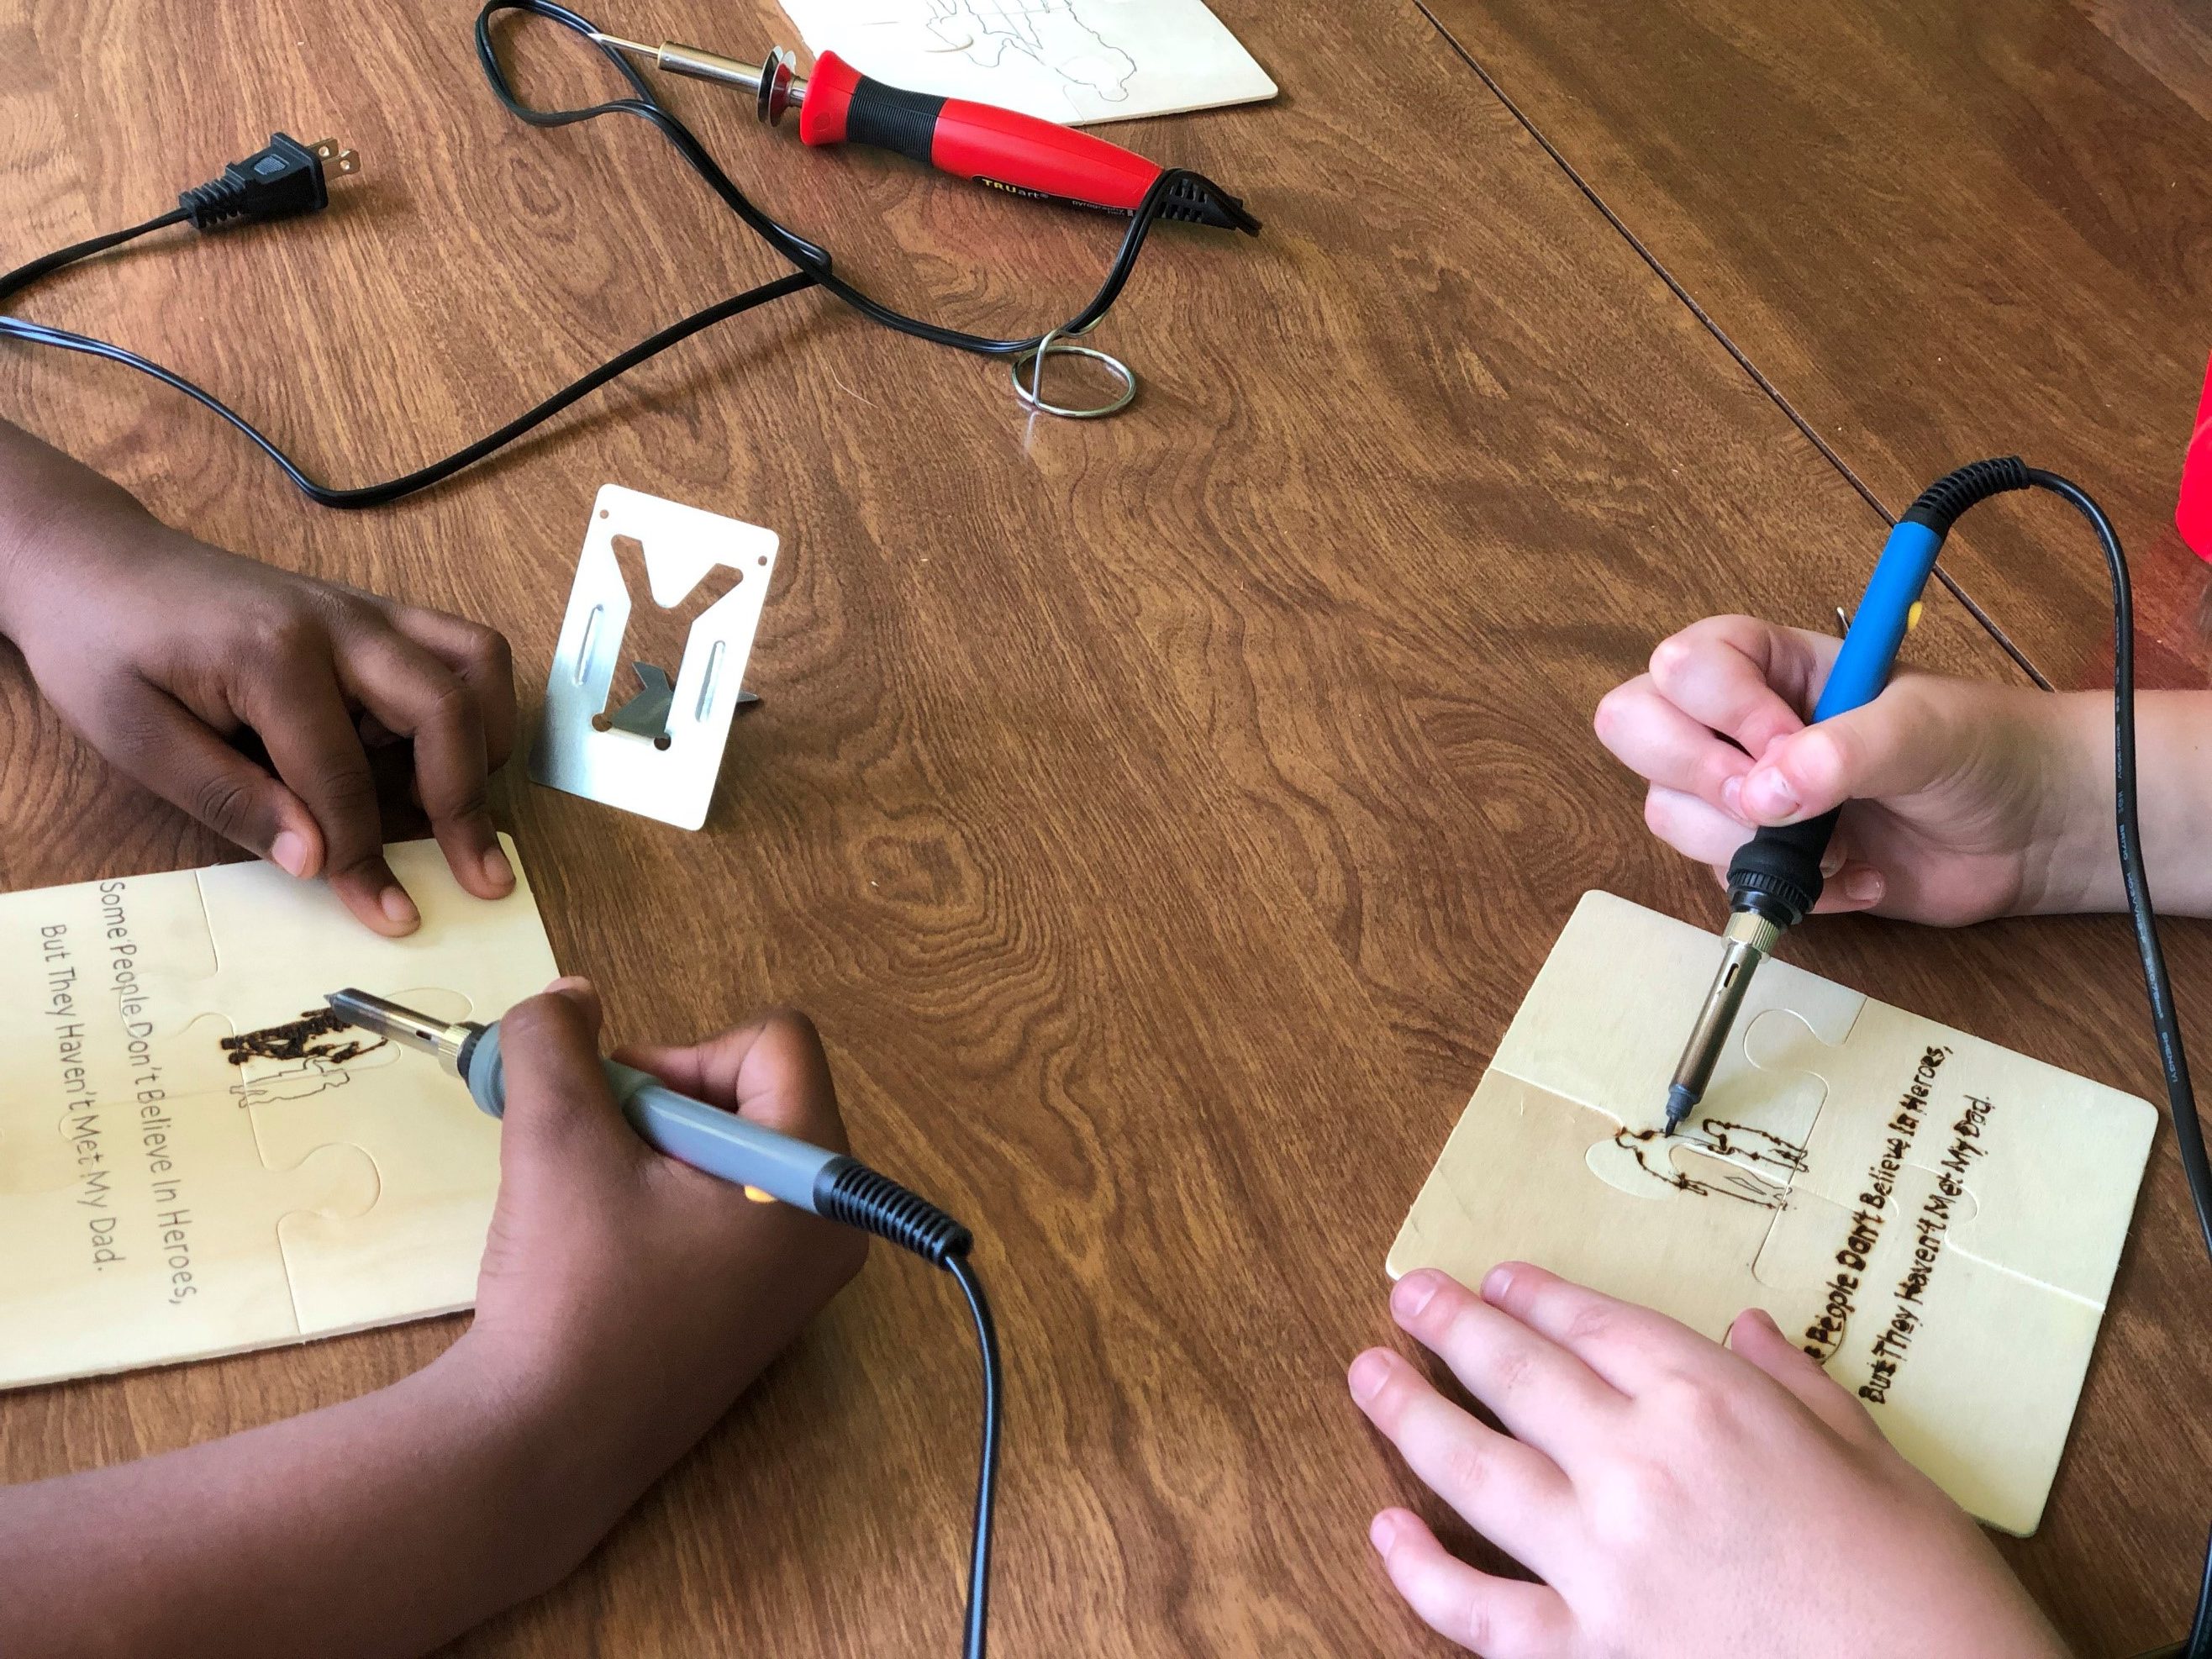
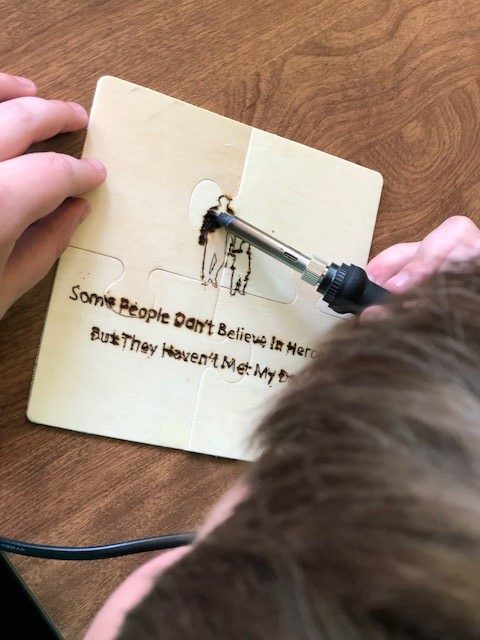
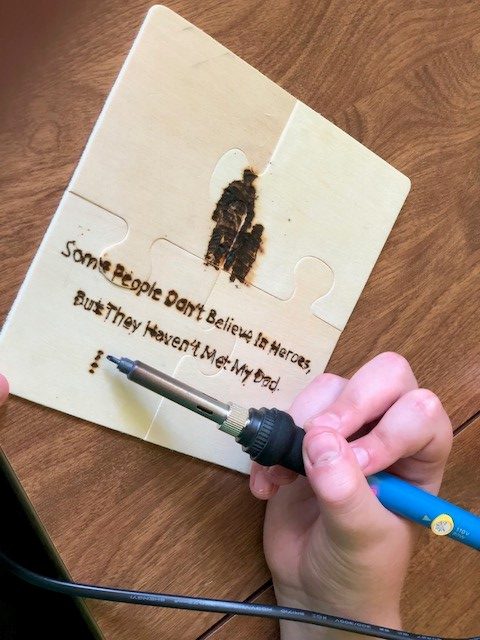
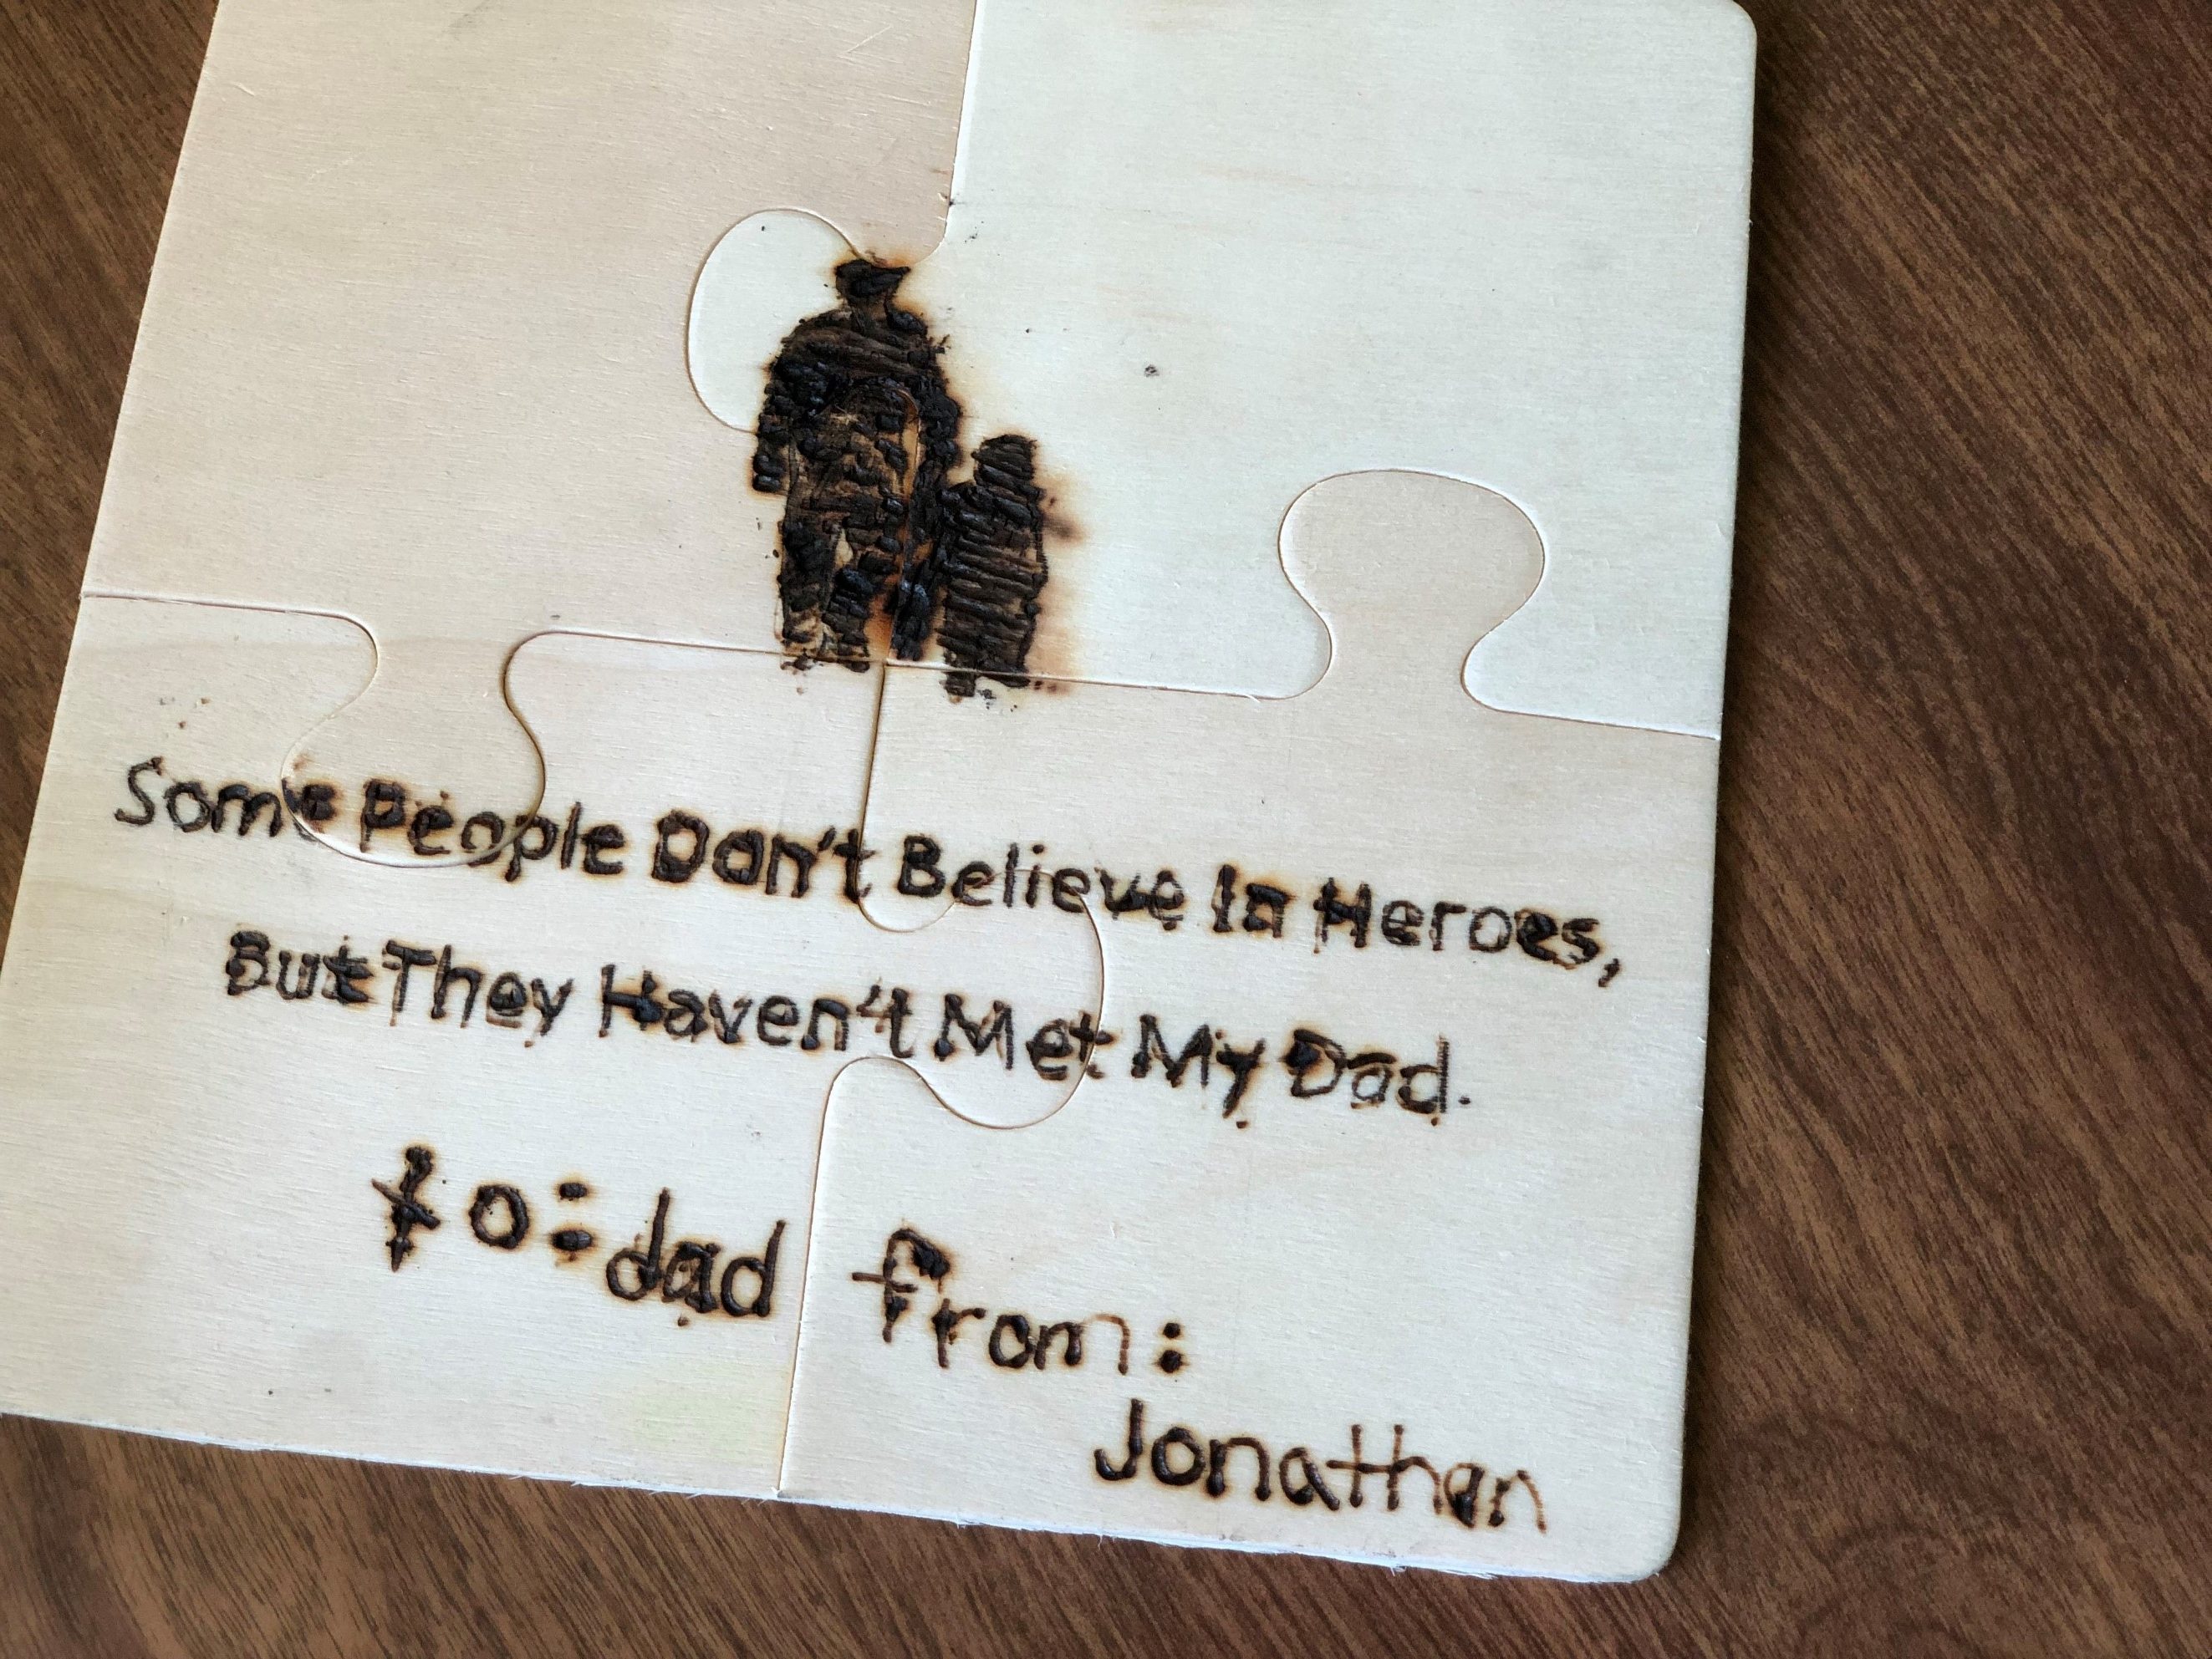
A great way to bond the whole family is to work together on a single woodburning project. Yes, pyrography can be for the little ones too!
What you will need:
IMPORTANT Child Safety Tips:
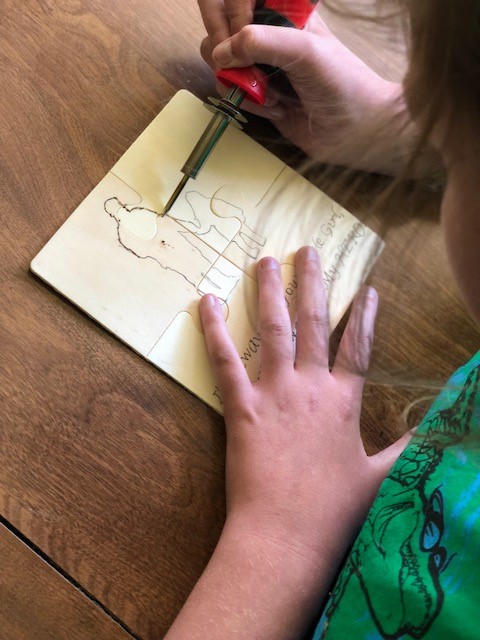
Never let a child use a pyrography pen unattended. An adult must always be present to supervise since pyrography pens get hot – VERY HOT. Be sure your child holds the pen by the rubber handle and never touch near the tip of the pen. If you or your child is not actively burning with your pen, keep it propped up on the stand that was provided with your TRUArt pyrography kit. It holds your hot pen securely and you don’t have to worry about it accidentally touching anything else. Always make sure your pen is turned OFF and unplugged when it is not in use. Allow some time for your pen to cool off completely before handling and storing it. Remember, these pens are HOT. This is not a toy and must be used with caution under adult supervision.

 |
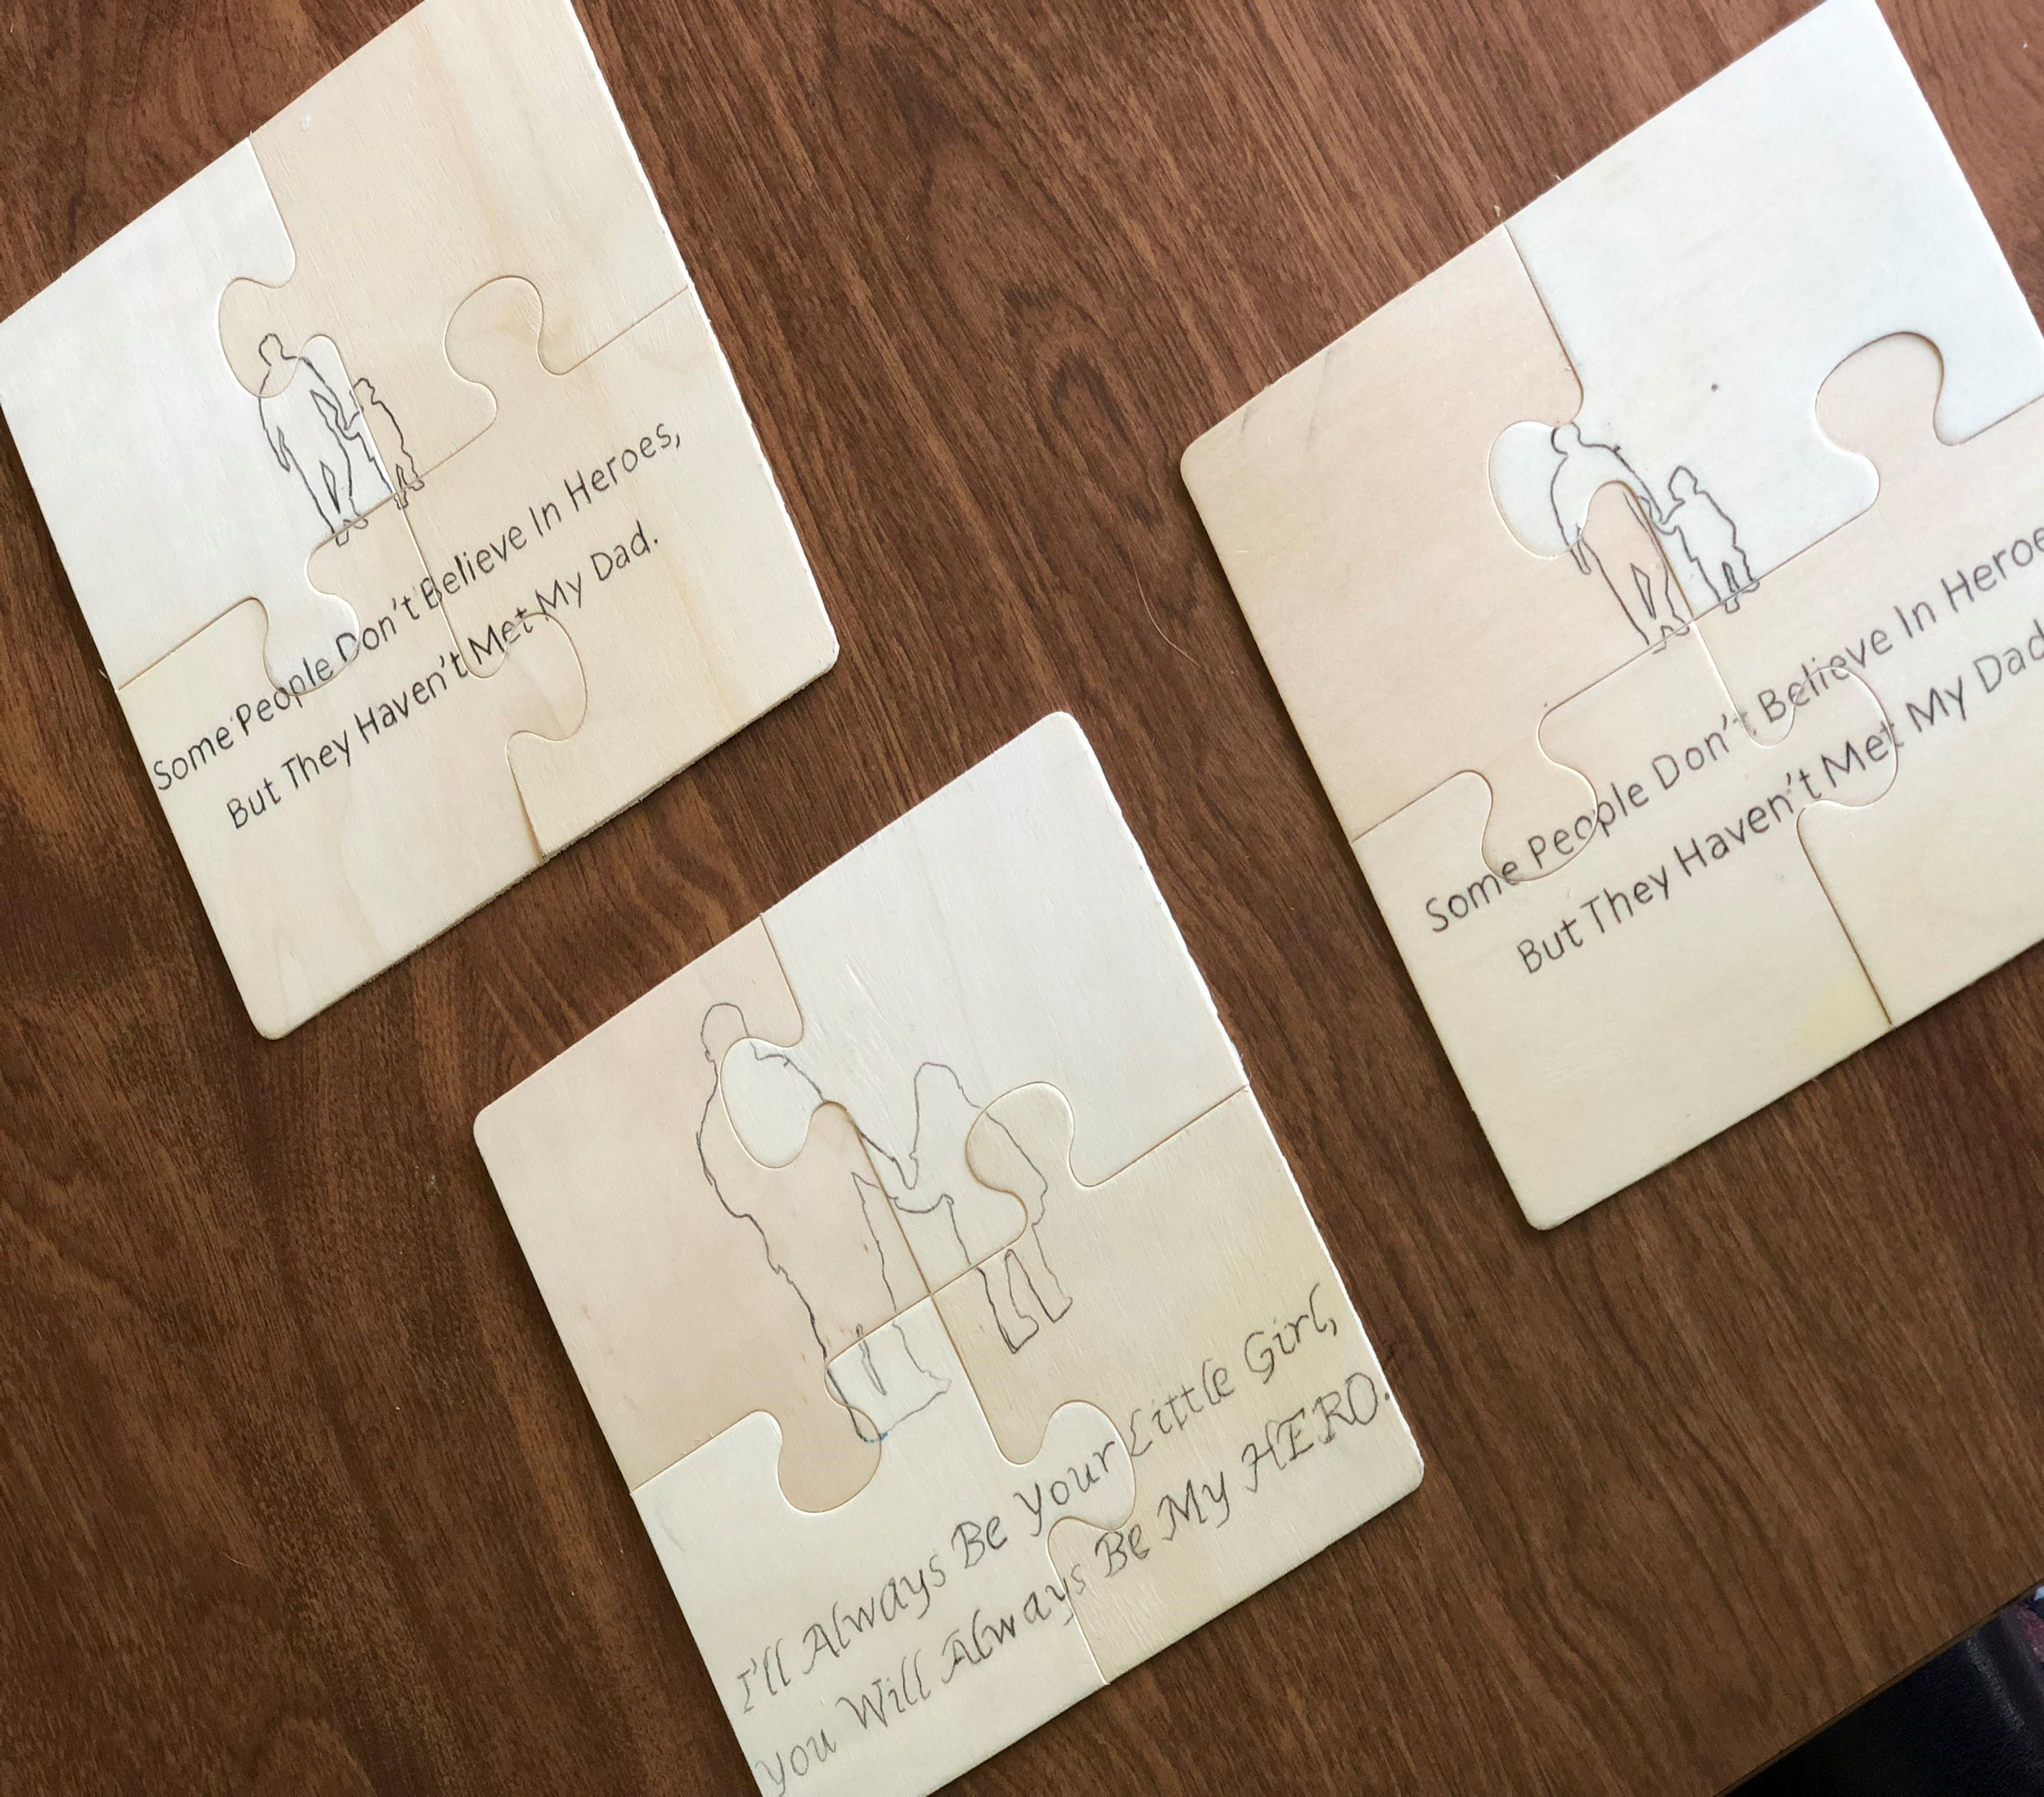 |
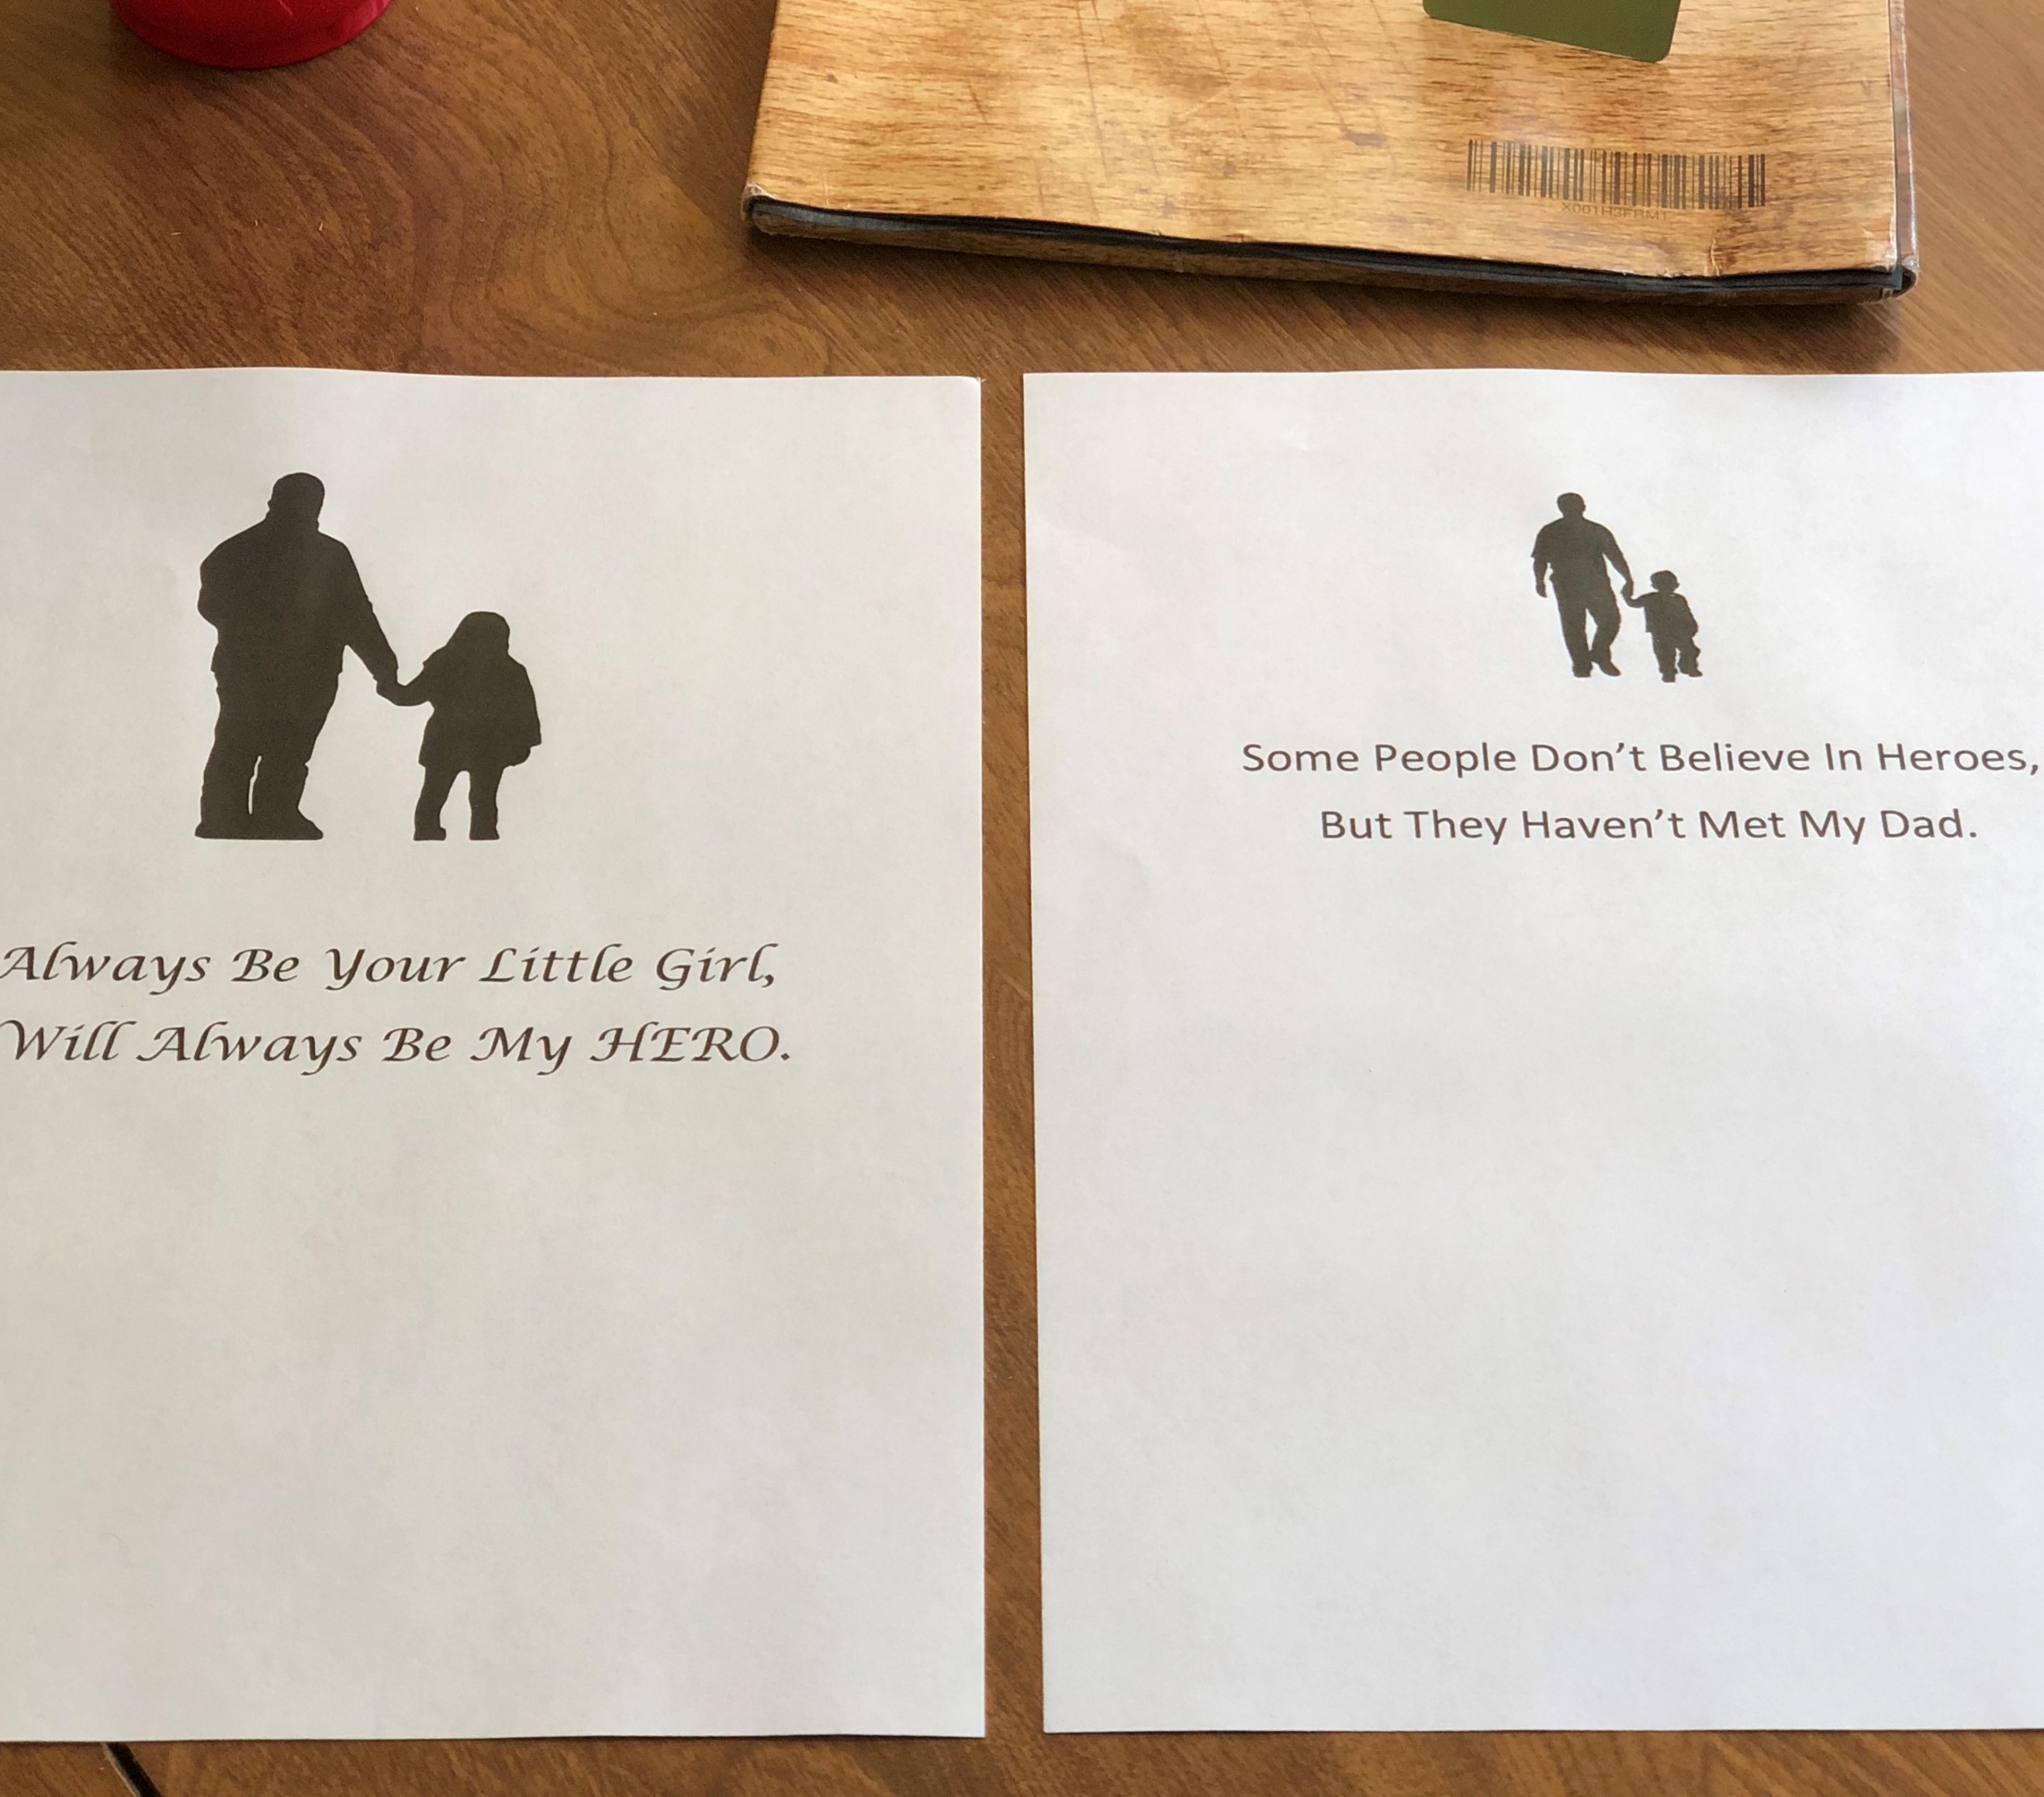
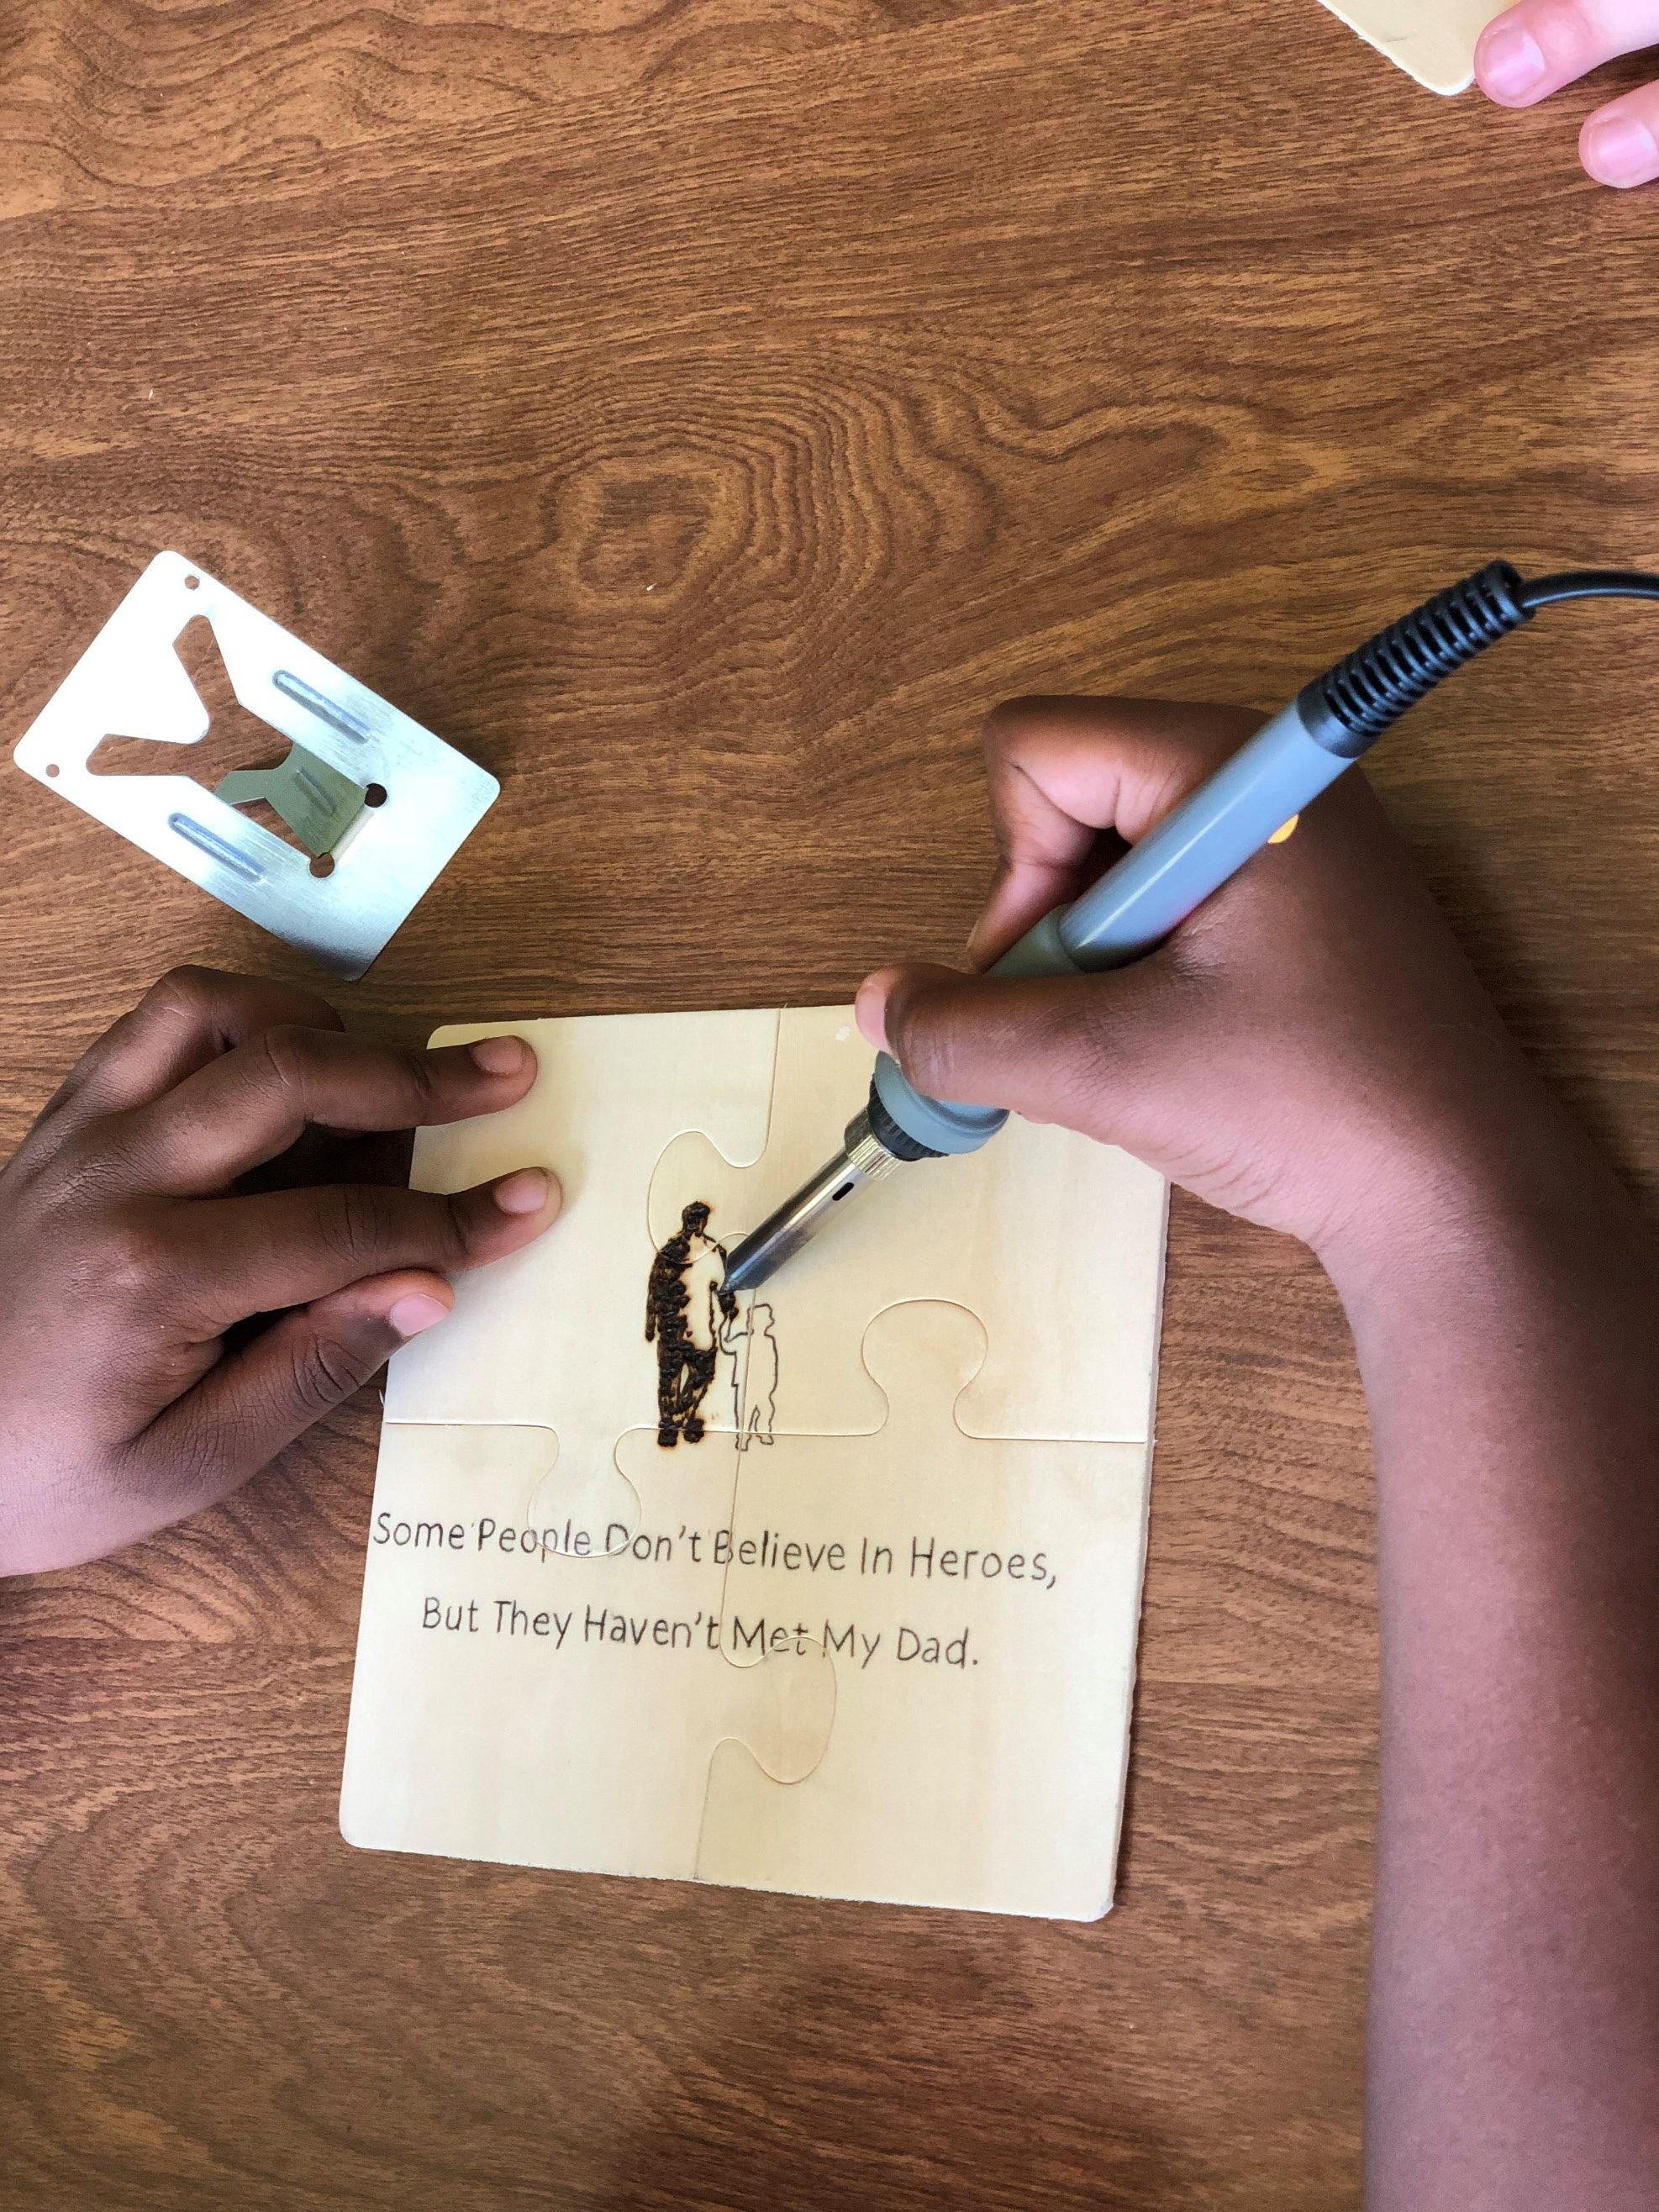
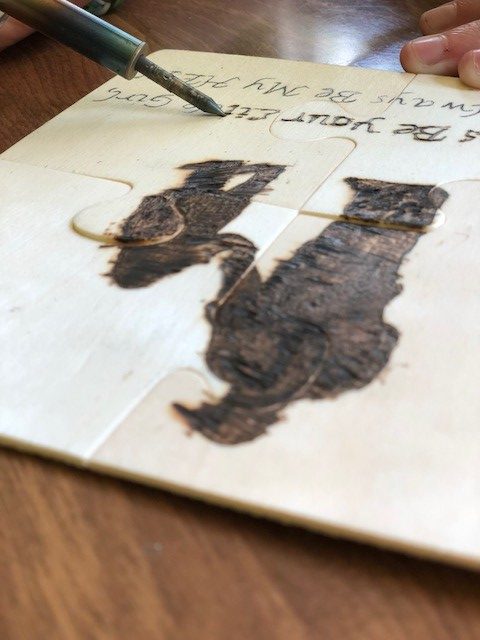
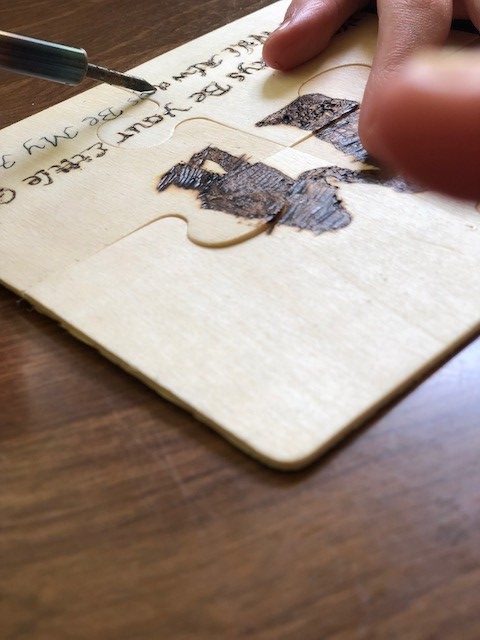
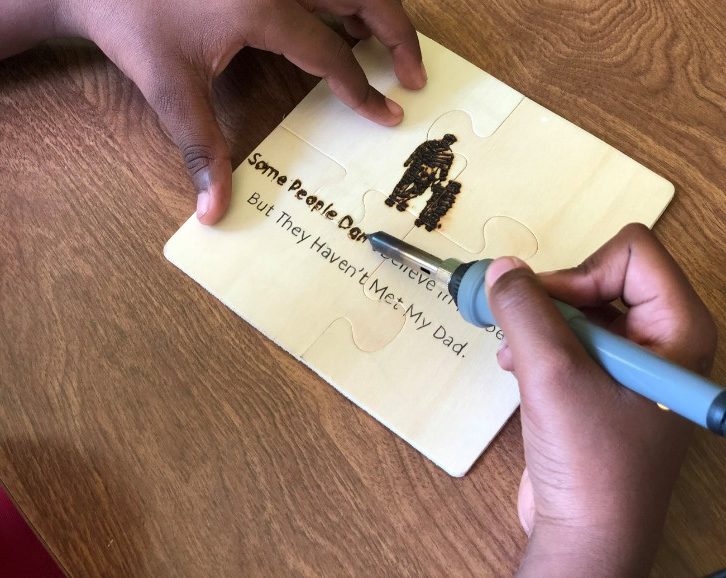
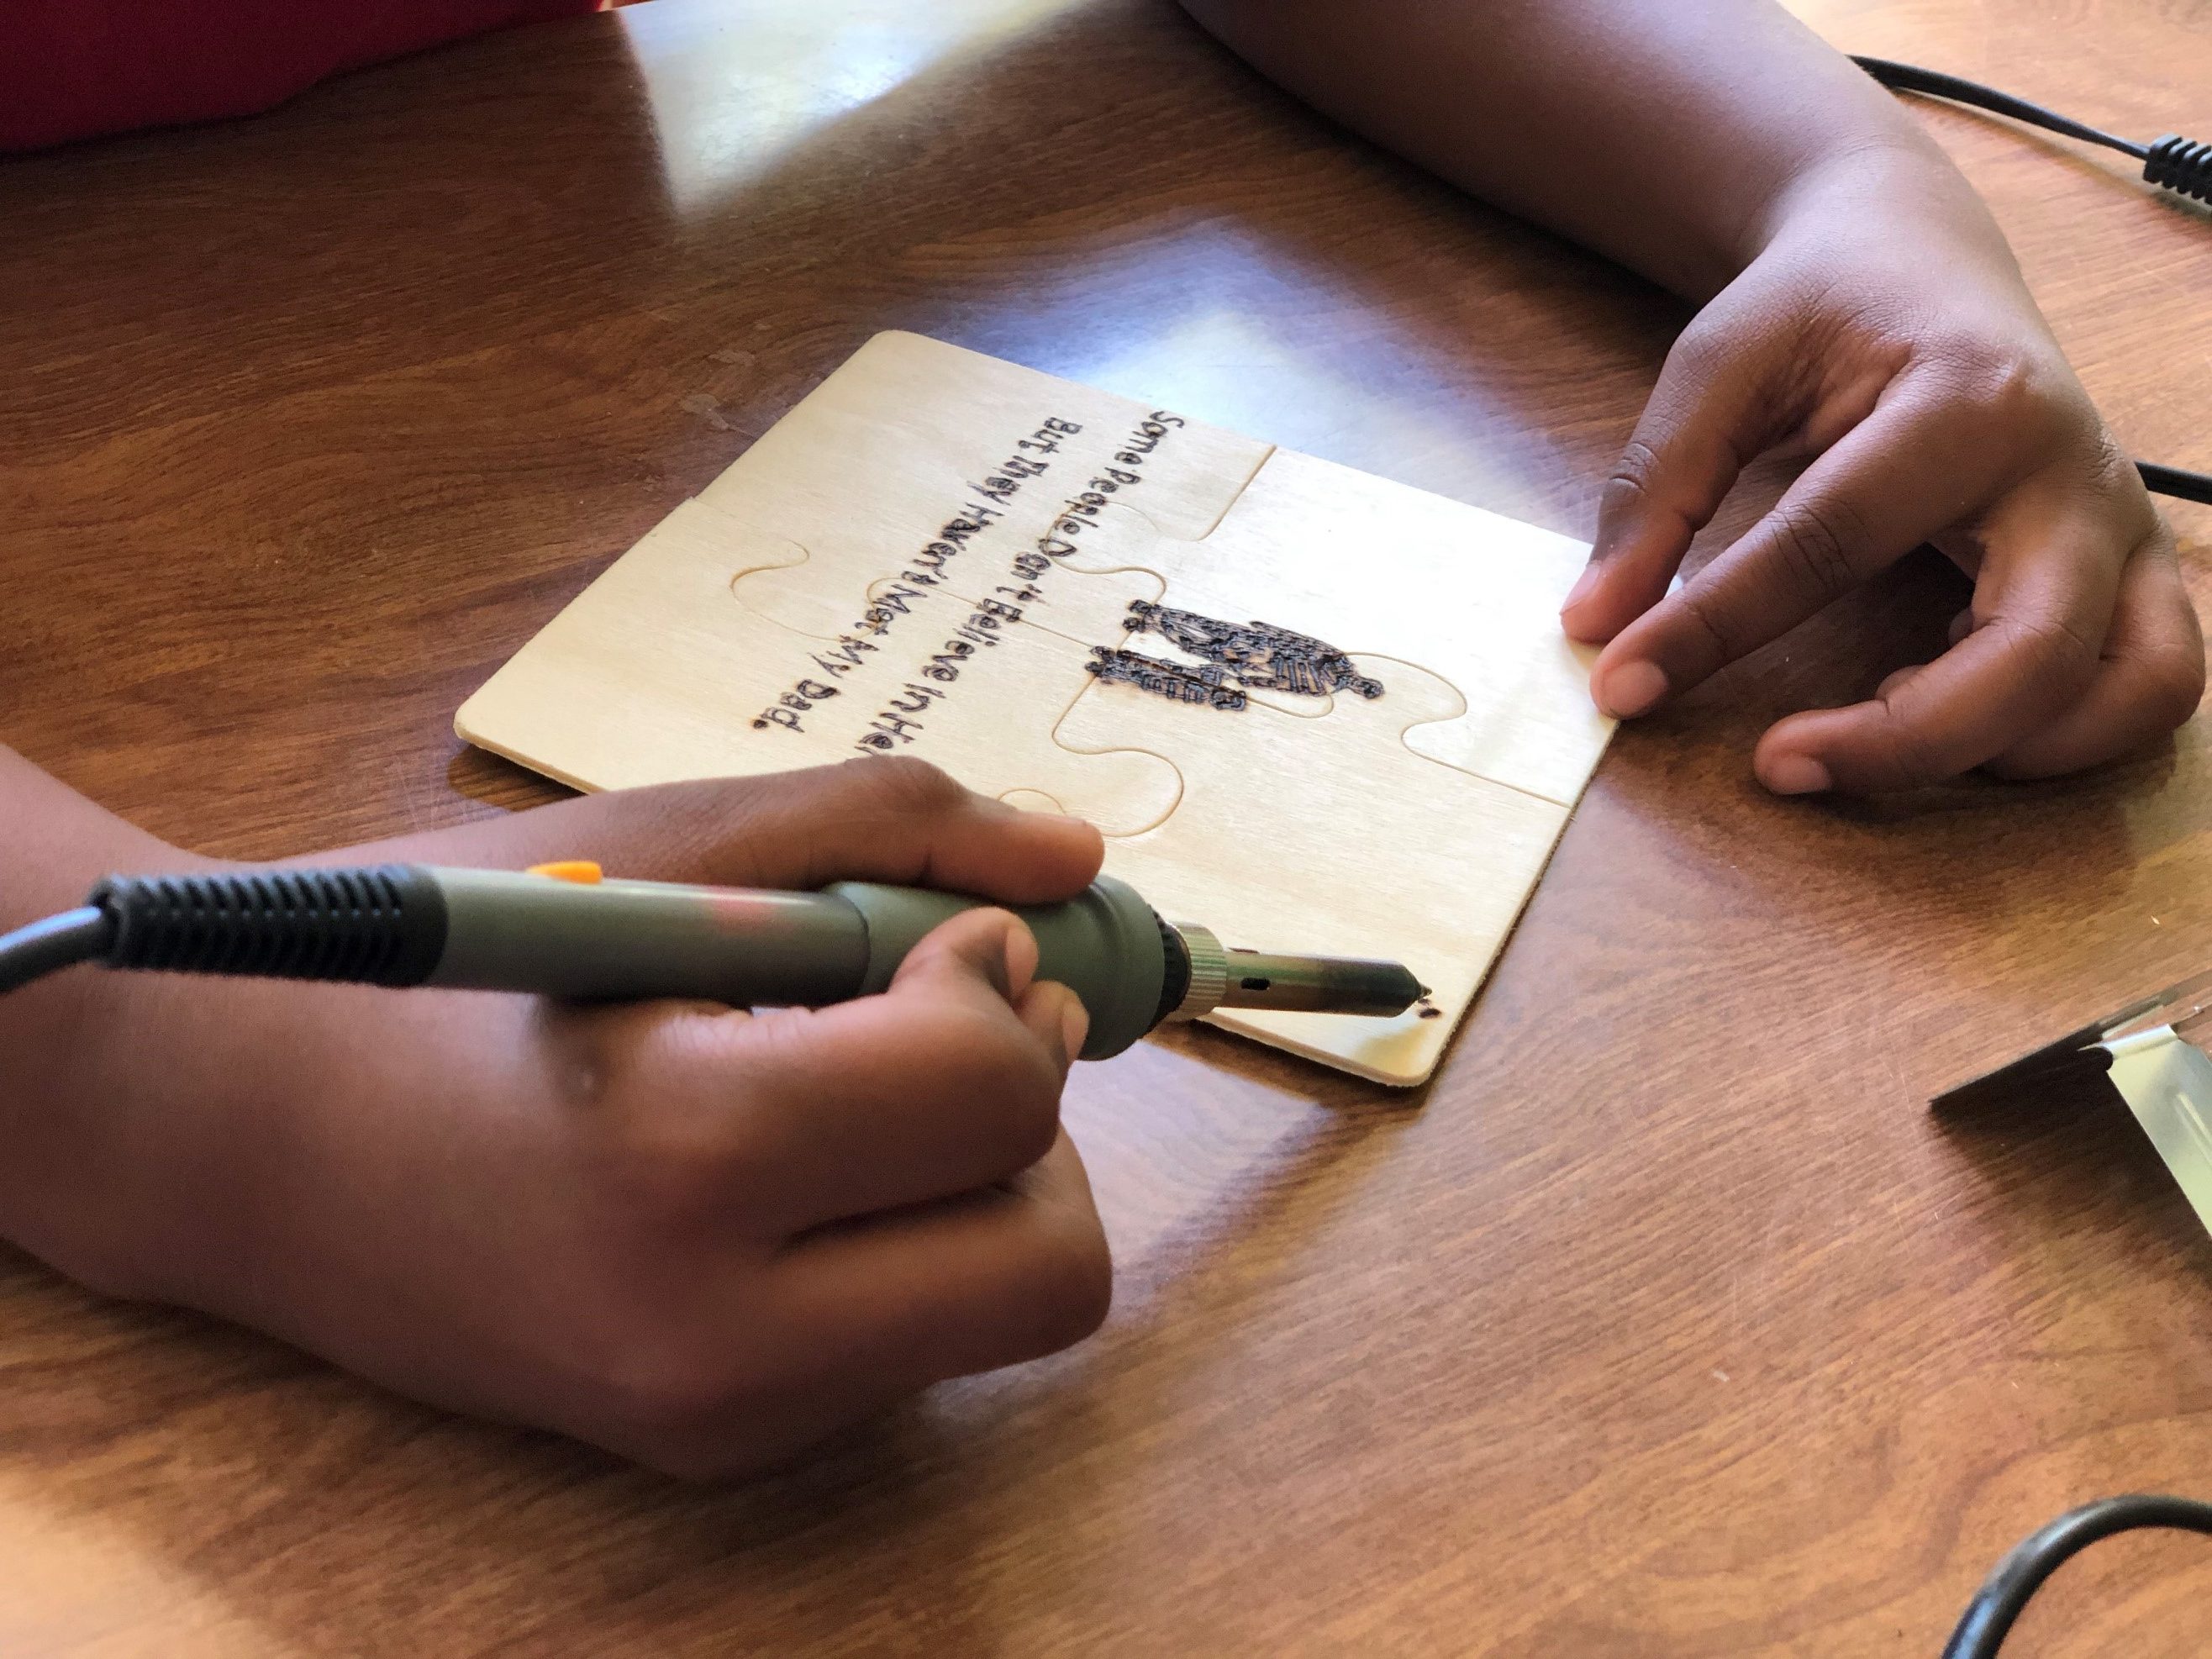
One thing I find exciting about pyrography is that anyone can do it! Children in general love to draw and enjoy creating something special for the ones they love so I wanted to find a project that would be fun and easy for any age to try. With the help of my three little artist volunteers, we scoured the internet for quotes or phrases that sounded like something they would want to tell their father. Once we had the phrases picked out, I typed up the words on a Word document. I let the young artists pick the font that they thought looked best for their artwork. Larger fonts work best as does thicker lettering. I then looked for some simple clip art to add to the document – nothing too difficult for our young artists to handle.
Once you have everything picked out the way you want, scale everything down to the size you need to fit the wood. Print your image out and then either you or your child can trace the image onto the wood. If you’re not sure on how to do this, check out my previous post Woodburning Tutorial. Once the image is traced, remove the carbon paper and tape. Start burning.
 |
 |
When burning, children tend to press down hard with the pen. This can cause hand cramping as well as burn splotches on the wood. If this happens, don’t worry. Remember, they are just children. Let them have fun enjoying the process and reassure them that it happens to everyone every now and then. If burn splotches do happen, this usually means the temperature is too high and needs to be adjusted. Be sure that an adult adjusts the temperature of the pen, never a child.
 |
 |
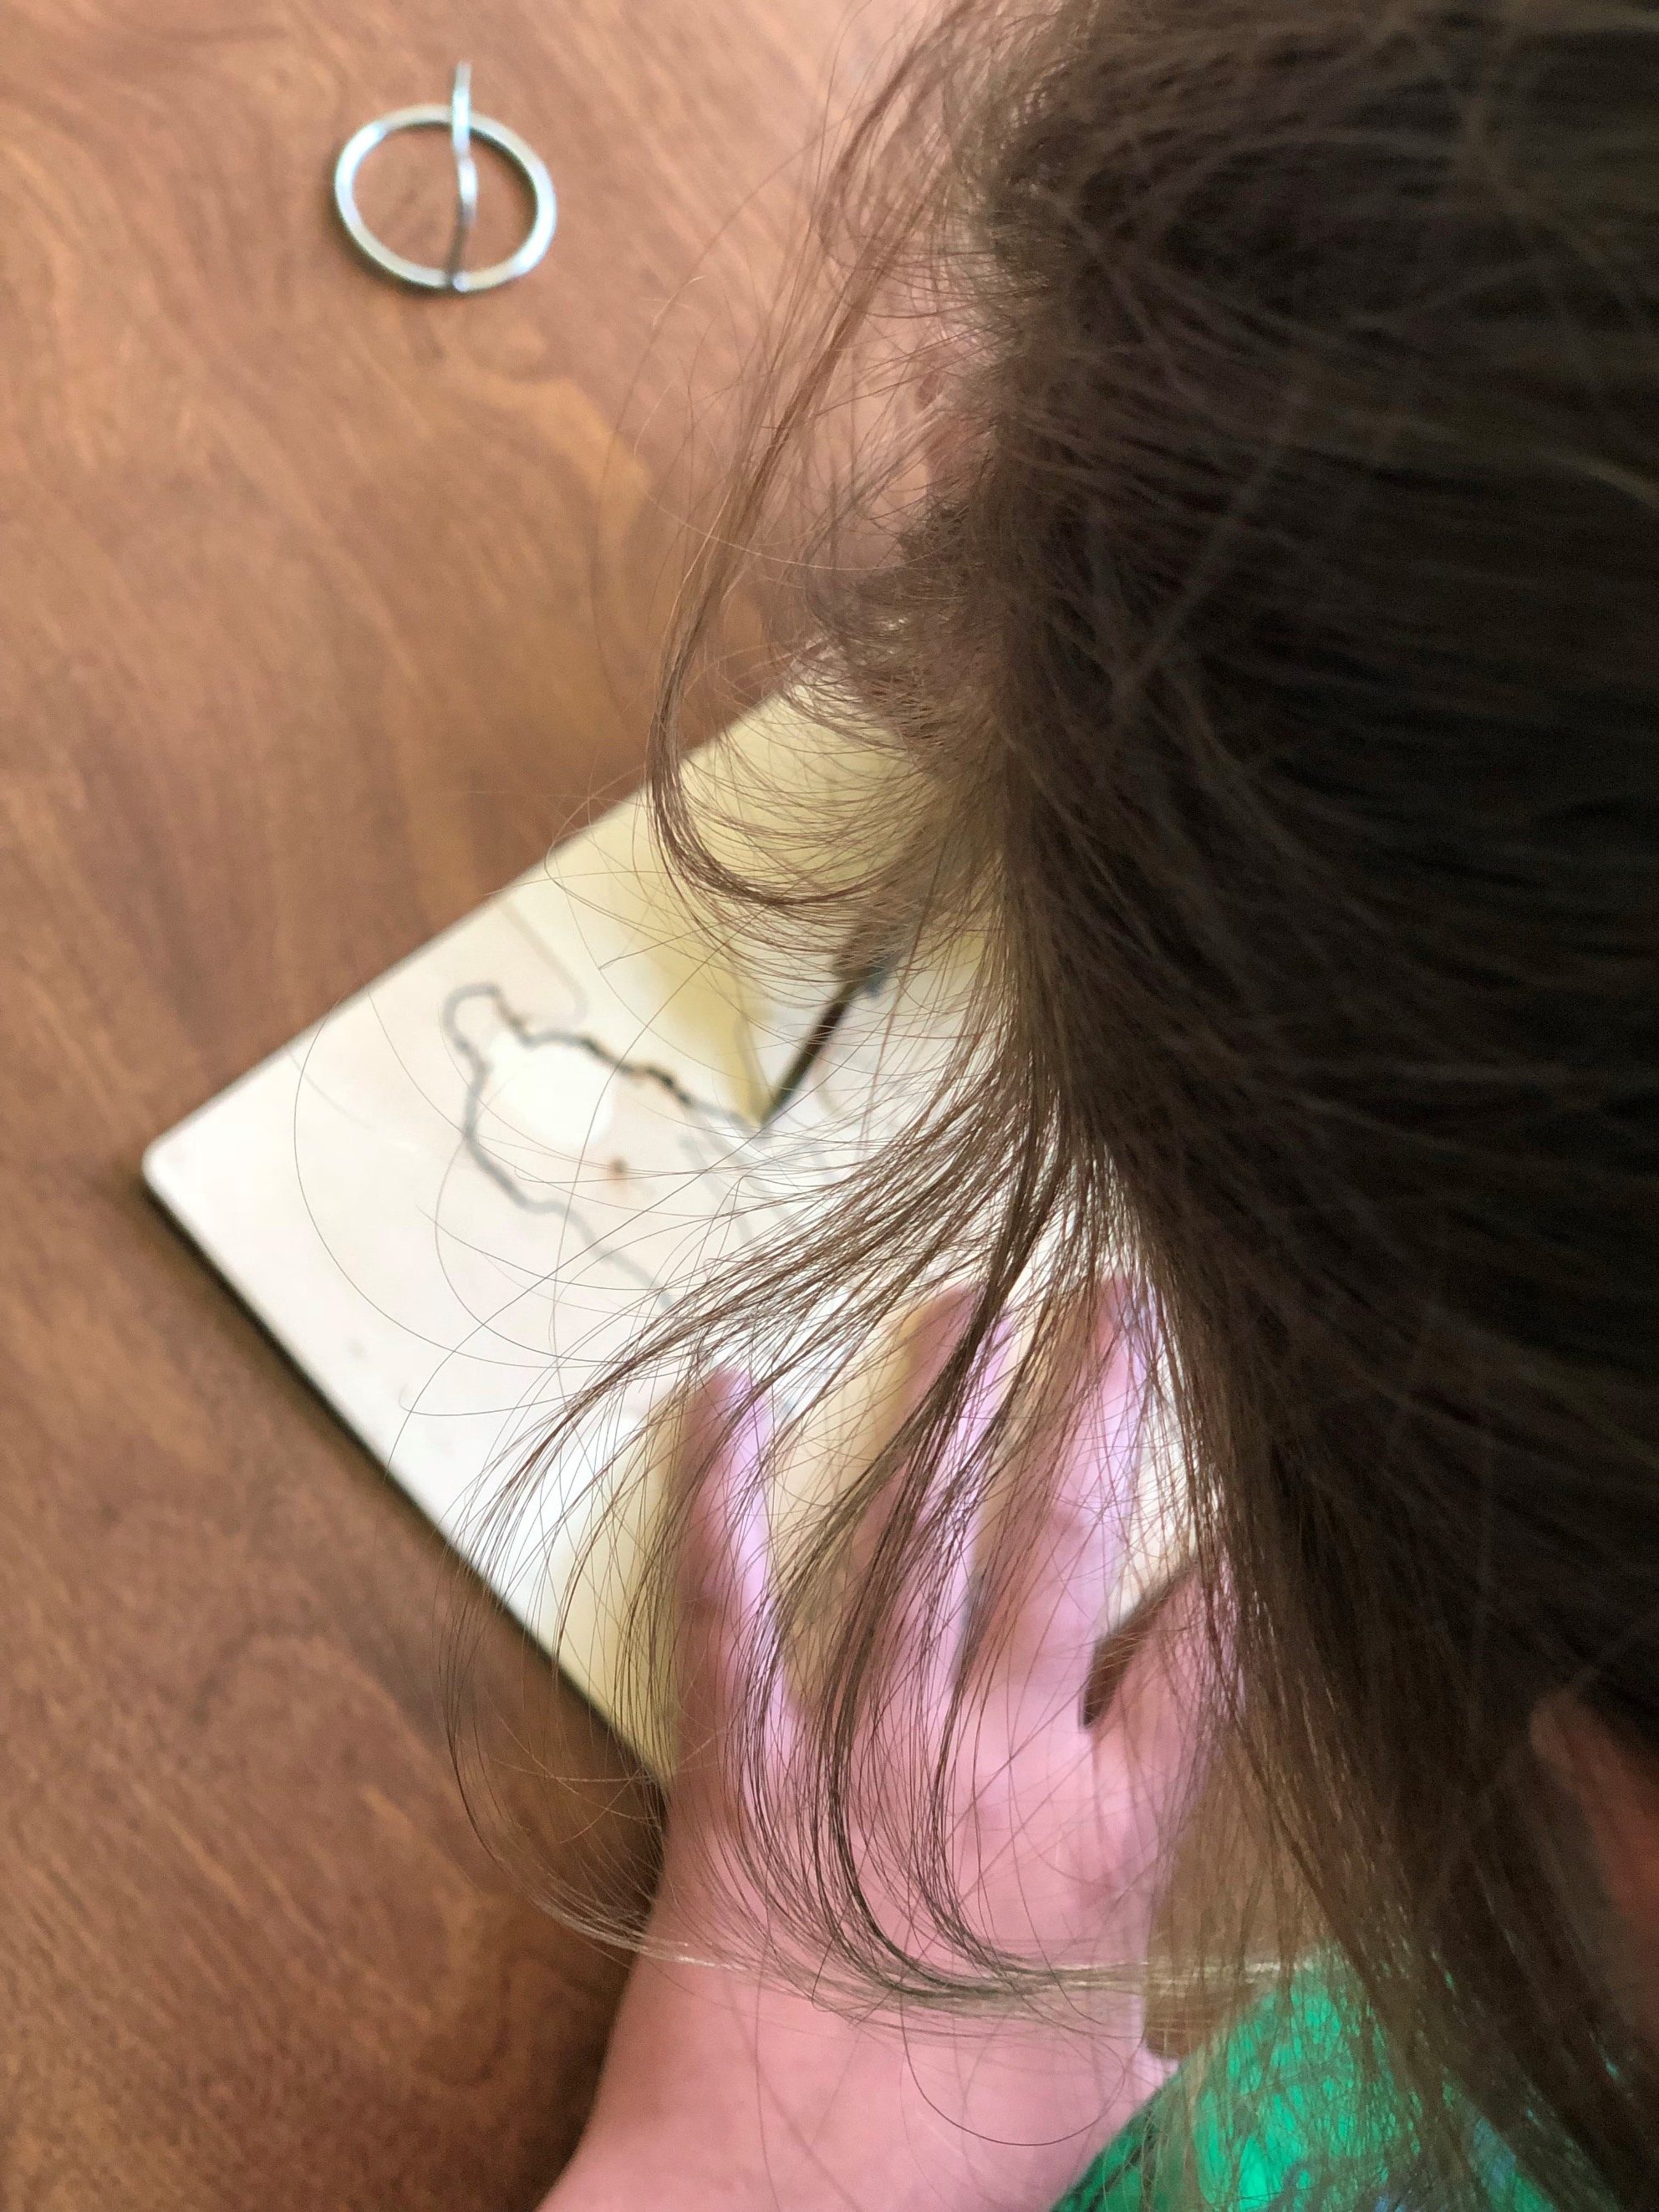
Sometimes, the grains in the wood may prevent a smooth burn for the young artist. The grains may cause some stray, crooked lines. It takes practice to learn the right pressure and heat to use while burning. Embrace the flaws. Remind the young artist to have patience. They are learning and it will get easier with time. Observe their excitement as they burn into the wood. After all, this is about having fun while learning a new art form. Occasionally, you may see some smoke come up when the pen touches the wood. This is normal. This usually happens if the pen is too hot or when it is pressed hard into the wood. Be sure that the child does not keep the pen pressed onto the wood for a length of time. With these pens, you are burning the wood so a hole can be burned through if you’re not careful.
 |
 |
As the adult, you may need to assist the child with holding the pen. It is thicker than regular pen and the child may be scared at first. That’s ok too. Safety is the main priority. Most children are nervous the first time they use a pyrography pen. Once they start burning, they usually become comfortable with the pen rather quickly and end up loving the process. Guide them, help them and supervise them. Allow them to have fun creating something unique and special.
 |
 |
 |
 |
When the burning is complete, you can give them a pen to write their name down or personalize a message.
 |
 |
Practice wood burning with your children often. You’ll be amazed at how quickly they adjust to using the pens. Be patient and know that mistakes will be made, it’s just part of the process. Always follow the safety tips and have fun.
Got any questions? Just leave them in the comments below and I’ll get to it as soon as possible.
Enjoy!
Andrea Pate
Pate’s Pyrography